

-
Welcome to Tacoma World!
You are currently viewing as a guest! To get full-access, you need to register for a FREE account.
As a registered member, you’ll be able to:- Participate in all Tacoma discussion topics
- Communicate privately with other Tacoma owners from around the world
- Post your own photos in our Members Gallery
- Access all special features of the site
 Tacoma Rock Lights to Dome
 Stuck in Miami Sand + tow hook question. (with pics)
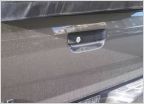 Best tailgate locking solution? Right now leaning towards PL5400. Opinions please.
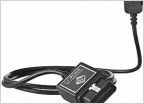 Scanguage
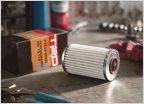 OEM TRD Oil Filter Rattle
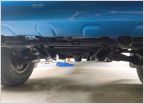 Trying to identy what part is missing to replace
Mirror Control Switch Question
Discussion in '2nd Gen. Tacomas (2005-2015)' started by jabrackin, Jul 20, 2015.
Page 2 of 4
Page 2 of 4


