

-
Welcome to Tacoma World!
You are currently viewing as a guest! To get full-access, you need to register for a FREE account.
As a registered member, you’ll be able to:- Participate in all Tacoma discussion topics
- Communicate privately with other Tacoma owners from around the world
- Post your own photos in our Members Gallery
- Access all special features of the site
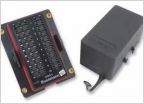 SR5 heated seat wiring- please help
 Wheel & tire setup on 17 SR
 Brake caliper tool and brake shims?
 TPMS cloning and/or reprogramming
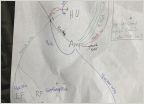 Install Subs/Amp to OEM Entune Headunit - 2016
 Question for Folks with Pets and Toppers
Mirror-mounted Baja S2 DIY
Discussion in '3rd Gen. Tacomas (2016-2023)' started by robmpii, Mar 14, 2019.
Page 7 of 7
Page 7 of 7


