

-
Welcome to Tacoma World!
You are currently viewing as a guest! To get full-access, you need to register for a FREE account.
As a registered member, you’ll be able to:- Participate in all Tacoma discussion topics
- Communicate privately with other Tacoma owners from around the world
- Post your own photos in our Members Gallery
- Access all special features of the site
 Interior LED lights - color temp preference?
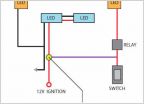 How to make 12V on actually turn lights off
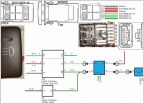 BD harness switch wires
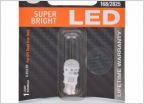 Help Me Find Warm White LED Dome/Map
 Taking a girl rabbit hunting, few questions!
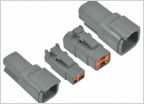 Preferred Connector type for added accessories
Morimoto D2S retrofit with Apollo Shrouds (lots of really big pics)
Discussion in 'Lighting' started by tooblutacoma06, Oct 16, 2010.
Page 4 of 6
Page 4 of 6


