1. Welcome to Tacoma World!

    You are currently viewing as a guest! To get full-access, you need to register for a FREE account.

    As a registered member, you’ll be able to:
    • Participate in all Tacoma discussion topics
    • Communicate privately with other Tacoma owners from around the world
    • Post your own photos in our Members Gallery
    • Access all special features of the site

Morimoto Mini Stage III Kit (H1) step by step with pics!

Discussion in 'Lighting' started by stattonmw, Feb 28, 2012.

  1. Nov 1, 2013 at 4:36 AM
    #181
    TonkaToyTaco

    TonkaToyTaco Hope you can run faster than 965 FPS

    Joined:
    Feb 2, 2011
    Member:
    #50428
    Messages:
    1,671
    Gender:
    Male
    First Name:
    Louie
    Vehicle:
    11 Tacoma TRD DCLB 4X4
    Fox 2.0 Coilovers cranked up with JBA UCA, Rear OME 2" leaf pack with Ride Rite air bags, SCS Steath 6 matte black rims wrapped in 285/75/17 Cooper ST MAXX, Blacked out emblems, Debaged tailgate, Tinted windows (5% in rear, 5% up front and 40% on windsheild), Retro color matched HID headlights with Amber Halo, Projector LED Foglight, Custom LED Taillight and 3rd brake light, T-Rex 2 eyelids color matched, Fog light anytime MOD, All LED interior and exterior ligths, Volant CAI With forced Ram, JET throttle body spacer, Aero Turbine SS Muffler, Aero Turbine SS 4inch tip dumped after axel, URD MAF Calibrator, LED bed lights, 4X4 light mod, Satoshi Grill with matching scoop and lower Valance, 20" LED bar and 2 LED Pods behind Satoshi, Diff breather mod, Sea Blu secondary fuse box with 100A breaker, Outlaw Train Horns with dual Air Compressors and 5 Gal tank, Ultraguage, Andre Devil Horns, Pedal Commander
    Whats the difference between mini gatling and gatling? Im assuming size but how much? And Do you know if you can put halos on the gatling or mini gatling shroud?
     
  2. Nov 1, 2013 at 8:05 PM
    #182
    Rich91710

    Rich91710 Well-Known Member

    Joined:
    Feb 23, 2012
    Member:
    #73470
    Messages:
    16,331
    Gender:
    Male
    First Name:
    Rich
    Los Angeles
    Vehicle:
    08 Base
    Satoshi with FJ badge, factory cruise, factory intermittent wipers, Redline Tuning hood-lift struts, Hellwig Swaybar, Rosen DVD-Nav
    Mini is for the H1, Gatling is for the D2S
     
  3. Nov 1, 2013 at 8:40 PM
    #183
    TonkaToyTaco

    TonkaToyTaco Hope you can run faster than 965 FPS

    Joined:
    Feb 2, 2011
    Member:
    #50428
    Messages:
    1,671
    Gender:
    Male
    First Name:
    Louie
    Vehicle:
    11 Tacoma TRD DCLB 4X4
    Fox 2.0 Coilovers cranked up with JBA UCA, Rear OME 2" leaf pack with Ride Rite air bags, SCS Steath 6 matte black rims wrapped in 285/75/17 Cooper ST MAXX, Blacked out emblems, Debaged tailgate, Tinted windows (5% in rear, 5% up front and 40% on windsheild), Retro color matched HID headlights with Amber Halo, Projector LED Foglight, Custom LED Taillight and 3rd brake light, T-Rex 2 eyelids color matched, Fog light anytime MOD, All LED interior and exterior ligths, Volant CAI With forced Ram, JET throttle body spacer, Aero Turbine SS Muffler, Aero Turbine SS 4inch tip dumped after axel, URD MAF Calibrator, LED bed lights, 4X4 light mod, Satoshi Grill with matching scoop and lower Valance, 20" LED bar and 2 LED Pods behind Satoshi, Diff breather mod, Sea Blu secondary fuse box with 100A breaker, Outlaw Train Horns with dual Air Compressors and 5 Gal tank, Ultraguage, Andre Devil Horns, Pedal Commander
    Thanks. Now Does Anyone know About The Halos?
     
  4. Feb 5, 2014 at 7:43 AM
    #184
    99TacoDriver

    99TacoDriver Well-Known Member

    Joined:
    Jul 8, 2011
    Member:
    #59531
    Messages:
    6,728
    Gender:
    Male
    South Louisiana
    OME 885x/5100s/LR UCA/3 leaf AAL/275/70/17 Terra Trac X-Venture
    i just have a few questoins just to clear up a little uncertainty that i have

    1.) where exactly did you add the glue to the shroud to glue it to the projector itself? did you also glue the shroud to the reflector bowl?

    im thinking of doing this and im just trying to get as much info as possible.

    2.) when you cut the shroud did you cut off the back side (the side that would be touching the reflector bowl) and how much did you cut? what did you use to cut, a dremel tool?

    3.) also can it be installed with out any cutting at all or is there too much of a gap between the reflector and the shroud?

    thanks in advance

    4.) would you know what the difference between the h1 mini and the h1 mini 6.0 is, like is there a size difference?
     
  5. Apr 1, 2014 at 9:48 AM
    #185
    stattonmw

    stattonmw [OP] Well-Known Member

    Joined:
    Feb 10, 2011
    Member:
    #50926
    Messages:
    445
    Gender:
    Male
    First Name:
    Statton
    Redmond, WA
    Vehicle:
    2014 DCLB Tacoma TRDsport
    5" RCD Lift TOYO ATII Extreame 295/70R18 XD Addict wheels Factory toyota side steps TRD exhaust
    1. I just glued the centric ring to the shroud and then the put a small bead of glue on the ring and slid it over the projector

    2. When I cut the shroud, I just cut the inside which was the part the fits into the ring. I did this by placing the shroud in the ring drawing a line with a sharpie and then cutting with a dremel. I did this get the shroud close to the reflector bowl but without touching. I would not advise that you glue the shroud to the bowl at all as it needs to have some ability to move hence the silicone grummet that is included.

    3. By no means do you have to cut it plenty of people don't. this is just what I decided I like better

    4. for the difference in projector I'm sure they are much better now then they were when I did this. but to be honest I have not followed or looked into this in a while.
     
  6. Sep 30, 2014 at 6:54 PM
    #186
    jfrost007

    jfrost007 Well-Known Member

    Joined:
    Jan 9, 2010
    Member:
    #29047
    Messages:
    330
    Gender:
    Male
    First Name:
    Jason
    Lake Charles, LA
    Vehicle:
    06 Prerunner 4.0
    Magnaflow Exhaust,AFE Pro Dry S, BHLM, Grillcraft grill, hella 500s, Sockmoney black vinyl badges, OME 885s, OME Front and Rear shocks, toytec aal, Built Right UCAs, 255/85r16 BFG KM2s, Powder Coated Valance , Stealth Custom Series Wheels,
  7. Feb 21, 2015 at 6:46 PM
    #187
    Tacoman503

    Tacoman503 Well-Known Member

    Joined:
    Jul 31, 2014
    Member:
    #135146
    Messages:
    162
    Gender:
    Male
    Subd. Got a morimoto D2S Stage III kit awaiting installation. Mad props to you sir for creating this thread :cheers:
     
  8. Feb 23, 2015 at 2:38 PM
    #188
    Ostrichsak

    Ostrichsak Don't taze me bro!

    Joined:
    Apr 5, 2012
    Member:
    #76327
    Messages:
    9,122
    Gender:
    Male
    First Name:
    Jer
    Northern Colorado, USA
    Vehicle:
    Supercharged '10 Tacoma 4x4 TRD
    TRD Supercharger + too much stuff to list. Click sig pic
    Read this whole thread and about ready to order up some parts for my retrofit. I've got a couple of questions though.

    1) I see reference to an Mini H1 kit and a D2S kit.... are these one in the same? In other words, is this the kit that the OP and others in this thread ordered/used?

    2) Where did you get the bixenon decal that is inside the headlight? Does that come with the kit? I like the look and want to slap one of those on mine while I have it all apart.
     
  9. Feb 24, 2015 at 7:12 AM
    #189
    Pugga

    Pugga Pasti-Dip Free 1983 - 2015... It was a good run

    Joined:
    Jun 18, 2010
    Member:
    #39131
    Messages:
    38,469
    Gender:
    Male
    First Name:
    Mike
    Massachusetts
    Vehicle:
    '19 Ford F-250 6.7 SCrew
    F-250 Land Yacht Mod
    The D2S and H1 are 2 different projectors but the install for both is the same. I used the H1 because I had a slight preference when I looked at the pattern each one put out. D2S and H1 use different bulbs, D2S is an OEM based bulb where as H1 is not. H1 will only have 2 wires sticking out the back of the headlight and you'll have to seal around them, D2S has a fatter base so you'll have to trim your rubber boot a bit to fit around them. Depending on how anal you are about lights, you might not even notice a difference between the 2 kits, both are great kits. I went with the H1 with the upgraded bulbs and loved it. The D2S upgrades are more expensive because it's OEM quality stuff.

    No idea about the decal, I don't recall seeing it in the kit but I wouldn't swear it wasn't included.
     
  10. Feb 26, 2015 at 12:00 PM
    #190
    REDTRD

    REDTRD Woods & Water Edition

    Joined:
    Jan 19, 2012
    Member:
    #70958
    Messages:
    1,401
    Gender:
    Male
    First Name:
    Anthony
    Western NC
    Vehicle:
    07 DCSB SR5 4x4
    Click my build thread!
    I never got a decal, looks cool but I'm not cracking the seal on my lights to put on a sticker lol.
     
  11. Feb 27, 2015 at 2:25 PM
    #191
    Ostrichsak

    Ostrichsak Don't taze me bro!

    Joined:
    Apr 5, 2012
    Member:
    #76327
    Messages:
    9,122
    Gender:
    Male
    First Name:
    Jer
    Northern Colorado, USA
    Vehicle:
    Supercharged '10 Tacoma 4x4 TRD
    TRD Supercharger + too much stuff to list. Click sig pic
    I wonder where I can get those stickers from to put in mine.
     
  12. Feb 27, 2015 at 2:44 PM
    #192
    TRSJimmy

    TRSJimmy All I Do Is Nguyen

    Joined:
    Jul 10, 2012
    Member:
    #82308
    Messages:
    3,088
    Gender:
    Male
    First Name:
    Jimmy
    Gainesville, GA
    Vehicle:
    12' Mall Crawlin Peerunner
    It's in their accessories section for $10
     
  13. Mar 3, 2015 at 12:43 PM
    #193
    Ostrichsak

    Ostrichsak Don't taze me bro!

    Joined:
    Apr 5, 2012
    Member:
    #76327
    Messages:
    9,122
    Gender:
    Male
    First Name:
    Jer
    Northern Colorado, USA
    Vehicle:
    Supercharged '10 Tacoma 4x4 TRD
    TRD Supercharger + too much stuff to list. Click sig pic
    They're cool but I'm not sure they're worth $10 plus shipping. I like the ones that are straight that go inside the light and it looks like it comes with a curved one for your shroud too. I may just have to make up my own or just learn to live w/o them. :D
     
  14. Mar 4, 2015 at 5:21 AM
    #194
    Pugga

    Pugga Pasti-Dip Free 1983 - 2015... It was a good run

    Joined:
    Jun 18, 2010
    Member:
    #39131
    Messages:
    38,469
    Gender:
    Male
    First Name:
    Mike
    Massachusetts
    Vehicle:
    '19 Ford F-250 6.7 SCrew
    F-250 Land Yacht Mod
    You'll never notice from the driver's seat :)
     
  15. Mar 4, 2015 at 7:34 AM
    #195
    Ostrichsak

    Ostrichsak Don't taze me bro!

    Joined:
    Apr 5, 2012
    Member:
    #76327
    Messages:
    9,122
    Gender:
    Male
    First Name:
    Jer
    Northern Colorado, USA
    Vehicle:
    Supercharged '10 Tacoma 4x4 TRD
    TRD Supercharger + too much stuff to list. Click sig pic
    True dat!
     
  16. Dec 11, 2015 at 6:53 AM
    #196
    REDTRD

    REDTRD Woods & Water Edition

    Joined:
    Jan 19, 2012
    Member:
    #70958
    Messages:
    1,401
    Gender:
    Male
    First Name:
    Anthony
    Western NC
    Vehicle:
    07 DCSB SR5 4x4
    Click my build thread!
    Well this is the first issue I have had with mine since I installed them 2+ years ago. On my way to work this morning my drivers side started to blink or flash off and on?! So I just cut them off and turned on my LED's and went on my way. Just curious and gonna look at it this weekend but does it sounds like a bulb or a ballast going bad? Hopefully TRS still has replacement parts for the Mini H1, last thing I want to do right now is retrofit all over again lol.
     
  17. Dec 11, 2015 at 8:48 PM
    #197
    99TacoDriver

    99TacoDriver Well-Known Member

    Joined:
    Jul 8, 2011
    Member:
    #59531
    Messages:
    6,728
    Gender:
    Male
    South Louisiana
    OME 885x/5100s/LR UCA/3 leaf AAL/275/70/17 Terra Trac X-Venture
    could be a ballast or maybe check the wiring? when i hd HID's mine did that when the ballast started going out then it finally pooped out
     
  18. Dec 16, 2015 at 8:51 AM
    #198
    REDTRD

    REDTRD Woods & Water Edition

    Joined:
    Jan 19, 2012
    Member:
    #70958
    Messages:
    1,401
    Gender:
    Male
    First Name:
    Anthony
    Western NC
    Vehicle:
    07 DCSB SR5 4x4
    Click my build thread!
    Yeah PM'd Andrew with TRS and asked him also gonna try switching ballast to other headlight and see if it does same.
     
  19. Feb 13, 2016 at 5:06 PM
    #199
    awoit

    awoit Well-Known Member

    Joined:
    Nov 28, 2007
    Member:
    #3639
    Messages:
    491
    Gender:
    Male
    CA
    Vehicle:
    08 TRD, SR5
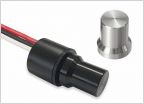
    What is supposed to happen when testing the solenoid with a 9v battery? Is the solenoid supposed to make a noise? How do I know it is working the way it should?
     
  20. Feb 13, 2016 at 5:29 PM
    #200
    TRSJimmy

    TRSJimmy All I Do Is Nguyen

    Joined:
    Jul 10, 2012
    Member:
    #82308
    Messages:
    3,088
    Gender:
    Male
    First Name:
    Jimmy
    Gainesville, GA
    Vehicle:
    12' Mall Crawlin Peerunner
    Your cutoff should drop. You'll hear it click and physically see the cutoff move
     

Products Discussed in

To Top