

-
Welcome to Tacoma World!
You are currently viewing as a guest! To get full-access, you need to register for a FREE account.
As a registered member, you’ll be able to:- Participate in all Tacoma discussion topics
- Communicate privately with other Tacoma owners from around the world
- Post your own photos in our Members Gallery
- Access all special features of the site
 Budget Custom roof rack+light bar build by a complete dolt
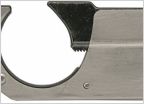 Is there a Tailgate Lock for a 2013 PreRunner that works?!?
 Super White II?
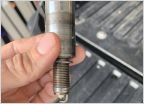 Socket Stuck in Spark Plug Tube
 2010 2.7L won’t start after fuel system cleaner
 Dynolock and camara
Mounting roof rack to Leer shell
Discussion in '2nd Gen. Tacomas (2005-2015)' started by billygoat, Sep 27, 2021.


