

-
Welcome to Tacoma World!
You are currently viewing as a guest! To get full-access, you need to register for a FREE account.
As a registered member, you’ll be able to:- Participate in all Tacoma discussion topics
- Communicate privately with other Tacoma owners from around the world
- Post your own photos in our Members Gallery
- Access all special features of the site
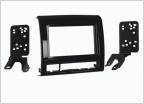 Double Din Fit Question
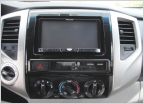 Alpine KTP-455U
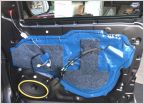 Newbie Question - Please help
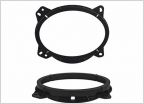 Pioneer AVH-4100NEX Installed! Need speakers.....
 Ditching JBL setup
 Need help with radio accesories... stuff...
Move camera feed from mirror to nav on a 2013 with a 2014 nav entune unit?
Discussion in 'Audio & Video' started by klavender1, Jun 6, 2017.
Page 1 of 2
Page 1 of 2


