1. Welcome to Tacoma World!

    You are currently viewing as a guest! To get full-access, you need to register for a FREE account.

    As a registered member, you’ll be able to:
    • Participate in all Tacoma discussion topics
    • Communicate privately with other Tacoma owners from around the world
    • Post your own photos in our Members Gallery
    • Access all special features of the site

MunkeyWrench's 2nd Gen LS swap

Discussion in '2nd Gen. Builds (2005-2015)' started by munkeywrench, Apr 13, 2020.

  1. Apr 13, 2020 at 12:05 PM
    #1
    munkeywrench

    munkeywrench [OP] Well-Known Member

    Joined:
    Dec 11, 2018
    Member:
    #275524
    Messages:
    81
    Gender:
    Male
    LS Swap
    Hey guys,


    I am a long time lurker but this is my first post on the forum. I recently finished up an LS swap into my 2006 2nd Gen. I have been trying to document the process on social media but I am horrible at it and will try to do my best on here. Ill try and go into detail on how involved it was so help anyone that might want to do this. This was my first engine swap so you can take my info with a grain of salt and I and open to any input you guys may have.

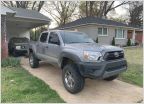
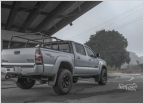
    I guess I am going to go backwards for a bit while I update the thread as I have time. Here are some pictures of how she is sitting right now.

    [​IMG]

    [​IMG]

    [​IMG]

    Cold start and a Rev
     
    Last edited: Apr 13, 2020
    allenfab, btot588, HondaGM and 23 others like this.
  2. Apr 13, 2020 at 12:12 PM
    #2
    jacpa

    jacpa Well-Known Member

    Joined:
    Jan 17, 2020
    Member:
    #316393
    Messages:
    547
    Gender:
    Male
    First Name:
    Jim
    Vehicle:
    2021 4Runner TRD ORP
  3. Apr 13, 2020 at 2:00 PM
    #3
    JasonLee

    JasonLee Hello? I'm a truck.

    Joined:
    May 9, 2014
    Member:
    #129454
    Messages:
    11,112
    First Name:
    Jason
    Q322+3C Denver, Colorado
    Vehicle:
    15 TRD OffRoad
    TRD Supercharger and more.
    Do you have an ad blocker? I can see three images in the first post just fine with my ad blocker allowing imgur.com
     
    PennSilverTaco and jacpa[QUOTED] like this.
  4. Apr 13, 2020 at 2:05 PM
    #4
    munkeywrench

    munkeywrench [OP] Well-Known Member

    Joined:
    Dec 11, 2018
    Member:
    #275524
    Messages:
    81
    Gender:
    Male
    LS Swap
    The engine and transmission I used came from a 2003 Silverado 1500. It’s a Gen 3 5.3L Vortec with a 4L60E. I made the purchase as a "complete swap". I got the engine, trans, harness, ECU, TAC module, gas pedal, as well as all of the accessories.

    I had this engine shipped to me from Tennessee in a crate.
    [​IMG]

    Engine and transmission
    [​IMG]

    Once I unwrapped everything, this is what we got to work with.

    Complete Engine with accessories.

    [​IMG]

    Engine harness and some ignition wiring.

    [​IMG]


    Stock GM ECU


    [​IMG]

    GM gas pedal

    [​IMG]


    Harness and accessories removed.

    [​IMG]
     
  5. Apr 13, 2020 at 2:15 PM
    #5
    Oreo Cat

    Oreo Cat Worst Member

    Joined:
    Sep 19, 2016
    Member:
    #197755
    Messages:
    5,028
    Was it worth the effort?
     
  6. Apr 13, 2020 at 2:22 PM
    #6
    munkeywrench

    munkeywrench [OP] Well-Known Member

    Joined:
    Dec 11, 2018
    Member:
    #275524
    Messages:
    81
    Gender:
    Male
    LS Swap
    It depends what you are looking for from the swap. If you are looking to do the swap and expect it to be a monster youre going to be disappointed. Its about 30hp over stock or something like that with about the same in tq or a little more.

    It was worth it to me because I was after the potential in power this engine has. Its burly and will take pretty much anything I want to throw at it.
     
  7. Apr 13, 2020 at 2:29 PM
    #7
    Jensonbt

    Jensonbt Well-Known Member

    Joined:
    Dec 15, 2018
    Member:
    #275931
    Messages:
    978
    Gender:
    Male
    First Name:
    Beckler
    Idaho
    Vehicle:
    2012 gray tacoma DCLB
    Just enough to look kinda cool.
    Me and my friend were joking about LS swapping my truck last week. My question is why did you do the swap. I understand the idea for power potential but was there problems with the factory motor. Was it just a "how big of an engine can I fit".
     
  8. Apr 13, 2020 at 2:49 PM
    #8
    munkeywrench

    munkeywrench [OP] Well-Known Member

    Joined:
    Dec 11, 2018
    Member:
    #275524
    Messages:
    81
    Gender:
    Male
    LS Swap
    There were about 300k miles on the stock motor. No issues but it had me thinking how long it was going to last. It was definitely not "how big of an engine can I fit" because the 1GR is physically bigger than the LS.

    Ive always been a gear head and going fast is what I enjoy the most. Not that I'm gong anywhere fast now but Itll be fun stomping on most cars that think its just a Tacoma.
     
  9. Apr 13, 2020 at 3:45 PM
    #9
    Jensonbt

    Jensonbt Well-Known Member

    Joined:
    Dec 15, 2018
    Member:
    #275931
    Messages:
    978
    Gender:
    Male
    First Name:
    Beckler
    Idaho
    Vehicle:
    2012 gray tacoma DCLB
    Just enough to look kinda cool.
    Haha, my truck is almost to 180k but my moms 03 sequoia just passed 300k I know the older Toyotas run forever but I like your reasoning for having a “sleeper Tacoma”
     
  10. Oct 30, 2020 at 1:30 PM
    #10
    munkeywrench

    munkeywrench [OP] Well-Known Member

    Joined:
    Dec 11, 2018
    Member:
    #275524
    Messages:
    81
    Gender:
    Male
    LS Swap
    Motor and Trans Mounts

    I looked everywhere for universal LS swap motor mounts and honestly the ones out there didn’t look strong enough or just plain wouldn’t work for my truck. LSX innovations had the best ones in my opinion. I bought their adjustable LS mounts and they are quality mounts but they were about an inch and a half too short. I ended up only keeping the mounting plate and making some up out of a sheet a metal.

    LSX Innovations Universal Mounts

    [​IMG]

    I made some cardboard templates first to see what they might look like.

    [​IMG]

    [​IMG]

    I used 3/8” hot rolled steel which might have been overkill but the thickness was very forgiving to an unexperienced welder. You can really put some heat into the weld.

    [​IMG]

    We ended up with this.

    [​IMG]

    [​IMG]


    I blocked the engine in where it was level and where I wanted it then I had some help from friends to get the motor mounts welded onto the truck.

    [​IMG]

    [​IMG]

    Welded in.

    [​IMG]

    [​IMG]

    The transmission mount fit perfectly in the stock Toyota cross member. I used the GM trans mount.

    [​IMG]

    [​IMG]
     
    Last edited: Oct 30, 2020
  11. Nov 20, 2020 at 11:39 AM
    #11
    jjhitchen

    jjhitchen Relentless

    Joined:
    Sep 4, 2012
    Member:
    #86272
    Messages:
    1,002
    Gender:
    Male
    First Name:
    Joel
    Arroyo Grande, CA
    Vehicle:
    2012 4x4 V6
    100% stock Tacoma
    Really well done and exciting to see how “sleeper” this swap turned out.

    I have zerooo justification to swap my 4.0 right now, but the moment I have a motor issue I’m going to give your page and YouTube videos a few hundred more views. :thumbsup:
     
  12. Dec 1, 2020 at 8:16 AM
    #12
    munkeywrench

    munkeywrench [OP] Well-Known Member

    Joined:
    Dec 11, 2018
    Member:
    #275524
    Messages:
    81
    Gender:
    Male
    LS Swap

    Thank you! I really appreciate it.
     
  13. Dec 1, 2020 at 12:14 PM
    #13
    munkeywrench

    munkeywrench [OP] Well-Known Member

    Joined:
    Dec 11, 2018
    Member:
    #275524
    Messages:
    81
    Gender:
    Male
    LS Swap
    PCM and Wiring

    Here I will show the wiring that had to be done for this thing to run right. I am using the stock PCM that was re programmed, removing VATS. I am also using a stock harness that I reworked. The way I went about this harness was making it non emissions friendly. I removed evap and rear 02’s. I used LT1swap.com heavily when I was doing my wiring. Not only is the website full of information but Brandon is an awesome dude. If you guys are want to rework your harness, I highly suggest you follow his diagram. Its guaranteed to work if you follow it correctly.


    Complete engine harness with stock GM fuse box.
    [​IMG]

    Stock Fuse Box. We need all the pink wires.

    [​IMG]

    You will remove about half of the wires in the harness for a non emissions friendly harness. LT1Swap.com has the PCM pinouts that are color coded to make removing the unwanted wires very easy. Here is the link to the pinout I used.

    https://www.lt1swap.com/2004vortec_pcm.htm

    The rework of the harness leads to this small fuse box and two relays.
    [​IMG]

    Yes, two relays and 4 fuses for the whole harness. This controls the engine and trans only. I still have the stock Toyota body harness that powers up everything else on the truck.
    One relay is the main relay for the PCM and accessories. The second is for the fuel pump. This is how I wired up the fuses.

    Fuse #1 PCM, Trans and coils
    Fuse #2 Injectors and TAC (gas pedal)
    Fuse #3 O2 sensors and MAF
    Fuse #4 PCM, Fuel Pump and OBD2

    Backside of fuse box and relays
    [​IMG]
    LT1swap has instructions on how to make this fuse box also.

    https://www.lt1swap.com/fuseblock_obd2port.html

    Once you’re done with the fuse box, there’s going to be 7 wires that go to external devices. Meaning they aren’t going to connect to the engine or fuse box. These wires are carrying a voltage or signal that need to be connected to something. There will be 3 wires coming from the Blue PCM connector and 4 wires coming from the Red or Green connector (Red or Green depends what year vehicle the harness was taken from). Unfortunately I didn't get a pictures of all 7 wires before connecting them but these are the 7 wires and what you need to do with them.

    [​IMG]

    NOTE - I added a pin to the Blue PCM Connector for an Electric Fan


    BLUE PCM CONNECTOR

    TCC Brake Switch - Purple - PIN #33 - This wire needs see 12v key hot all the time unless your brakes are pressed. If you’re in a modern car you can connect this to your brake light switch. This switch completes the brake light circuit by supplying a ground when you hit the brakes. That’s exactly what you need. 12v unless your brakes are on. This wire locks up your converter and is very important. If you don’t have a brake switch the same circuit can be achieved using a relay.

    Serial Data - Dark Green - Pin #58 - This connects to your OBD 2 port. You will need to make a new OBD2 port for the LS engine. You need 12v, Ground and this Dark Green wire to make your OBD2 port work.

    ** Added PIN - Fan 1 Control - PIN #42 - This will be empty on 99-2002 harnesses. 02+ should already have a pin here for Fan Control. The PCM will supply a ground to this wire when it hits the programmed temperature.


    RED OR GREEN PCM CONNECTOR

    Fuel Pump Relay Control - Dark Green/White - PIN # 9 - This wire will be coming from your fuse box. Once the PCM triggers the relay it will supply the 12v needed to turn your fuel pump on. I connected this wire to my sending unit. By using the stock sending unit I got my fuel gauge to work on my dash.

    Engine Speed Signal - White - PIN #10 - This gives you RPM signal. This part was a little tricky and its still not working 100%. As you know this was a 6-cylinder truck. Meaning the gauges are calibrated to a 6-cylinder engine. I tried to connect the wire straight to the gauge, but it was not reading correctly and incredibly high. I added a 1kohm resistor to the circuit and it made it better but not perfect. RPMs start getting a little funky after 4500rpm.

    MIL Control - Brown/White - PIN #46 - This will be connected to your check engine light. The PCM will supply a ground when there are any codes on the PCM. This was as simple as splicing into the stock check engine light circuit on the dash.

    VSS - Dark Green/White - PIN #50 - This is the vehicle speed signal and goes to the odometer. I am almost positive GM uses the same 4000 ppm signal that Toyota uses so it would be as easy as splicing into the odometer circuit. *** I did not use this wire. I am still running the stock Toyota PCM, BCM and harness to control everything electrical other than the engine and trans. The speed signal on our trucks come from the speed sensors on the wheels so as long as these sensors got voltage I would get a MPH reading on the odometer.


    The last part of the wiring I had to do was for the gas pedal TAC module. This is only for a drive by wire swap. Drive by cable engines will not need this.

    [​IMG]


    The gas pedal I got was from the same vehicle and was a lot bigger than the stock Toyota pedal. I was able to cut it down and get it pretty close to looking like the stock pedal but had to use different mounting points. The only wiring required for this was a 12v source from the fuse box. Everything else plugs into the module and pedal.

    [​IMG]
     
    Last edited: Dec 1, 2020
  14. Dec 1, 2020 at 1:07 PM
    #14
    munkeywrench

    munkeywrench [OP] Well-Known Member

    Joined:
    Dec 11, 2018
    Member:
    #275524
    Messages:
    81
    Gender:
    Male
    LS Swap
    Updated engine bay pic

    [​IMG]
     
    Yota X, Biscuits, Hayrider and 2 others like this.
  15. Dec 1, 2020 at 1:14 PM
    #15
    PennSilverTaco

    PennSilverTaco Encyclopedia of useless information...

    Joined:
    Jul 15, 2014
    Member:
    #134007
    Messages:
    66,056
    Gender:
    Male
    First Name:
    Charlie
    Central Bucks, Pennsylvania
    Vehicle:
    2010 Zombie Truck
    How hard was it to get the A/C parts from the Silverado into the Tacoma?
     
  16. Dec 1, 2020 at 1:20 PM
    #16
    mjbtaco

    mjbtaco low and slow

    Joined:
    Mar 21, 2008
    Member:
    #5423
    Messages:
    4,678
    Gender:
    Male
    First Name:
    Michael
    Montclair , so cal
    Vehicle:
    Turbo'd 95.5 extra cab and 2013 Silver DCSB TRD Sport
    PERFORMANCE Custom Turbo Setup FRONT SUSPENSION Drop Spindles by Aaron Carswell 01-04 Swaybar Endlinks Energy Suspension Endlink Bushings Cando Upper Control arms QA1 coilovers with 8" spring Custom 4 pot Brembo BBK Modified lower control arms with mjbfab qa1 mounting plates and Poly bushing sleeves REAR SUSPENSION Chasis Tech drop leafs QA1 adjustable shocks weld in drop notch Gas tank cross member bridge 3" angled blocks 2013 Double Cab Short Bed TRD Sport Eibach Pro Truck Shocks front and rear Lifted to the 3rd setting on the front shocks
    I mean cool build and all, I'm just disappointed by your username :rofl:
     
  17. Dec 1, 2020 at 1:23 PM
    #17
    munkeywrench

    munkeywrench [OP] Well-Known Member

    Joined:
    Dec 11, 2018
    Member:
    #275524
    Messages:
    81
    Gender:
    Male
    LS Swap
    AC and heater are not connected yet.

    To be honest I haven't looked too much into the AC other than space in the engine bay. Maybe before next summer :thumbsup:
     
  18. Dec 1, 2020 at 1:24 PM
    #18
    PennSilverTaco

    PennSilverTaco Encyclopedia of useless information...

    Joined:
    Jul 15, 2014
    Member:
    #134007
    Messages:
    66,056
    Gender:
    Male
    First Name:
    Charlie
    Central Bucks, Pennsylvania
    Vehicle:
    2010 Zombie Truck
    No heat? A/C I can do without to some extent, but heat is a different story!
     
  19. Dec 1, 2020 at 1:24 PM
    #19
    munkeywrench

    munkeywrench [OP] Well-Known Member

    Joined:
    Dec 11, 2018
    Member:
    #275524
    Messages:
    81
    Gender:
    Male
    LS Swap
    lmao maybe the mods can help me out.
     
  20. Dec 1, 2020 at 1:25 PM
    #20
    munkeywrench

    munkeywrench [OP] Well-Known Member

    Joined:
    Dec 11, 2018
    Member:
    #275524
    Messages:
    81
    Gender:
    Male
    LS Swap
    I live in California :D
     

Products Discussed in

To Top