1. Welcome to Tacoma World!

    You are currently viewing as a guest! To get full-access, you need to register for a FREE account.

    As a registered member, you’ll be able to:
    • Participate in all Tacoma discussion topics
    • Communicate privately with other Tacoma owners from around the world
    • Post your own photos in our Members Gallery
    • Access all special features of the site

My Ultimate Toyota Tacoma Upgrades

Discussion in '2nd Gen. Builds (2005-2015)' started by mountainwolfpup, Jun 5, 2009.

  1. Jun 5, 2009 at 2:13 PM
    #1
    mountainwolfpup

    mountainwolfpup [OP] Ford Guy (Formerly known as a Toyota Guy)

    Joined:
    Jan 1, 2009
    Member:
    #12116
    Messages:
    972
    Gender:
    Male
    Vancouver, WA
    Vehicle:
    2015 Ford F150 Lariat FX4 3.5l Eco
    First month of ownership... This month I'm removing front air dam, and also Rhino lining the bed.
    OK, so this 07 Tacoma 4x4 extra cab TRD Off-Road package (the ones without the non-functional hood scoop) V6 is a pretty sweet ride just the way it is.. I've been driving it stock since driving off the dealers lot, for about 35k miles and it's been great. During that time driving it stock on that way too soft suspension and the lousy OEm tires I have been plotting and planning for the ultimate upgrades to make my truck really fit my type of driving.

    I use the truck as a daily driver and also put a fair amount of highway miles on it too going to wherever I'm going. So, I'd say about 10-12% of my driving is off-pavement (always wish I had time to do more though). And that off-road travel is usually on dirt roads, jeep trails, and whatever.. sometimes it's driving just through the woods, no roads at all... So, I needed a setup that would meet my needs both on and off road. Nothing too extreme and nothing too tame.

    ------------------------------------------------------------------------>
    Here is the equipment I bought and installed on my vehicle (most of it I bought from Wheelers, they were AWESOME to deal with):

    OME N140S Front shock set (add $200 to have the spring and shock pre-compressed)

    OME 886 Front coil set

    OME95PF5 (5mm spacer trim packer)

    10mm lift enhancement kit (add .5" additional lift in front)

    OME 2.75" Lift leaf spring set

    CS047 bushing set for the above spring set

    U-bolt set for leaf springs

    OME N182 rear shock set

    OME FK29 driveline carrier bearing drop kit

    Total Chaos uni-ball upper control arm set

    Front differential drop kit

    ARB bumper

    Warn 9.0RC winch

    KC HiLites 660 Hid - 6" stainless 35w long range (pair)

    BFGoodrich All-Terrain KO 265/75-16 (these are about 1" larger diameter then TRD Off-road package stock)

    Stainless steel brake lines (front and rear)

    ---------------------------------------------------------------------------->
    The installation notes and comments follow below:

    The whole front suspension was quick and easy to R&R. Total Chaos UCAs were very easy to install. The OME shock/spring strut setup popped right in. The brake lines had some issues with the end connectors being mishaped.. so I had to grind them out a little bit to fit correctly. The differential drop kit went on easy, but then I had some issues with the skid plate rubbing against the differential housing. I was uncomfortable with that so I made some minor modifications to the skid plate (basically I bent it so that there would be some clearance). Total time for the front suspension was about 4 hours (I did have my wife on hand for this to hold this and that for me, and ask over and over again "how much longer.." Arggg)


    The rear suspension was also very easy to R&R. The Dakar 8 leaf pack is pretty heavy (much heavier then my 3 leaf stock pack) so holding it up in place was a challenge. But really no issues.. again the brake line ends didn't fit correctly and I modified them with my hand grinder until they did. The driveline spacer didn't arrive from Wheelers in time (it was backordered) so I used some 11mm machining blanks to lower it.. which seems to be working out fine, but I'll probably swap them out with the correct OME part sometime now that it's arrived and sitting on a shelf in my garage? Total time 2 hours (and I did it without the assistance of my wife, which was more difficult but less frustrating overall - it may have saved our marriage??).


    Now we get to the rough part, not for you if you don't like to weld. I wanted to put on a strong ARB bumper, but also wanted a particular Warn winch that I knew was not going to fit the bumper. (I wish ARB would have designed their bumper to accommodate this very awesome Warn). Basically the ARB bumper has some vertical mounting bars inside for a variety of winches. My Warn needs horizontal mounting bars to align correctly.. so I had to weld some into the bumper, basically attaching them to and running between the preexisting vertical ones. Then I drilled out my mounting holes. Then I had to use my hand grinder to smooth it all out, and to fix some minor obstruction where the fairlead hole is.. and then painted it with a can of rustoleum. This fabrication took about 4 hours.


    Now I was ready to R&R the bumper. The factory bumper is super easy to remove, and as soon as you get it off you'll see why you need a better one.. It is basically a hollow plastic cup with some frangible material (aluminum) straddled behind it. The new ARB bumper is overt 100lbs itself, and with the 70+ lbs of the winch it took some considerable effort to get it hoisted up into place and attached to the crash cans. Please note, ARB sent no spare nuts and two of theirs were bad (misthreaded) requiring me to go buy replacements at local hardware store. Now, for about $1000 you'd think they could have thrown in a couple extra nuts.. and/or had better quality control. This took about 2 hours.

    BTW- I decided not to mount the winch control on the bumper, but instead wired it inside the engine compartment up by the DS firewall. This has the advantage that it's almost impossible for anyone to mess with your winch (and if you are not a frequent user of the winch it works out great). You do have to pop the hood every time you want to use it. This took about 3 hours (the supplied cables from Warn were not long enough, so took time to make new longer ones).


    Next, I mounted the KC HiD lights. Very easy to do. They mount to the bumper fine, but the cable coming off them has a huge plug on it that won't fit through the bumper pre-drilled holes.. so I had to run the lighting cables in through the grill (which I was bummed about having to do but really, this cable is non-removable and the plug looks pretty proprietary so I didn't want to cut it off and re-cable it). Also, KC doesn't provide any real mounts for the light ballasts.. right now mine are zip tied inside my engine compartment, one on each side of my radiator. This weekend I'll fabricate some metal mounts for them. Plan to make them attach inside the engine compartment to the vehicle wheel wells using existing factory holes. Also, since the HID lights only draw 35 watts I was able to simply connect them up to the wiring from the factory driving lights.. and they use that factory switch and wiring harness. Total time 1 hour.

    ---------------------------------------------------------------------->
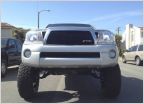
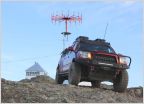
    Some pictures below. I should have taken more but my whole body was very very dirty and sweaty (go figure I'd do this all while we had record high temps.. and my truck won't fit into my garage so had to do this in my driveway in the hot sun) Anyway, that's my excuse. I do have some pics of the welding I did on it and so on.. those are on my disposable (real film) camera and I'll post them when I finish the role and get developed.

    DSCN0219.jpg
    DSCN0220.jpg
    DSCN0221.jpg
    DSCN0222.jpg
    DSCN0223.jpg
     
  2. Jun 5, 2009 at 2:16 PM
    #2
    mountainwolfpup

    mountainwolfpup [OP] Ford Guy (Formerly known as a Toyota Guy)

    Joined:
    Jan 1, 2009
    Member:
    #12116
    Messages:
    972
    Gender:
    Male
    Vancouver, WA
    Vehicle:
    2015 Ford F150 Lariat FX4 3.5l Eco
    First month of ownership... This month I'm removing front air dam, and also Rhino lining the bed.
    Some more pictures. Looking in at the rear suspension. The special place where I mounted the Warn controller. The HiD light ballast zip tied to my radiator (that's temporary I assure you).

    DSCN0224.jpg
    DSCN0225.jpg
    DSCN0226.jpg
     
  3. Jun 5, 2009 at 2:39 PM
    #3
    chris4x4

    chris4x4 With sufficient thrust, pigs fly just fine. Moderator

    Joined:
    May 8, 2008
    Member:
    #6497
    Messages:
    112,751,531
    Gender:
    Male
    First Name:
    FlimFlubberJAM
    Tenoe, AZ
    Vehicle:
    2019 Rubicon 4 Door,
    4.10 gears, sliders, and lots of buttons.
    WTG!! Dwight!!!!!!!!!

    Lookin SWEET!!!

    I cant wait to see it in person, Buddy! :)
     
  4. Jun 5, 2009 at 2:56 PM
    #4
    Snipe

    Snipe Well-Known Member

    Joined:
    Jan 9, 2009
    Member:
    #12421
    Messages:
    1,146
    Gender:
    Male
    Pacific NW
    Vehicle:
    08 TRD Off Road
    Most guys get the mod bug an add a little here and then do a little more over time but it seems like the Mod bug slapped you hard and silly.

    So whats on next weeks agenda?
     
  5. Jun 5, 2009 at 3:05 PM
    #5
    chris4x4

    chris4x4 With sufficient thrust, pigs fly just fine. Moderator

    Joined:
    May 8, 2008
    Member:
    #6497
    Messages:
    112,751,531
    Gender:
    Male
    First Name:
    FlimFlubberJAM
    Tenoe, AZ
    Vehicle:
    2019 Rubicon 4 Door,
    4.10 gears, sliders, and lots of buttons.
    LMAO!! He has always been an "All or Nothing" type. :)
     
  6. Jun 8, 2009 at 11:04 PM
    #6
    mountainwolfpup

    mountainwolfpup [OP] Ford Guy (Formerly known as a Toyota Guy)

    Joined:
    Jan 1, 2009
    Member:
    #12116
    Messages:
    972
    Gender:
    Male
    Vancouver, WA
    Vehicle:
    2015 Ford F150 Lariat FX4 3.5l Eco
    First month of ownership... This month I'm removing front air dam, and also Rhino lining the bed.
    It's a curse I guess? I just had this vision for what I wanted in my truck.. and was never sure of the particulars.. thankfully Chris4x4 helped me out big time and gave me some strait advise on the shocks and suspension choices and some recommendations... of-course I couldn't stop there could I :)

    Well, I do want to do two more mods here pretty soon:
    1) Change locking rear dif behavior so it can be locked while in 2WD, $WD high
    2) Change driving light behavior (now actually my HiD KCs) to be able to turn them on and off independently of the low/high beams.

    FYI, I do have my heart set on one more mod. The TRD Turbo. But that'll have to wait until fall as I'll be driving my truck all over the Southwest this summer.
     
  7. Jun 9, 2009 at 11:35 AM
    #7
    TacoTycoon

    TacoTycoon Well-Known Member

    Joined:
    Apr 1, 2008
    Member:
    #5653
    Messages:
    400
    Gender:
    Male
    First Name:
    Justin
    Hayes, VA
    Vehicle:
    07 TRD Sport 4WD Indigo Ink
    Bilstein 5100 Coilovers, Diff Drop Kit, TSB AAL, 285/70/17 BFG A/T Tires, 17X8 Helo HE835 Wheels, Rear Bilstein 5100s, Dual Flowmaster 50 series, TRD CAI, TRD Front Seat Covers, Rear Suspension TSB, 35% Tint, Redline Hood Struts, MagLite Mod
    wow! When people say if you are going to lift, lift right... you definitely listened! Great looking truck bud
     
  8. Jun 9, 2009 at 11:39 AM
    #8
    mjp2

    mjp2 Living vicariously through myself Moderator

    Joined:
    Feb 16, 2007
    Member:
    #924
    Messages:
    21,892
    Gender:
    Male
    First Name:
    Milton Juevo Portimous II
    NJ
    Vehicle:
    Current: '21 Bronco Badlands. Previous: '06 TRD Access Cab, v6, 6-speed
    Get some skidplates on that thing to protect your investment. ;)

    I'd recommend tossing the differential drop. It doesn't do much, and the clearance issues you've already experienced are much worse with stronger skids.

    Really nice, well thought-out truck! :thumbsup:
     
  9. Jun 9, 2009 at 3:14 PM
    #9
    bk1

    bk1 Well-Known Member

    Joined:
    Nov 9, 2008
    Member:
    #10614
    Messages:
    100
    Gender:
    Male
    Lower Mainland, BC
    Vehicle:
    08 Tacoma TRD Sport
    ProComp Stage 2 6" lift, AAL, Heated Mirrors, DVD/NAV, Amp & Subs, Fog Light Mod, Rear Diff breather. WeatherTech Mats, Soft Tonneau Cover, 33" TrXus M/T, M8000 Winch & Bumper, CB, Rock/suspension Lighting and a whole lot more Soon to come rear Locker and more....
    Nice looking truck almost the exact setup that i've done for suspension...

    Nice and clean too
     
  10. Jun 9, 2009 at 3:17 PM
    #10
    tacomaman06

    tacomaman06 Carolina Alliance: Enforcer

    Joined:
    May 1, 2007
    Member:
    #1475
    Messages:
    26,212
    Gender:
    Male
    First Name:
    Will
    York,South Carolina
    Vehicle:
    '16 Tundra TRD Pro
    getting there....
    awesome tacoma,man!!! very well done!
     
  11. Jun 9, 2009 at 5:07 PM
    #11
    Incognito

    Incognito No better friend, no worse enemy

    Joined:
    May 25, 2009
    Member:
    #17626
    Messages:
    13,752
    Gender:
    Male
    VA
    Vehicle:
    2012 Pyrite AC TRD OR
    Spacer lift, bumper stickers, ejector seat, etc.
    Nice job man!
     
  12. Jun 9, 2009 at 5:46 PM
    #12
    bigyetti

    bigyetti Well-Known Member

    Joined:
    Apr 12, 2009
    Member:
    #15880
    Messages:
    398
    Gender:
    Male
    First Name:
    mike
    asheville, nc
    Vehicle:
    08 taco dc 4x4 short bed
    sirius satilite radio, more on the way when i get more money. oh ya removed the secondary filter
    looks awsome great job
     
  13. Jun 9, 2009 at 5:55 PM
    #13
    chris4x4

    chris4x4 With sufficient thrust, pigs fly just fine. Moderator

    Joined:
    May 8, 2008
    Member:
    #6497
    Messages:
    112,751,531
    Gender:
    Male
    First Name:
    FlimFlubberJAM
    Tenoe, AZ
    Vehicle:
    2019 Rubicon 4 Door,
    4.10 gears, sliders, and lots of buttons.
    Actually, Its a Supercharger.....Not a turbo. :eek:

    And of all the years I have known ya, Im pretty sure you can call me "Chris". :)
     
  14. Jun 22, 2009 at 7:19 PM
    #14
    mountainwolfpup

    mountainwolfpup [OP] Ford Guy (Formerly known as a Toyota Guy)

    Joined:
    Jan 1, 2009
    Member:
    #12116
    Messages:
    972
    Gender:
    Male
    Vancouver, WA
    Vehicle:
    2015 Ford F150 Lariat FX4 3.5l Eco
    First month of ownership... This month I'm removing front air dam, and also Rhino lining the bed.
    Ahhh yes, you are correct Chris4x4. I stand corrected. And a supercharger is all the much better :)
     
  15. Jun 22, 2009 at 9:50 PM
    #15
    chris4x4

    chris4x4 With sufficient thrust, pigs fly just fine. Moderator

    Joined:
    May 8, 2008
    Member:
    #6497
    Messages:
    112,751,531
    Gender:
    Male
    First Name:
    FlimFlubberJAM
    Tenoe, AZ
    Vehicle:
    2019 Rubicon 4 Door,
    4.10 gears, sliders, and lots of buttons.
    Im still kickin around the idea of SC'ing my truck. Its sssssoooooo much fun. :D
     
  16. Jun 22, 2009 at 10:02 PM
    #16
    luk8272

    luk8272 Poodoo

    Joined:
    Feb 24, 2008
    Member:
    #4929
    Messages:
    5,958
    Gender:
    Male
    First Name:
    Lucas
    Southern Louisiana
    Vehicle:
    07 Silver4dr. 4x4, V6 Shortbed
    5% Tint, Bug flector, vent Visors, Removed secondary air filter, Rear Spring TSB w/ Wheeler's Add A Leaf HD Pack, Icon 2.0 rear shocks, Toytec 3" lift up front with Total Chaos UCA's, Debadged, Billet Grille,TRD Offroad rims/17x9 Pro comp 6001 rims, Duratracs 265/75/16 or 285/70/17, Fog light anytime mod, Tailgate hose clamp mod, Pro-dry AFE filter. Extended Differential Breather, ABS on/off, 6000k LEDs from CSJumper, heads/fogs, ScanguageII, Devil horns, Devil horns on third brake light, Mounted 60" Highlift, Mounted Tool Box, Wet Okole Front/Rear Seat Covers, TW sticker, Midland Handheld CB,Painted engine cover, Revenge Fab Sliders, ARE Topper, Weather tech Floorliners, Camper shell, ultimate headlight upgrade. URD -3° exhaust cam gears, .5" XTP Intake spacer. Custom dents.
    Hot damn.
     
  17. Nov 13, 2010 at 3:13 AM
    #17
    peerlesstaco

    peerlesstaco peerlesstaco

    Joined:
    Sep 17, 2010
    Member:
    #43413
    Messages:
    15
    Gender:
    Male
    Charleston SC
    Vehicle:
    2010 black dbl cab 4X4
    K&N cold air intake, neoprene seat covers, Cabelas floor mats, Wind deflectors, ARE cab level topper with yakima rack, Tsb suspension upgrade, Toytec 3' lift with rear AAL, BFG KM2 285/75/16
    just got my arb and warn xd 9000. I like the under the hood mount of solenoid, but wish there was a way to put the controller plug in the bumper. Has that been done? I have not taken the cover off the solenoid yet so this might be a dumb question. It just seems like this should be possible and it would keep me from having to raise the hood while using the winch.
     
  18. Jun 17, 2011 at 10:44 AM
    #18
    whitetaco02

    whitetaco02 Well-Known Member

    Joined:
    Jan 6, 2010
    Member:
    #28857
    Messages:
    656
    Gender:
    Male
    First Name:
    Frank
    GA
    Vehicle:
    09 Tacoma 4x4
    Tinted windows, stainless steel drop hitch, rear TSB, Marathon seat covers in Realtree AP camo, low profile chrome toolbox, husky liners front and back, debadged
    I really enjoyed reading your build thread. Looks like it was a lot of work but well worth it! Congrats!
     

Products Discussed in

To Top