1. Welcome to Tacoma World!

    You are currently viewing as a guest! To get full-access, you need to register for a FREE account.

    As a registered member, you’ll be able to:
    • Participate in all Tacoma discussion topics
    • Communicate privately with other Tacoma owners from around the world
    • Post your own photos in our Members Gallery
    • Access all special features of the site

Need help with light switch wiring

Discussion in 'Lighting' started by derickt, Jun 10, 2015.

  1. Jun 10, 2015 at 9:35 PM
    #1
    derickt

    derickt [OP] Active Member

    Joined:
    Feb 2, 2015
    Member:
    #147699
    Messages:
    35
    Gender:
    Male
    First Name:
    Derick
    Los Angeles
    Hey all,

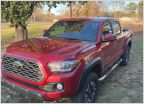
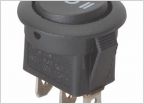
    Totally newbie problem that I'm throwing out to the TW lighting pros. So I just installed a 32" light bar in the lower front bumper today. Was a cheap ebay bar that came with a harness. Overall the install was a success and everything went smoothly. I wanted to keep an OEM appearance so also bought an oem style switch to mount in the dash and replace the one that came pre-installed in the harness. However, the connectors for the oem switch and the ones that the bar came with look very different. The oem switch has 4 wires (red, green, black, blue) while the original switch has 3 wires (white, blue, black). Can someone point me in the right direction as to how to make this work? I'm a complete idiot when it comes to anything electrical.

    Here's the switch that came with the light bar...
    [​IMG]

    And here's the switch I'm trying to replace it with...
    [​IMG]

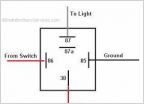
    There is also an intermediate connector between the original switch that came with the light bar, and the rest of the harness. I assume they did this to make it easier to route through the firewall...
    [​IMG]

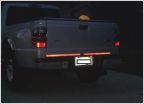
    And here's a pic of the almost finished install for kicks...
    [​IMG]
     
    This site contains affiliate links for which the site may be compensated.
    #1
  2. Jun 10, 2015 at 9:52 PM
    #2
    chenbro

    chenbro ¯\_(ツ)_/¯

    Joined:
    May 27, 2009
    Member:
    #17697
    Messages:
    3,334
    Gender:
    Male
    Broomfield, CO
    Vehicle:
    2009 Silver DCSB TRD OR
    What haven’t I changed?
    Did the OEM-style switch come with a wiring diagram? It looks like an air onboard switch so I'm going off the diagram here:

    https://www.tacomaworld.com/threads/oem-to-air-on-board-fog-light-switch-wiring.369623/

    I would say that the wiring goes something like this:

    Red/Yellow => Middle wire
    Black => Black wire
    Green/Yellow => Whatever wire is left from the generic switch
    Blue wire => Dash illumination (can tap into the in-dash fuse box or stock radio harness)


    Depending on how much room is available behind your switch location, you might crimp on some quick disconnects to the OEM switch to avoid having to solder anything.
     
  3. Jun 11, 2015 at 12:52 AM
    #3
    derickt

    derickt [OP] Active Member

    Joined:
    Feb 2, 2015
    Member:
    #147699
    Messages:
    35
    Gender:
    Male
    First Name:
    Derick
    Los Angeles
    Thanks for the info Chenbro! I'll try that configuration. Also, forgot to mention that the generic switch has an LED which only illuminates when it's in the ON position. So does that mean I don't have to tap into another power wire to get dash illumination on the OEM switch? And can I bypass dealing with the blue wire? Or is the OEM switch just built differently and requires to tap into another wire for illumination? Guess I'm just trying to wrap my head around how the generic switch manages to handle power, relay, ground, and illumination with only 3 wires :confused:
     
  4. Jun 11, 2015 at 1:00 AM
    #4
    juneatsbears

    juneatsbears Well-Known Member

    Joined:
    Sep 26, 2013
    Member:
    #113271
    Messages:
    45
    Gender:
    Male
    First Name:
    Jun
    Phoenix AZ
  5. Jun 11, 2015 at 1:07 AM
    #5
    fergyz

    fergyz Mmmm...Tacos

    Joined:
    Apr 25, 2012
    Member:
    #77624
    Messages:
    743
    Gender:
    Male
    49th State
    Vehicle:
    06' DBC 4x4 6spd
    Post where you got the switch from. This is very simple to do but we need to know the correct pin out of the OEM style switch. We don't want to steer you wrong.
     
  6. Jun 11, 2015 at 1:13 AM
    #6
    deeezy

    deeezy Well-Known Member

    Joined:
    Sep 1, 2013
    Member:
    #111645
    Messages:
    5,253
    Gender:
    Male
    First Name:
    Dana
    Hawaii
    Vehicle:
    2013 4x4 DC, 6 spd, TRD Sport
    King ext travel coilovers, Icon tubular UCA's Rear-King "Tundra" 2.5's, Allpro Expos, TRD cat-back, Hurst/Core short shift kit, etc...
    The OEM switch probably has two wires that are for the pos and negative illumination so it'll dim with your dimming controls. The other two wires will the 12v in and out that goes to relay. I'm not sure which colors are which though.
     
  7. Jun 11, 2015 at 1:14 AM
    #7
    fergyz

    fergyz Mmmm...Tacos

    Joined:
    Apr 25, 2012
    Member:
    #77624
    Messages:
    743
    Gender:
    Male
    49th State
    Vehicle:
    06' DBC 4x4 6spd
    Can you trace the white and blue wire back to the relay? Pull the relay off the harness and tell me which wire goes to what number pin. You should see the numbers next to the terminals.... Hopefully.
     
  8. Jun 11, 2015 at 3:34 PM
    #8
    derickt

    derickt [OP] Active Member

    Joined:
    Feb 2, 2015
    Member:
    #147699
    Messages:
    35
    Gender:
    Male
    First Name:
    Derick
    Los Angeles
    This site contains affiliate links for which the site may be compensated.
    #8
  9. Jun 11, 2015 at 4:10 PM
    #9
    fergyz

    fergyz Mmmm...Tacos

    Joined:
    Apr 25, 2012
    Member:
    #77624
    Messages:
    743
    Gender:
    Male
    49th State
    Vehicle:
    06' DBC 4x4 6spd
    Green/Yellow => White wire - although you should use a switched 12volt source - this will prevent leaving the light bar on when truck is completely off.
    Red/Yellow => Blue wire - triggers relay
    Black => Black wire - ground

    Blue/yellow wire - Dash illumination - use an "Mini add-a-circuit" and tap into the in-dash fuse box "tail" fuse.
     
    Last edited: Jun 11, 2015
  10. Jun 11, 2015 at 4:22 PM
    #10
    fergyz

    fergyz Mmmm...Tacos

    Joined:
    Apr 25, 2012
    Member:
    #77624
    Messages:
    743
    Gender:
    Male
    49th State
    Vehicle:
    06' DBC 4x4 6spd
    This site contains affiliate links for which the site may be compensated.
    #10
  11. Jun 11, 2015 at 4:33 PM
    #11
    derickt

    derickt [OP] Active Member

    Joined:
    Feb 2, 2015
    Member:
    #147699
    Messages:
    35
    Gender:
    Male
    First Name:
    Derick
    Los Angeles
    You, sir, are a Godsend. I'm going to the parts store tonight to get some quick connects and bits to make this happen. I do not have a voltage meter. Is this something I need? I wouldn't even know what to look for with it lol. As for the blue/yellow dash illumination. Can you point me to a link or source where I might find an add-a-circuit? Also, where is the in-dash fuse box located? Thank you!
     
  12. Jun 11, 2015 at 5:15 PM
    #12
    fergyz

    fergyz Mmmm...Tacos

    Joined:
    Apr 25, 2012
    Member:
    #77624
    Messages:
    743
    Gender:
    Male
    49th State
    Vehicle:
    06' DBC 4x4 6spd
  13. Jun 11, 2015 at 5:16 PM
    #13
    fergyz

    fergyz Mmmm...Tacos

    Joined:
    Apr 25, 2012
    Member:
    #77624
    Messages:
    743
    Gender:
    Male
    49th State
    Vehicle:
    06' DBC 4x4 6spd
    that can be found at most parts stores... make sure it's for the mini fuse. if they have a low-profile version of the mini - get that one.
     
  14. Jun 12, 2015 at 6:27 PM
    #14
    derickt

    derickt [OP] Active Member

    Joined:
    Feb 2, 2015
    Member:
    #147699
    Messages:
    35
    Gender:
    Male
    First Name:
    Derick
    Los Angeles
    OK, got everything wired up just like fergyz outlined. Worked like a charm! Thanks again for everyone's help. Couldn't have done this alone and probably would have a made an epic mess of things haha.

    Started by taking off some panels to access the in-dash fuse and remove the blank switch
    [​IMG]

    Popped in the OEM style switch and wired as per fergyz instructions
    [​IMG]

    Inserted the mini add-a-circuit into the #3 tail fuse behind the dash
    [​IMG]

    Secured wiring and reinstalled panels
    [​IMG]

    Let there be light!
    [​IMG]
     
    PrisonerOfDoom likes this.
  15. Jul 3, 2015 at 8:34 AM
    #15
    MattRRT

    MattRRT Well-Known Member

    Joined:
    May 1, 2014
    Member:
    #128935
    Messages:
    59
    Gender:
    Male
    First Name:
    Matt
    Concord, NC
    Vehicle:
    2009 Tacoma TRD Sport
    5100s, BGF TA KO2, Trifold Tonneau Cover, Weathertech window visors, window tint,
    Where did you run the wires through the firewall? I am trying to find the best place without using the drain plug above the frame
     
  16. Nov 18, 2015 at 12:48 AM
    #16
    thebaker

    thebaker Well-Known Member

    Joined:
    Feb 14, 2009
    Member:
    #13597
    Messages:
    2,504
    Gender:
    Male
    First Name:
    Byron
    NorCal
    Vehicle:
    Upgraded to a 3rd gen
    Never ending......$$$
  17. Oct 19, 2016 at 9:37 PM
    #17
    oly kenji

    oly kenji Well-Known Member

    Joined:
    Jun 17, 2014
    Member:
    #132165
    Messages:
    362
    Gender:
    Male
    Seattle, WA
    2014 DCSB OME, Soon to be 35's Group Buy Builder
  18. Oct 23, 2016 at 4:49 PM
    #18
    LINCOLN45

    LINCOLN45 Well-Known Member

    Joined:
    May 25, 2014
    Member:
    #130561
    Messages:
    94
    Gender:
    Male
    First Name:
    john
    sac
    Vehicle:
    2014 TACOMA DCSB
    265/70/17 TOYO OC AT Bilstein 6112 Coil and Strut Combo Tacoma Stealth 32" LED SOS SKID PLATES AND SLIDERS RIGID LED FOG LIGHT UPGRADE
  19. Oct 25, 2016 at 7:18 PM
    #19
    oly kenji

    oly kenji Well-Known Member

    Joined:
    Jun 17, 2014
    Member:
    #132165
    Messages:
    362
    Gender:
    Male
    Seattle, WA
    2014 DCSB OME, Soon to be 35's Group Buy Builder
    Did everything on here correctly. However, the switch itself is always on, even if the car is off. And the dimmer won't work. Any ideas.
     
  20. Oct 25, 2016 at 11:16 PM
    #20
    jaddels

    jaddels Well-Known Member

    Joined:
    Jul 8, 2012
    Member:
    #82169
    Messages:
    186
    Gender:
    Male
    First Name:
    Jeff
    Phoenix, AZ
    Vehicle:
    '12 Prerunner
    Maxtrac Spindles, SCS SR8 wheels, All-Pro Sliders, Kings front and rear w Dakar pack
    As it should be if these particular instructions were followed. The above setup means an always live switch and no dimming with factory dimmer. You'd need a switched 12v source for power if you want the switch to only work with the ignition on.
     

Products Discussed in

To Top