1. Welcome to Tacoma World!

    You are currently viewing as a guest! To get full-access, you need to register for a FREE account.

    As a registered member, you’ll be able to:
    • Participate in all Tacoma discussion topics
    • Communicate privately with other Tacoma owners from around the world
    • Post your own photos in our Members Gallery
    • Access all special features of the site

Need help with XRTeam fog light install...

Discussion in 'Lighting' started by Blackbear, Mar 26, 2011.

  1. Mar 26, 2011 at 2:08 PM
    #1
    Blackbear

    Blackbear [OP] Hardtooree Member

    Joined:
    Feb 22, 2011
    Member:
    #51666
    Messages:
    106
    Gender:
    Male
    Maine
    Vehicle:
    2008 Blk SR5 2.7 4X4 5 spd ACab
    (DIY)...Fog lights, alloys, wheelwell liners, tonneau, frame cleanup & rustproofing, floor mats, trailer hitch.
    Just bought a XRTeam clear fog light kit off Ebay, listing #140512535151 ($87.99). Using past threads from TWF I mounted the lights and know how to set up the front (light) half of the lighting harness, but the 2nd half of the harness (that goes to the switch) is confusing. Thought maybe someone here has bought the same kit and could offer suggestions.

    Here's where I think the wires connect...with questions posed as applicable:

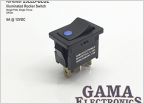
    Green connector (has two green wires, a black wire and a blue wire)....seems like it plugs into the switch that came with the kit.

    Black wire....a ground wire, to be attached to a grounded screw.

    Single white wire....need to extend this wire and add an in-line fuse to it, then attach it to the positive terminal of the battery.

    Red wire with white connector....plugs into the red wire w/ white connector on the 1st half of the harness.

    Ok, here's where I'm scratching my head:

    4-wire plug (has red/white/blue/black wires attached)....I'm guessing this simply plugs into the 30 amp relay that was provided in the kit, and the relay simply gets attached (screwed) to the truck chasis. Right?

    Green wire....I'm not sure where this connects. Do I need to extend it and connect to an open slot in either the engine or cabin fuse box? If so, do I need a "Add a Fuse" to do this or can I simply put an appropriate connector on the end of the extended wire and plug it into a fuse box slot? If it doesn't go to the fuse box, where does it go?

    Also, how do you access the area in the cabin behind the switch...I've heard the term 'kick panel' used but can see no removal panel in that area.

    Thanks in advance for any help. Wouldn't have made it this far without the excellent descriptions offered here.
     
    This site contains affiliate links for which the site may be compensated.
    #1
  2. Mar 26, 2011 at 7:48 PM
    #2
    Blackbear

    Blackbear [OP] Hardtooree Member

    Joined:
    Feb 22, 2011
    Member:
    #51666
    Messages:
    106
    Gender:
    Male
    Maine
    Vehicle:
    2008 Blk SR5 2.7 4X4 5 spd ACab
    (DIY)...Fog lights, alloys, wheelwell liners, tonneau, frame cleanup & rustproofing, floor mats, trailer hitch.
    Yes, that's it. It's similar to kits described in other posts here but the harnesses are slightly diffferent, different wire colors, etc. Noticed also that the fog lamp bulbs are 9005 rather than 9045, but have to assume they will work (otherwise I'll get new bulbs). If I can figure out where the green wire and 4-wire plug go I think I can finish the install.
     
  3. Mar 26, 2011 at 11:30 PM
    #3
    fast7

    fast7 Member

    Joined:
    Feb 3, 2011
    Member:
    #50489
    Messages:
    6
    Gender:
    Male
    First Name:
    Rick
    winnipeg canada
    Fog Lights, 1" Rear Lift, Grillecraft grille, Tinted windows.
    I hope this gets solved because I have a similar kit and tried to install it today and stopped after connecting the first half of the harness to the actual lights.
     
  4. Mar 27, 2011 at 6:30 AM
    #4
    Blackbear

    Blackbear [OP] Hardtooree Member

    Joined:
    Feb 22, 2011
    Member:
    #51666
    Messages:
    106
    Gender:
    Male
    Maine
    Vehicle:
    2008 Blk SR5 2.7 4X4 5 spd ACab
    (DIY)...Fog lights, alloys, wheelwell liners, tonneau, frame cleanup & rustproofing, floor mats, trailer hitch.
    My camera is pure crap so hard to take good pics...but yes the harness does have a fuse holder (with fuse...connected to white wire in pic) and the 4-wire plug does match up with (i.e., will plug into) the relay (plug and relay in upper left in pic). The green wire is only about 7" long (center of pic), has no plug at the end but does have an end-of-wire connector for extending the wire (similar to the white wire that is supposed to be attached to the battery).

    [​IMG]

    The biggest difference between this kit and others demo'd on this site is the relay (the other kits don't seem to have one) and the fact that the 2nd harness is made to go entirely into the engine compartment except for the switch (you can see how long the coiled-up switch side of the harness is). This means I'll need to put everything in the engine compartment and figure a way to get the green connector (that will go to the switch, that will go in the cabin) through the firewall with the connector still on the wire. I.e., I'll need to make or find a big hole for the connector to fit through the firewall. I don't really want to slice a big opening through that rubber section where the main engine wires go through the firewall, so will have to think some more on that aspect. I suppose I could cut the connector off and splice it on later, but would rather not add splices if I don't have to.

    Anyway, does the the 4-wire plug go to the relay, and does the green wire go to the engine compartment fuse box ?
     
  5. Mar 27, 2011 at 10:48 AM
    #5
    fast7

    fast7 Member

    Joined:
    Feb 3, 2011
    Member:
    #50489
    Messages:
    6
    Gender:
    Male
    First Name:
    Rick
    winnipeg canada
    Fog Lights, 1" Rear Lift, Grillecraft grille, Tinted windows.
    Ok I just came from outside and tried this just to see if they work.
    Plug in the switch to the connector that fits it.
    Plug in the relay to the connector that fits it.
    Plug in Red wire to first half of harness that runs to lights.
    Both black wires are grounds, connect then to the ground bolt on fender by fuse box.
    The green wire needs power too My wire was red and thin but same but same connecter as your green one. I cut off the connector for the thin red and the power fuse wire and connected them both to power. lights work fine and switch off an on. I just have to run the wires through the fire wall and connect to switch. Basicly the white and green both need power.
     
  6. Mar 27, 2011 at 2:00 PM
    #6
    Blackbear

    Blackbear [OP] Hardtooree Member

    Joined:
    Feb 22, 2011
    Member:
    #51666
    Messages:
    106
    Gender:
    Male
    Maine
    Vehicle:
    2008 Blk SR5 2.7 4X4 5 spd ACab
    (DIY)...Fog lights, alloys, wheelwell liners, tonneau, frame cleanup & rustproofing, floor mats, trailer hitch.
    Thanks for the replies, it looks like the answer to both of my questions is yes...4-wire plugs into the relay, green wire goes to a power source.

    Glad your setup works for you fast7, I will try that if my own doesn't work. If possible I'd like my fogs to be tied to my tail lights so that when I leave the truck (accessories off) the fogs go off too.

    Caribe makaira, for Option #2, what do you mean by 'driverside marker'?

    Would extending the green wire into the cabin and connecting it to the 10 amp TAIL fuse (via an Add-A-Fuse) control the fogs with the tail light switch?

    Thanks again for the help.
     
  7. Mar 27, 2011 at 2:39 PM
    #7
    fast7

    fast7 Member

    Joined:
    Feb 3, 2011
    Member:
    #50489
    Messages:
    6
    Gender:
    Male
    First Name:
    Rick
    winnipeg canada
    Fog Lights, 1" Rear Lift, Grillecraft grille, Tinted windows.
    I just finished it now. I connected the white directly to positive side terminal and covered it with the red rubber boot so it cant be seen. I extended the thin red (your green) to the 10amp low beam headlight fuse by extending the wire under the fuse box and under the fuse box cap so it cant bee seen either. I extended the 4 switch wires and poked a small hole in the rubber boot going into the cab. So the only wires that entered the cab is the 4 switch wires for a nice clean look. This way the fogs are off when the low beams are off and can be switched on only when lo beam is on. The switch lights up only when the fog lights are on. My lights turn off automaticly when i take out key and open door so yours may be different. Good luck.
     
  8. Mar 27, 2011 at 5:50 PM
    #8
    Blackbear

    Blackbear [OP] Hardtooree Member

    Joined:
    Feb 22, 2011
    Member:
    #51666
    Messages:
    106
    Gender:
    Male
    Maine
    Vehicle:
    2008 Blk SR5 2.7 4X4 5 spd ACab
    (DIY)...Fog lights, alloys, wheelwell liners, tonneau, frame cleanup & rustproofing, floor mats, trailer hitch.
    Nice work fast7, that sounds like a good setup...maybe I'll go that route and reduce the amount of wire going to the cabin.

    Caribe makaira, I appreciate your feedback (you sound like you've done a few of these before) and I believe I know a bit more about how the system can be arranged with those different options you described. My camera work (as shown above) is lousy but maybe I can get some pics out when I finish the mod...pretty cold/windy for most of the week here but hopefully can do it next weekend.

    Thanks again guys, there's always good people and good info here on the TWF!
     
  9. Apr 2, 2011 at 11:32 AM
    #9
    Blackbear

    Blackbear [OP] Hardtooree Member

    Joined:
    Feb 22, 2011
    Member:
    #51666
    Messages:
    106
    Gender:
    Male
    Maine
    Vehicle:
    2008 Blk SR5 2.7 4X4 5 spd ACab
    (DIY)...Fog lights, alloys, wheelwell liners, tonneau, frame cleanup & rustproofing, floor mats, trailer hitch.
    Well, after a week of cold windy weather (and a 12" snowstorm yesterday) I finally had a chance today to try and finish my fog lamp install. Decided to go with fast7's fusebox connect approach. After chasing down the elusive "Add-A' Circuit" wiring add-on (see note below...maybe they should call it a Unicorn Circuit...it's a pretty rare item) and doing another 4 hours of fussing with connections I plugged everything in, flipped the switch and......nuthin'. Checked the lines for any obvious problems, tried again. Nuthin'. The grounds and main power source seem solid so somewhere there has to be a bad connection...but I don't know much about troubleshooting electronics and with 7 hours into the effort so far I'm not inclined to go for another 2 or 3, at least not now. But, at least the truck looks better with the light housings instead of the plastic inserts, I didn't set it on fire, and I did learn a few things that I didn't know. And some that I still don't know, lol.

    P.S. For those attempting this install, note that a 'low-profile mini fuse Add-A-Circuit' apparently doesn't exist...found this after checking the internet and local parts stores. None of them had even heard of one so I used a standard mini fuse version which kinda fits but still doesn't seem completely 'tight' in the fuse slot (it sits high in the slot and can be moved fairly easily. This may be a source of the fail I had, but maybe not).
     
  10. Apr 2, 2011 at 2:37 PM
    #10
    Blackbear

    Blackbear [OP] Hardtooree Member

    Joined:
    Feb 22, 2011
    Member:
    #51666
    Messages:
    106
    Gender:
    Male
    Maine
    Vehicle:
    2008 Blk SR5 2.7 4X4 5 spd ACab
    (DIY)...Fog lights, alloys, wheelwell liners, tonneau, frame cleanup & rustproofing, floor mats, trailer hitch.
    Thanks for the feedback. I used the 10A right side low beam headlight slot in the engine compartment fuse box (since the only tail light slot is in the cabin). When plugged in, wire is facing up as you suggested and it seems to be in as far as it wants to go, but the fit isn't tight and the fuse rides fairly high in the slot. It doesn't fall out and it does make decent contact, but it's not 'solid' either.

    Could it be the switch? It does plug into the harness plug, but it doesn't 'click'.

    On several of the wires I did have to make connections with the old-fashioned 'twist wires together and wrap with electrical tape' approach. They are tight and well-wrapped, but might that be a source of a short? Tried the standard crimp connectors but they pulled out fairly easily, especially on the smaller wires.
     
  11. Apr 2, 2011 at 7:43 PM
    #11
    Blackbear

    Blackbear [OP] Hardtooree Member

    Joined:
    Feb 22, 2011
    Member:
    #51666
    Messages:
    106
    Gender:
    Male
    Maine
    Vehicle:
    2008 Blk SR5 2.7 4X4 5 spd ACab
    (DIY)...Fog lights, alloys, wheelwell liners, tonneau, frame cleanup & rustproofing, floor mats, trailer hitch.
    I've tried re-inserting the switch many times but it doesn't click into position, it just slides in. Seems pretty tight but don't know if all pins are engaging.

    I'll check the other connections again and solder the joints if any seem loose. Will also check where the harness plugs into the lamps...maybe they're not tight.

    Thanks again for the help.
     
  12. Apr 3, 2011 at 8:16 AM
    #12
    Blackbear

    Blackbear [OP] Hardtooree Member

    Joined:
    Feb 22, 2011
    Member:
    #51666
    Messages:
    106
    Gender:
    Male
    Maine
    Vehicle:
    2008 Blk SR5 2.7 4X4 5 spd ACab
    (DIY)...Fog lights, alloys, wheelwell liners, tonneau, frame cleanup & rustproofing, floor mats, trailer hitch.
    I re-did the wire connections this morning and replaced original cheap switch with a Toyota rocker switch. Tried running with the accessories on/engine off, then accessories on/engine running. Nuthin'.
     
  13. Apr 7, 2011 at 2:51 PM
    #13
    Blackbear

    Blackbear [OP] Hardtooree Member

    Joined:
    Feb 22, 2011
    Member:
    #51666
    Messages:
    106
    Gender:
    Male
    Maine
    Vehicle:
    2008 Blk SR5 2.7 4X4 5 spd ACab
    (DIY)...Fog lights, alloys, wheelwell liners, tonneau, frame cleanup & rustproofing, floor mats, trailer hitch.
    Checked connections, redid those that I thought might have a chance of malfunction. Still doesn't work. I'm pretty confident that the connections (wires going to right places) are right so I have to think it's a problem with the harness or lights themselves. Dang.

    Update....bought a continuity tester and checked my harness (both halves), looks like the problem is coming from the green wire (fuse to switch), probably the Add-A-Fuse or the lo-beam headlight slot that it's plugged into. Any ideas why the low-beam headlights work (power is in the fuse slot) but no power is getting to the fog light switch?
     
  14. Apr 12, 2011 at 10:42 PM
    #14
    fast7

    fast7 Member

    Joined:
    Feb 3, 2011
    Member:
    #50489
    Messages:
    6
    Gender:
    Male
    First Name:
    Rick
    winnipeg canada
    Fog Lights, 1" Rear Lift, Grillecraft grille, Tinted windows.
    Just try not using the add a fuse connector. I just placed the wire in the low beam fuse slot and pushed the fuse into the wire. No problems with it at all. Good luck.
     
  15. Apr 13, 2011 at 3:38 PM
    #15
    Blackbear

    Blackbear [OP] Hardtooree Member

    Joined:
    Feb 22, 2011
    Member:
    #51666
    Messages:
    106
    Gender:
    Male
    Maine
    Vehicle:
    2008 Blk SR5 2.7 4X4 5 spd ACab
    (DIY)...Fog lights, alloys, wheelwell liners, tonneau, frame cleanup & rustproofing, floor mats, trailer hitch.
    Fuse in add-a-circuit tests ok. I'll try the 'push fuse and wire in together' trick to see if that works. Thanks.

    PS Fast7, your idea sounds like a good way to test if the add-a-circuit is the culprit in my situation, but it seems risky to leave the setup like that since if the fuse in the slot burns out the wire would still be hot, meaning you would be 'fuseless' and potentially risk an overload hazard. True?
     
  16. Apr 13, 2011 at 11:29 PM
    #16
    fast7

    fast7 Member

    Joined:
    Feb 3, 2011
    Member:
    #50489
    Messages:
    6
    Gender:
    Male
    First Name:
    Rick
    winnipeg canada
    Fog Lights, 1" Rear Lift, Grillecraft grille, Tinted windows.
    I believe the fog light circuit would still be protected from overheating because there is the other wire with the inline fuse that would blow even if the low beam fuse blows.
     
  17. Apr 15, 2011 at 5:49 PM
    #17
    Blackbear

    Blackbear [OP] Hardtooree Member

    Joined:
    Feb 22, 2011
    Member:
    #51666
    Messages:
    106
    Gender:
    Male
    Maine
    Vehicle:
    2008 Blk SR5 2.7 4X4 5 spd ACab
    (DIY)...Fog lights, alloys, wheelwell liners, tonneau, frame cleanup & rustproofing, floor mats, trailer hitch.
    Well, I tried bypassing the add-a-circuit as Fast7 suggested (put bare wire into fuse slot and pushed fuse over it)...and yee-haw, success! I've no idea why the add-a-circuit doesn't work since the fuse in it tests ok, but it's sure nice to have the danged things working and to know that I had actually wired them right to begin with (amazing in itself since I'm no Joe Electrician). Last steps were to feed the switch wires through the firewall with a coathanger and trim off some extra plastic around the edge of the switch opening with a mill file and jack knife. I used a Toyota rocker switch...it's a little bigger than the fancier OEM swicth but also only $13 vs. about $70 for the fancypants one. It popped in the opening just fine after the edge trimming, is MUCH better made than the one that came with the harness, looks good, and works good. Thank gaawwd it's finally done cause' I was getting sick of playing with wires and second-guessing myself.

    Oh, what a feelin' !!! (Sorry...had to say it).

    Once again, thanks for all the help and excellent tips offered, I definately could not have done it on my own.

    Next up will be cleaning up/ priming/ painting/ rustproofing the truck undercarriage...a necessary evil since rust eats iron like candy around these parts. Maybe I'll wait a few more weeks for that one, though. I must first linger a time in the blinding fog light of success.

    Time for a beer. Light, of course.
     

Products Discussed in

To Top