

-
Welcome to Tacoma World!
You are currently viewing as a guest! To get full-access, you need to register for a FREE account.
As a registered member, you’ll be able to:- Participate in all Tacoma discussion topics
- Communicate privately with other Tacoma owners from around the world
- Post your own photos in our Members Gallery
- Access all special features of the site
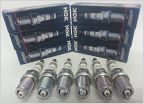 I4 loss of power and rumbling up hill only
 Custom Speaker Setups
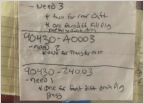 Crush Gaskets On Drain Plugs
 Looking for suggestion for a waterproof plug/connector to wie my light bar
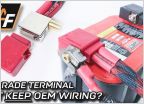 FAvorite battery terminals for accessory connection?
 Compatibility with subs, amp and Taco Tunes box
Need wiring help for Alternator
Discussion in '2nd Gen. Tacomas (2005-2015)' started by TommyD269, Aug 26, 2025.
Page 1 of 2
Page 1 of 2


