1. Welcome to Tacoma World!

    You are currently viewing as a guest! To get full-access, you need to register for a FREE account.

    As a registered member, you’ll be able to:
    • Participate in all Tacoma discussion topics
    • Communicate privately with other Tacoma owners from around the world
    • Post your own photos in our Members Gallery
    • Access all special features of the site

New speakers/sub/amp and the spacial dilemma... a JBL story

Discussion in 'Audio & Video' started by Denk, Aug 27, 2016.

  1. Sep 2, 2016 at 9:43 AM
    #21
    Denk

    Denk [OP] Well-Known Member

    Joined:
    Oct 11, 2012
    Member:
    #88739
    Messages:
    1,148
    Gender:
    Male
    PNW
    Vehicle:
    '13 Spruce TRD Sport DCSB
    If I need to get back in there for any reason, the raammat is pretty easy to cut and pull up. Then I can just make a new panel to replace. I initially thought about fabbing panels out of alu and bolting them in, but got lazy.

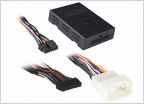
    The factory amp does a fair amount of signal processing and the LOC is needed to "sum" the signal and provide a low level input (rca) to the new amp. If you take the amp out, the HU stops working. I'm sure someone else could explain that better.
     
  2. Sep 2, 2016 at 11:39 AM
    #22
    rob feature

    rob feature Tacos!

    Joined:
    Aug 10, 2011
    Member:
    #61468
    Messages:
    1,705
    Gender:
    Male
    Colorado
    Vehicle:
    2003 4x4 V6 X-Cab SR5
    Shocks. Pegs. Lucky.
    I see - didn't realize you were keeping the factory HU.
     
  3. Sep 2, 2016 at 11:50 AM
    #23
    Denk

    Denk [OP] Well-Known Member

    Joined:
    Oct 11, 2012
    Member:
    #88739
    Messages:
    1,148
    Gender:
    Male
    PNW
    Vehicle:
    '13 Spruce TRD Sport DCSB
    Post #2 updated.
     
    Last edited: Sep 2, 2016
  4. Sep 6, 2016 at 8:16 PM
    #24
    Denk

    Denk [OP] Well-Known Member

    Joined:
    Oct 11, 2012
    Member:
    #88739
    Messages:
    1,148
    Gender:
    Male
    PNW
    Vehicle:
    '13 Spruce TRD Sport DCSB
    Decided to elevate the JBL amp instead of the LOC. This way, the LOC lays flat on the board and the RCAs will have a direct unobstructed route to the Arc amp. Came across www.speedymetals.com and ordered some aluminum 6061 angle to use as brackets/risers (1/4" x 3" x 3" cut in 1 3/8" lengths). Alu was only $5 but shipping was $16 :rolleyes:.
     
    Boomkanani likes this.
  5. Sep 10, 2016 at 5:10 PM
    #25
    Denk

    Denk [OP] Well-Known Member

    Joined:
    Oct 11, 2012
    Member:
    #88739
    Messages:
    1,148
    Gender:
    Male
    PNW
    Vehicle:
    '13 Spruce TRD Sport DCSB
    Made some progress today with a front door,
    20160910_154905.jpg 20160910_165428.jpg

    Painted the baffles,
    20160910_133505.jpg

    And took delivery of some important parts.
    20160910_170548.jpg

    Today was a good day. Now for my reward.
    1473552580307-2070698647.jpg
     
  6. Sep 10, 2016 at 6:04 PM
    #26
    Boomkanani

    Boomkanani Well-Known Member

    Joined:
    Nov 7, 2015
    Member:
    #168939
    Messages:
    997
    Gender:
    Male
    First Name:
    Mike
    Goldsboro, NC
    Vehicle:
    2009 TRD OffRoad DCSB - 6 Speed
    Some stuffz
    Is that grey top layer the ensolite? I've only put in the butyl w/foil layer so far. Haven't had the chance to research what sound proofing I want to use. Let us know how it works out!
     
  7. Sep 10, 2016 at 7:31 PM
    #27
    Denk

    Denk [OP] Well-Known Member

    Joined:
    Oct 11, 2012
    Member:
    #88739
    Messages:
    1,148
    Gender:
    Male
    PNW
    Vehicle:
    '13 Spruce TRD Sport DCSB
    Yep. That's the ensolite. It helps decouple acoustical energy from resonating other parts of the door.
     
  8. Sep 10, 2016 at 8:19 PM
    #28
    Boomkanani

    Boomkanani Well-Known Member

    Joined:
    Nov 7, 2015
    Member:
    #168939
    Messages:
    997
    Gender:
    Male
    First Name:
    Mike
    Goldsboro, NC
    Vehicle:
    2009 TRD OffRoad DCSB - 6 Speed
    Some stuffz
  9. Sep 10, 2016 at 8:58 PM
    #29
    rob feature

    rob feature Tacos!

    Joined:
    Aug 10, 2011
    Member:
    #61468
    Messages:
    1,705
    Gender:
    Male
    Colorado
    Vehicle:
    2003 4x4 V6 X-Cab SR5
    Shocks. Pegs. Lucky.
    Steve_nm likes this.
  10. Sep 10, 2016 at 10:01 PM
    #30
    Denk

    Denk [OP] Well-Known Member

    Joined:
    Oct 11, 2012
    Member:
    #88739
    Messages:
    1,148
    Gender:
    Male
    PNW
    Vehicle:
    '13 Spruce TRD Sport DCSB
    That is some serious matting. I wouldnt mind laying that down on the floor once I'm done with everything else.
     
  11. Sep 11, 2016 at 1:11 PM
    #31
    Denk

    Denk [OP] Well-Known Member

    Joined:
    Oct 11, 2012
    Member:
    #88739
    Messages:
    1,148
    Gender:
    Male
    PNW
    Vehicle:
    '13 Spruce TRD Sport DCSB
    Started dampening the driver door and ended up short on material. If you plane on going 100% coverage, the RAAMmat door package is not enough. Be sure to pick up a couple more sheets; this should also leave enough scrap to add to the back of the door panels.

    Pic of the double layer (8"x8") and ensolite behind the speaker (recommended).
    20160911_095824.jpg

    Tip: before removing the vapor barrier, make outlines of the spots that require extra attention, then use as a template. I was using saran wrap before I realized to just do it this way.
    This is for cutting out a patch panel for one of the access holes.
    20160911_100516.jpg
     
    Last edited: Sep 11, 2016
  12. Sep 14, 2016 at 8:50 PM
    #32
    Denk

    Denk [OP] Well-Known Member

    Joined:
    Oct 11, 2012
    Member:
    #88739
    Messages:
    1,148
    Gender:
    Male
    PNW
    Vehicle:
    '13 Spruce TRD Sport DCSB
    Made some good progress the last couple days. Both rear doors are done and wired.

    Perfect fit. Marv's the man!
    20160913_183722.jpg

    #magneticallychallenged
    20160913_184001.jpg

    Nice 'n tight.
    20160914_195953.jpg 20160914_201440.jpg
     
    Boomkanani likes this.
  13. Sep 16, 2016 at 9:39 PM
    #33
    Denk

    Denk [OP] Well-Known Member

    Joined:
    Oct 11, 2012
    Member:
    #88739
    Messages:
    1,148
    Gender:
    Male
    PNW
    Vehicle:
    '13 Spruce TRD Sport DCSB
    Sound dampening complete. On to wiring.
    20160916_205316.jpg

    These tweeter brackets are a PITA. bent one of the mounting arms trying to loosen the bolts that hold the tweet to the adapter. Not to mention tearing up my hand in the process. Bent it back best i could, still a little tweaked.
    20160916_205420.jpg

    These are press fit into Marv's adapter, then go back on the original bracket.
    20160916_205336.jpg

    Also poked around in all the little nooks and crannies searching for a good location for the crossovers. No luck in finding some clever little spot, so just going to mount under the front seats with some velcro.
     
    Boomkanani likes this.
  14. Sep 17, 2016 at 9:31 AM
    #34
    Denk

    Denk [OP] Well-Known Member

    Joined:
    Oct 11, 2012
    Member:
    #88739
    Messages:
    1,148
    Gender:
    Male
    PNW
    Vehicle:
    '13 Spruce TRD Sport DCSB
    Beautiful rainy day today, here in the emerald city. So time to show some love to the amp rack. Got my alu angle for fabbing brackets. Just need to run to the hardware store for some, umm... hardware. :cool:
    Heres the idea. Now there will be room for running the RCAs to the amp.
    20160917_092656.jpg
     
    Man of Steel TRD and Boomkanani like this.
  15. Sep 17, 2016 at 2:24 PM
    #35
    Denk

    Denk [OP] Well-Known Member

    Joined:
    Oct 11, 2012
    Member:
    #88739
    Messages:
    1,148
    Gender:
    Male
    PNW
    Vehicle:
    '13 Spruce TRD Sport DCSB
    I really like how this turned out! The brackets will be secured to the board with T-nuts on the backside.
    20160917_125603.jpg 20160917_124122.jpg
    20160917_141949.jpg 20160917_142034.jpg
     
    Man of Steel TRD likes this.
  16. Sep 18, 2016 at 6:00 PM
    #36
    Denk

    Denk [OP] Well-Known Member

    Joined:
    Oct 11, 2012
    Member:
    #88739
    Messages:
    1,148
    Gender:
    Male
    PNW
    Vehicle:
    '13 Spruce TRD Sport DCSB
    Test fitting and fine tuning the board.
    1474246609488-1726401475.jpg

    Backside, had to violate the corners a bit to get the T-nuts in since the new amp is a little too wide.

    Edit: I have never worked with MDF before, just carving out these little nut caves made a huge mess. I feel for anyone with allergies that works with this on a regular basis.
    20160918_162015.jpg 20160918_162028.jpg
     
    Last edited: Sep 19, 2016
    Man of Steel TRD likes this.
  17. Sep 18, 2016 at 7:01 PM
    #37
    rob feature

    rob feature Tacos!

    Joined:
    Aug 10, 2011
    Member:
    #61468
    Messages:
    1,705
    Gender:
    Male
    Colorado
    Vehicle:
    2003 4x4 V6 X-Cab SR5
    Shocks. Pegs. Lucky.
    Coming along nicely Denk. Loving the detail in this one.
     
  18. Sep 19, 2016 at 4:56 AM
    #38
    Denk

    Denk [OP] Well-Known Member

    Joined:
    Oct 11, 2012
    Member:
    #88739
    Messages:
    1,148
    Gender:
    Male
    PNW
    Vehicle:
    '13 Spruce TRD Sport DCSB
    Thanks, this has been a fun project so far and puts all my skills to the test.
     
  19. Sep 20, 2016 at 8:09 PM
    #39
    Denk

    Denk [OP] Well-Known Member

    Joined:
    Oct 11, 2012
    Member:
    #88739
    Messages:
    1,148
    Gender:
    Male
    PNW
    Vehicle:
    '13 Spruce TRD Sport DCSB
    I stand corrected. Look like the crossovers will fit behind the kick panels. At least on the driver side. Nice n snug. Tomorrow I'll investigate the passenger side.
    20160920_190310.jpg

    Oooh... sexy.
    20160920_190339.jpg
     
    Boomkanani likes this.
  20. Sep 21, 2016 at 8:22 PM
    #40
    Denk

    Denk [OP] Well-Known Member

    Joined:
    Oct 11, 2012
    Member:
    #88739
    Messages:
    1,148
    Gender:
    Male
    PNW
    Vehicle:
    '13 Spruce TRD Sport DCSB
    Annnd it fits on the other side as well.
    20160921_174456.jpg

    All the doors finished now. Still have to run the power wire from the engine bay, finish carpeting the amp rack and sub enclosure, them make all the connections. I can finally see the light!
    20160921_192316.jpg
     
    Man of Steel TRD likes this.

Products Discussed in

To Top