

-
Welcome to Tacoma World!
You are currently viewing as a guest! To get full-access, you need to register for a FREE account.
As a registered member, you’ll be able to:- Participate in all Tacoma discussion topics
- Communicate privately with other Tacoma owners from around the world
- Post your own photos in our Members Gallery
- Access all special features of the site
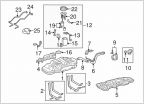 Gas Cap doesn't seal anymore?
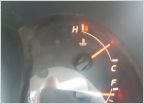 Cooling Question
 Archive Hammer Hanger Install Experience
 Mevotech TTX Ball Joint FAIL
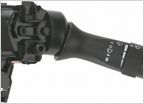 Change to Intermittent Wipers
Night Vision Gun Vault Mod
Discussion in '2nd Gen. Tacomas (2005-2015)' started by Burnout, Aug 11, 2011.


