1. Welcome to Tacoma World!

    You are currently viewing as a guest! To get full-access, you need to register for a FREE account.

    As a registered member, you’ll be able to:
    • Participate in all Tacoma discussion topics
    • Communicate privately with other Tacoma owners from around the world
    • Post your own photos in our Members Gallery
    • Access all special features of the site

NoSoup4You's First Build Ever

Discussion in '2nd Gen. Builds (2005-2015)' started by NoSoup4You, Feb 5, 2012.

  1. Jun 29, 2014 at 11:30 AM
    #141
    Navar

    Navar Well-Known Member

    Joined:
    Sep 14, 2012
    Member:
    #86923
    Messages:
    959
    Gender:
    Male
    First Name:
    Steve
    Corona CA
    Vehicle:
    07 Tacoma TRD Sport 4x4
    Washed it, Icon suspension, Icon UCA
    Looks good
     
  2. Jun 29, 2014 at 3:36 PM
    #142
    RockyMtnTRD

    RockyMtnTRD Wanderlust.

    Joined:
    May 4, 2011
    Member:
    #56088
    Messages:
    6,557
    Gender:
    Male
    First Name:
    Noah
    Colorado
    Vehicle:
    '11 TRD OR
    hack job

    Thanks man! Looks like you've got some good shit going yourself!
     
  3. Jun 30, 2014 at 4:46 PM
    #143
    Datsik

    Datsik Well-Known Member

    Joined:
    Aug 16, 2011
    Member:
    #61799
    Messages:
    1,337
    Gender:
    Male
    First Name:
    Anthony
    San Diego
    Vehicle:
    1999 Tacoma 4x4
    Not much.
    Love the new set up!
     
  4. Feb 5, 2015 at 10:49 AM
    #144
    Ricks2013

    Ricks2013 Well-Known Member

    Joined:
    Nov 22, 2012
    Member:
    #91635
    Messages:
    1,378
    Gender:
    Male
    First Name:
    Rick
    Orlando, FL
    Vehicle:
    13' TRD Sport DCSB
    A few things
    Nice build man!!!!
     
  5. Mar 25, 2015 at 9:14 PM
    #145
    NoSoup4You

    NoSoup4You [OP] Well-Known Member

    Joined:
    Jan 3, 2012
    Member:
    #69909
    Messages:
    1,240
    Gender:
    Male
    First Name:
    David
    Palos Verdes
    Vehicle:
    2008 DCSB DMZ LT 4x4
    Camburg | King | Glassworks | DMZ | Nitro | Banks | Pelfreybilt | Brute Force Fab | Bay Area Metal Fab | Baja Designs | Rigid Industries | STL
    Thanks :)

    The truck is getting dropped off at DMZ in a few days :spy::spy:
     
  6. Mar 25, 2015 at 9:16 PM
    #146
    BBtacosurfer

    BBtacosurfer Well-Known Member

    Joined:
    Nov 23, 2012
    Member:
    #91716
    Messages:
    3,828
    Gender:
    Male
    First Name:
    Dave
    ID
    Vehicle:
    MGM 2012 4x4
    Sua and triples!?!?
     
  7. Mar 25, 2015 at 10:08 PM
    #147
    NoSoup4You

    NoSoup4You [OP] Well-Known Member

    Joined:
    Jan 3, 2012
    Member:
    #69909
    Messages:
    1,240
    Gender:
    Male
    First Name:
    David
    Palos Verdes
    Vehicle:
    2008 DCSB DMZ LT 4x4
    Camburg | King | Glassworks | DMZ | Nitro | Banks | Pelfreybilt | Brute Force Fab | Bay Area Metal Fab | Baja Designs | Rigid Industries | STL
    yessir!
     
  8. Mar 25, 2015 at 10:29 PM
    #148
    NoSoup4You

    NoSoup4You [OP] Well-Known Member

    Joined:
    Jan 3, 2012
    Member:
    #69909
    Messages:
    1,240
    Gender:
    Male
    First Name:
    David
    Palos Verdes
    Vehicle:
    2008 DCSB DMZ LT 4x4
    Camburg | King | Glassworks | DMZ | Nitro | Banks | Pelfreybilt | Brute Force Fab | Bay Area Metal Fab | Baja Designs | Rigid Industries | STL
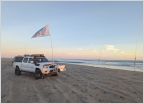
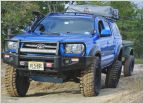
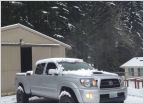
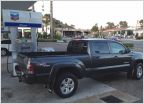
    Some current photos before it goes under the knife...


    [​IMG]

    [​IMG]

    [​IMG]

    [​IMG]


    And a quick shot of the new daily driver ... I can't resist Subaru :D

    [​IMG]
     
  9. May 5, 2015 at 6:26 PM
    #149
    NoSoup4You

    NoSoup4You [OP] Well-Known Member

    Joined:
    Jan 3, 2012
    Member:
    #69909
    Messages:
    1,240
    Gender:
    Male
    First Name:
    David
    Palos Verdes
    Vehicle:
    2008 DCSB DMZ LT 4x4
    Camburg | King | Glassworks | DMZ | Nitro | Banks | Pelfreybilt | Brute Force Fab | Bay Area Metal Fab | Baja Designs | Rigid Industries | STL
    And the tear down is under way...

    image.jpg

    image.jpg

    image.jpg

    image.jpg

    image.jpg
     
  10. May 5, 2015 at 6:44 PM
    #150
    VolcomTacoma

    VolcomTacoma Well-Known Member

    Joined:
    May 25, 2011
    Member:
    #57205
    Messages:
    20,617
    Gender:
    Male
    First Name:
    Jeff
    NorCal
    Vehicle:
    2015 TRD Sport 4x4 6 Speed Supercharged
    Front- Camburg 4x4 Long Travel 2.5" King Coilovers 2.5" King Triple Bypasses Wheelers Superbumps Rear- DMZ SUA 16" 3.0 King Triple Bypasses 3" 2.0 Fox bumps Wheels and Tires- 295/75/16 Toyo ATII XTREME SCS SR8 Dark Matte Bronze 16" Lighting- (2) 30" Combo light bars (4) Iggycorp diffused pods Tepui Ayer TRD Supercharger URD Mark III 3" Exhaust URD 4x4 Y Pipe URD CAI URD 2.85 Stealth Pulley Hurst Core Shifter with Hurst T URD Stage 3 clutch URD Lightweight flywheel URD Throw out bearing upgrade AEM Wideband AFR Gauge Speedhut Boost Gauge Craven Speed Flex Pod mount Weathertech Floor Liners BAMF Sliders Ultragauge sPod SE ARB CKMTA12 Hella Supertone horns Relentless Tailgate Reinforcement
    Oh snaps!!! What are you putting under there??? I'm waiting for my phone call from Tim at DMZ to finalize my order and have his kit shipped up here! :)
     
  11. May 5, 2015 at 6:44 PM
    #151
    VolcomTacoma

    VolcomTacoma Well-Known Member

    Joined:
    May 25, 2011
    Member:
    #57205
    Messages:
    20,617
    Gender:
    Male
    First Name:
    Jeff
    NorCal
    Vehicle:
    2015 TRD Sport 4x4 6 Speed Supercharged
    Front- Camburg 4x4 Long Travel 2.5" King Coilovers 2.5" King Triple Bypasses Wheelers Superbumps Rear- DMZ SUA 16" 3.0 King Triple Bypasses 3" 2.0 Fox bumps Wheels and Tires- 295/75/16 Toyo ATII XTREME SCS SR8 Dark Matte Bronze 16" Lighting- (2) 30" Combo light bars (4) Iggycorp diffused pods Tepui Ayer TRD Supercharger URD Mark III 3" Exhaust URD 4x4 Y Pipe URD CAI URD 2.85 Stealth Pulley Hurst Core Shifter with Hurst T URD Stage 3 clutch URD Lightweight flywheel URD Throw out bearing upgrade AEM Wideband AFR Gauge Speedhut Boost Gauge Craven Speed Flex Pod mount Weathertech Floor Liners BAMF Sliders Ultragauge sPod SE ARB CKMTA12 Hella Supertone horns Relentless Tailgate Reinforcement
    Nvm I see the DMZ flag in the back lol :)
     
  12. May 6, 2015 at 5:34 AM
    #152
    XPOTRON

    XPOTRON Is LIVE on the GRID.

    Joined:
    Feb 1, 2011
    Member:
    #50358
    Messages:
    6,808
    Gender:
    Male
    First Name:
    Stefen
    Chandler, Arizona
    Vehicle:
    IG: @ST3F3NS
    DUROBUMPS Use TRON10 for 10% Off & Free Shipping
    :spy: I like what I see here!
     
  13. May 6, 2015 at 8:37 PM
    #153
    NoSoup4You

    NoSoup4You [OP] Well-Known Member

    Joined:
    Jan 3, 2012
    Member:
    #69909
    Messages:
    1,240
    Gender:
    Male
    First Name:
    David
    Palos Verdes
    Vehicle:
    2008 DCSB DMZ LT 4x4
    Camburg | King | Glassworks | DMZ | Nitro | Banks | Pelfreybilt | Brute Force Fab | Bay Area Metal Fab | Baja Designs | Rigid Industries | STL
    Did you order an SUA kit? I think he mentioned waiting on some springs from Deaver. I'm getting SUA, frame boxing, motor mount gussets, and front bypasses installed. Ready for the next Mojave run!
     
  14. May 6, 2015 at 8:44 PM
    #154
    VolcomTacoma

    VolcomTacoma Well-Known Member

    Joined:
    May 25, 2011
    Member:
    #57205
    Messages:
    20,617
    Gender:
    Male
    First Name:
    Jeff
    NorCal
    Vehicle:
    2015 TRD Sport 4x4 6 Speed Supercharged
    Front- Camburg 4x4 Long Travel 2.5" King Coilovers 2.5" King Triple Bypasses Wheelers Superbumps Rear- DMZ SUA 16" 3.0 King Triple Bypasses 3" 2.0 Fox bumps Wheels and Tires- 295/75/16 Toyo ATII XTREME SCS SR8 Dark Matte Bronze 16" Lighting- (2) 30" Combo light bars (4) Iggycorp diffused pods Tepui Ayer TRD Supercharger URD Mark III 3" Exhaust URD 4x4 Y Pipe URD CAI URD 2.85 Stealth Pulley Hurst Core Shifter with Hurst T URD Stage 3 clutch URD Lightweight flywheel URD Throw out bearing upgrade AEM Wideband AFR Gauge Speedhut Boost Gauge Craven Speed Flex Pod mount Weathertech Floor Liners BAMF Sliders Ultragauge sPod SE ARB CKMTA12 Hella Supertone horns Relentless Tailgate Reinforcement
    I tried to order but he said o had to wait for those Deavers, but I'm on the list for orders to ship out when he gets them! I've got a full camburg front kit with all gussets and coilovers and bypasses. And then frame boxing plates already ready for the rear, just need his kit and some shocks, then I can move on to performance stuff. Should be picking up a new 4x4 at the end of the year!
     
  15. May 7, 2015 at 1:07 PM
    #155
    NoSoup4You

    NoSoup4You [OP] Well-Known Member

    Joined:
    Jan 3, 2012
    Member:
    #69909
    Messages:
    1,240
    Gender:
    Male
    First Name:
    David
    Palos Verdes
    Vehicle:
    2008 DCSB DMZ LT 4x4
    Camburg | King | Glassworks | DMZ | Nitro | Banks | Pelfreybilt | Brute Force Fab | Bay Area Metal Fab | Baja Designs | Rigid Industries | STL
    Performance stuff? Are you getting supercharged? Stay away from intakes unless you're getting a race can.

    I would put gears on that list ASAP. Especially since you have to pay for front and rear. Also need driveshaft work if you get a long bed. Who is doing the build?
     
  16. May 7, 2015 at 1:14 PM
    #156
    VolcomTacoma

    VolcomTacoma Well-Known Member

    Joined:
    May 25, 2011
    Member:
    #57205
    Messages:
    20,617
    Gender:
    Male
    First Name:
    Jeff
    NorCal
    Vehicle:
    2015 TRD Sport 4x4 6 Speed Supercharged
    Front- Camburg 4x4 Long Travel 2.5" King Coilovers 2.5" King Triple Bypasses Wheelers Superbumps Rear- DMZ SUA 16" 3.0 King Triple Bypasses 3" 2.0 Fox bumps Wheels and Tires- 295/75/16 Toyo ATII XTREME SCS SR8 Dark Matte Bronze 16" Lighting- (2) 30" Combo light bars (4) Iggycorp diffused pods Tepui Ayer TRD Supercharger URD Mark III 3" Exhaust URD 4x4 Y Pipe URD CAI URD 2.85 Stealth Pulley Hurst Core Shifter with Hurst T URD Stage 3 clutch URD Lightweight flywheel URD Throw out bearing upgrade AEM Wideband AFR Gauge Speedhut Boost Gauge Craven Speed Flex Pod mount Weathertech Floor Liners BAMF Sliders Ultragauge sPod SE ARB CKMTA12 Hella Supertone horns Relentless Tailgate Reinforcement
    DCSB 4x4 sport. Supercharging before pick up (hopefully). Why steer clear of intakes?

    Yea going with 4.56 from ECGS, and thinking ARB rear for now, and ARB front in the future. I don't wanna get to overconfident with dual lockers.

    I'm still looking into fab places...leaning towards Infamous Fab, they did that Solo LT build, and they put out good work.
     
  17. May 10, 2015 at 7:50 PM
    #157
    NoSoup4You

    NoSoup4You [OP] Well-Known Member

    Joined:
    Jan 3, 2012
    Member:
    #69909
    Messages:
    1,240
    Gender:
    Male
    First Name:
    David
    Palos Verdes
    Vehicle:
    2008 DCSB DMZ LT 4x4
    Camburg | King | Glassworks | DMZ | Nitro | Banks | Pelfreybilt | Brute Force Fab | Bay Area Metal Fab | Baja Designs | Rigid Industries | STL
    I've thought about getting a front locker quite a bit... I just don't want to be breaking CVs.
    All that other stuff is gooood :thumbsup:
     
  18. May 10, 2015 at 8:37 PM
    #158
    NoSoup4You

    NoSoup4You [OP] Well-Known Member

    Joined:
    Jan 3, 2012
    Member:
    #69909
    Messages:
    1,240
    Gender:
    Male
    First Name:
    David
    Palos Verdes
    Vehicle:
    2008 DCSB DMZ LT 4x4
    Camburg | King | Glassworks | DMZ | Nitro | Banks | Pelfreybilt | Brute Force Fab | Bay Area Metal Fab | Baja Designs | Rigid Industries | STL
    Tim from DMZ was kind enough to get the Glassworks bedsides fitted and removed so I could paint them while the build is still underway. This weekend I sprayed the inside of the bedsides with truck bed liner - to stengthen the fiberglass and to reduce the amount of paint chipping due to rocks being thrown inside the wheel well. I did this before painting the bedsides to ensure a clean exterior finish, free of overspray.

    Here's a quick run down of the process I used. A friend did this to the bed of his Tundra so we tackled this project together and finished in less than 2 hours.

    The tools:
    Texture spray gun ($25 from Harbor Freight)
    1-quart Rustoleum Reducer (paint thinner, $10)
    1-gallon Rustoleum truck bed coating ($60)
    1-roll brown paper ($6)
    1-roll blue painters tape ($4)

    Since the bed liner was meant to be rolled on and not sprayed, we mixed the gallon with about 3/4 quart of reducer for an easy spray. This was against the instructions on the Rustoleum bedliner and should be done at your own risk (but hey, this stuff is just heavy duty paint right?). I did this on a whim and could have found better bed liner online for cheaper, but even with the texture gun and masking materials I am all-in at $105.


    Everything....except for the compressor, which I am lucky enough to have recently inherited from my grandfather. The 33-gallon tank was keeping up nicely for an entire coat without interruption. We had the regulator set at 45 PSI and the texture gun setup with the smallest spray nozzle that came with the kit.


    I used some 100-grit sandpaper that I had to rough up the smoother areas of resin, as well as the tight corners and edges to help ensure a good bond


    The passenger bedside all prepped and ready for spray


    We sprayed in the backyard since we didn't want to bother with drop cloths, and the weather was cool with low humidity and no wind. It was nice to have a place to rest the texture gun in-between coats since the bedliner gets messy.


    Laying the first coat down. It took a while to get a nice rhythm but the bed liner is forgiving when sprayed and lays down evenly. The reducer allowed the gun to operate normally. A little less reducer would probably create a more textured finish, but would clog the gun quickly.


    One completed coat on the drivers bedside


    Finished passenger side. Two coats with some extra sprayed on damage-prone areas. We removed the masking while the second coat was still a bit tacky to ensure a clean line.


    A quick low-quality video of laying a first coat down:


    Overall the process was quick and easy. We poured a bit of reducer in the gun in-between coats to ensure the mechanism didn't seize up. Once we were done, a quick cleanup with the remaining reducer and the gun could actually be used for another job. At $25 it's not a huge cost if you have to buy one every time. Trading off between bedsides we didn't have to wait for coats to dry. After we finished spraying they were dry enough for storage within a couple hours.

    Now off to paint.... :)
     
    Last edited: May 10, 2015
  19. Jan 28, 2017 at 4:10 PM
    #159
    Taco Suave

    Taco Suave Taco Fever

    Joined:
    Aug 14, 2014
    Member:
    #136131
    Messages:
    708
    Gender:
    Male
    First Name:
    Griffin
    Oxnard
    Vehicle:
    2012 TRD Off Road
    Go fast stuff
    Nice build man! Saw you on the 91 today
     

Products Discussed in

To Top