1. Welcome to Tacoma World!

    You are currently viewing as a guest! To get full-access, you need to register for a FREE account.

    As a registered member, you’ll be able to:
    • Participate in all Tacoma discussion topics
    • Communicate privately with other Tacoma owners from around the world
    • Post your own photos in our Members Gallery
    • Access all special features of the site

OEM Inverter Install

Discussion in '2nd Gen. Tacomas (2005-2015)' started by Neveraeon, Sep 10, 2018.

  1. Feb 14, 2019 at 1:14 PM
    #21
    Neveraeon

    Neveraeon [OP] Member

    Joined:
    Mar 27, 2017
    Member:
    #214537
    Messages:
    23
    Vehicle:
    2012 Tacoma
    Hey sorry for the lack of updates. I haven't been able to work on this due to a number of things. I've been trying to collect everything I need for checking the valves and belts on my Ducati and the Tacoma has kind of taken a back seat. Once the temperature warms up, I'll be able to take the dash apart and trace the switch wires to wherever they go.

    I also smashed my towing wiring off the bumper while wheeling a while ago and moved that up beside the license plate. Cutting a hole in the bumper was a little terrifying. Also my needle bearing decided to go, so I built myself the removal tool and ordered the ECGS bushing and did that replacement.
     
    PzTank likes this.
  2. Dec 24, 2019 at 8:57 AM
    #22
    ThePanda

    ThePanda Well-Known Member

    Joined:
    Aug 29, 2019
    Member:
    #303699
    Messages:
    64
    Gender:
    Male
    First Name:
    Kaelan
    Colorado
    Vehicle:
    6-Speed Manual 2010 Magnetic Grey Tacoma SR5
    Procomp 6" Lift ARB Front Bumper Brute Force Fab's High Clearance Swing Arm Rear Bumper Relentless Fabs Bed Rack Gen 2.5 Face-Lifted Exterior and Interior (mostly) -Fleabay Headlights -Heritage Grille -Scooped Hood Alpha Rex 3rd Gen Pro-Series Taillights Joying 10.5" Android head unit URD Short Throw Shifter Advanced Fiberglass Front and 3rd Gen Rear Fenders 3rd Gen Tailgate RSG Metal-Works Sliders ARB Simpson III RTT Panels Lined w/ Closed Cell Foam (In Progess...) QTP Reverse Screamer muffler TRD CAI SPC UCAs S.S. Brake lines front and rear S.O.S. Performance rear Disk Brake conversion w/PowerStop performance calipers, rotors and pads KMC Tank 17" beadlocks wrapped in 35x12.5" KO2s Long Range Offroad Extended Range Fuel Tank ATO Dual Battery tray w/ 34D Optima Yellow tops and Blue Sea ML-ACR ClutchMasters Hydraulic Throwout Bearing
  3. Feb 29, 2020 at 1:59 PM
    #23
    Whatsthatrumble

    Whatsthatrumble New Member

    Joined:
    Feb 29, 2020
    Member:
    #320685
    Messages:
    1
    Gender:
    Male
    2011 Tacoma access cab
    Hey Everyone,

    Since it looks like the op is MIA.. I'm going to do everyone here a favor and finish this write up.

    Things you will need:
    100amp relay
    100amp breaker
    8g wire
    16g wire
    Some common sense

    After doing all the above from the OP, you now have a blue wire in the engine bay and no where to plug it into.

    You will use the 8g wire to extend this to however long you need this mount in a place of your choosing I would recommend right behind the fuse box on the driver side.

    Once you have the wiring routed. Connect it to the 100amp relay. On the other side of the relay, connect some 8g wire from the relay to the breaker, then breaker to the + on your battery. (You can also use the OEM fuse box and install the OEM 100amp fuse and wire it there instead of the breaker, but it's a pita to install and change the fuse.)

    Now you should have 2 wires left to trigger the relay. Use 16g wire and tap into the red wire on the back of the switch, you're going to have to fish this through the fire wall. The red wire is your 400w and has 12v when car is in the on position and parked. When you press the button this wire will ground out.

    Great one wire to go and your on your way to getting the inverter working. This is an easy one. You now need to find a wire that has 12v when the car is on( it's important that this wire only has current when your car is on otherwise the button will stay lit up even when the car is off, causing your battery to drain.) The blue wire behind the oem switch will provide power when button is pressed. I use this wire.

    Now you have a working OEM inverter.
    Note like factory this only works when the key is in the on position and you are in park or neutral. I believe you are always on 400w with this setup, plugged a power drill in and it worked like a charm.

    Hope this helps my fellow taco owners who are doing this upgrade.

    Note: I have a 2.7L 4 cylinder so your install may vary a bit.

    I'm almost never on this form, so if you have any questions about this install feel free to DM me on IG @touge.masters

    Always happy to help.

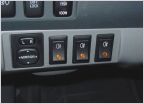
    Here's some pics.

     
    deanosaurus, jawmes and brockefellar like this.
  4. May 8, 2022 at 10:57 AM
    #24
    TimsTaco

    TimsTaco Well-Known Member

    Joined:
    Apr 4, 2014
    Member:
    #127000
    Messages:
    244
    Gender:
    Male
    First Name:
    Tim
    Moncton, NB
    Vehicle:
    07 DCLB SR5 Sandstone Metallic
    OEM Fog lights, headache rack, work lights, Tailgate Theft Deterrent (hose clamp), Tailgate Reinforcement, Roll'n'Lock tonneau cover, OEM Inverter
    For any of you that want to do what I did (go full OEM), I know I'm crazy. Figure I'd let you know where the wires go from the relay in through the firewall.
    The first picture shows the location of plug IA4 (Red circle), the blue wire goes to pin location #2 and the Instrument panel J/B (Yellow circle), they are behind the kick plate by the dead pedal.
    Tacoma IA4.jpg

    The next picture shows the back of the J/B, the red circle shows where the light green wire goes. It is visible in the image above.
    Tacoma Junction box.jpg
     
    deanosaurus likes this.

Products Discussed in

To Top