1. Welcome to Tacoma World!

    You are currently viewing as a guest! To get full-access, you need to register for a FREE account.

    As a registered member, you’ll be able to:
    • Participate in all Tacoma discussion topics
    • Communicate privately with other Tacoma owners from around the world
    • Post your own photos in our Members Gallery
    • Access all special features of the site

OffsetPlayer2's Slowly but Surely build

Discussion in '3rd Gen. Builds (2016-2023)' started by OffsetPlayer2, Dec 3, 2015.

  1. Dec 3, 2015 at 10:10 AM
    #1
    OffsetPlayer2

    OffsetPlayer2 [OP] Cornbread fed

    Joined:
    Oct 26, 2013
    Member:
    #115311
    Messages:
    1,451
    Gender:
    Male
    In the woods and fields, NC
    Vehicle:
    17 DCSB Off Road 4wd
    Weather Tech floor mats
    How she sits today as of 8/25/2016:


    Current:
    Toyota Bed Mat
    Toyota Tonneau Cover
    Step Rails
    G Tek door sill protectors
    2015 Tundra brake controller harness
    32" LED light bar
    Sumosprings
    K&N intake (ordered, delayed shipping)

    Around October of 2013, I got my first Tacoma. A 2011 DCSB OR....prerunner. At the time I didn't care if it was 2wd or 4wd. Now that I moved back to my hometown area and started getting more into the Tacoma scene, I wanted a 4wd since we do get ice and snow during the winter. The wife and I also enjoy taking trips to the mountains as well throughout the year. While the prerunner has never let me down or stuck, I did have some times where I would have rather had the 4wd.

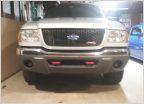
    Here is my good ol silver prerunner:


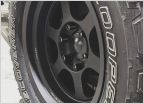
    Not much was done other than some 265/75/16 tires, step rails, bed mat, wind deflectors and dipped badges. I took the bed mat out and put it in the new one.

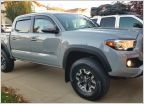
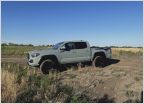
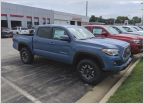
    And here is the new one that I just picked up:


    I went ahead and took off the factory air dam. I didn't drive it enough to notice if the mpg suffer any. As long as I stay around 18.5 like my '11, I'll be happy. So far I'm averaging 20 something. Not the best shots, but it'll work for now.


    I finally got my NFab style steps put on. The dealer ordered the wrong ones the first time around. I like these better than the last ones I had on. The wife will surely appreciate it now as well.


    My DSPs came in the mail, so I went ahead and put them on. I also located the install connector for the brake controller harness. Here is some shots of the DSPs.

    Front:


    Rear:


    Both:


    I had these on my '11 that were the prototypes he sent me. I had them on for over two years and they still looked brand new when I traded it in. I wanted to take them off and reuse them, but I figured the next owner would benefit from having them.


    This will be a slow and painful build, but it'll be more of a place to document everything. I live in a blue collar area so things are done a little more slowly.

    01/15/2016 4000 miles
    Greased all u-joints

    2/20/2016 5400 miles
    Rotated tires
    Topped of transmission fluid - 1.5q added

    I'll have to find the dates/miles
    TSB performed on the transmission
     
    Last edited: Aug 25, 2016
    jofish1983 likes this.
  2. Dec 3, 2015 at 10:11 AM
    #2
    OffsetPlayer2

    OffsetPlayer2 [OP] Cornbread fed

    Joined:
    Oct 26, 2013
    Member:
    #115311
    Messages:
    1,451
    Gender:
    Male
    In the woods and fields, NC
    Vehicle:
    17 DCSB Off Road 4wd
    Weather Tech floor mats
    It's been a while since I've purchased anything for the Taco lately. I stepped away from TW for a while and came back for a little while after I found out about the transmission TSB.

    I pulled the trigger on a 32" light bar, wiring harness (it was cheaper to buy a premade one versus building my own), Toyota style switch, K&N intake, and sumosprings.

    I didn't take too many pictures during the install of the light bar. Pretty much, I purchased some flat metal strips with predrilled holes in them from Lowes. I cut them to size, bent them, and used them to be drilled with tapping screws into the crash bar behind the bumper.


    Ignore the fingerprints. I had just finished up and hadn't cleaned everything back up yet.


    Sumosprings came in so they were installed today. Install only took about 30 minutes once I started doing actual work. It took longer to get all the tools I needed versus the actual work.


    To compare old - new.


    After they were installed. It lifted the rear just a tad as others have said before too. I like it like that though to give it a little bit of rake for towing.
     
    Last edited: Aug 25, 2016
  3. Dec 3, 2015 at 10:12 AM
    #3
    OffsetPlayer2

    OffsetPlayer2 [OP] Cornbread fed

    Joined:
    Oct 26, 2013
    Member:
    #115311
    Messages:
    1,451
    Gender:
    Male
    In the woods and fields, NC
    Vehicle:
    17 DCSB Off Road 4wd
    Weather Tech floor mats
    Snatching this one too just in case.
     

Products Discussed in

To Top