

-
Welcome to Tacoma World!
You are currently viewing as a guest! To get full-access, you need to register for a FREE account.
As a registered member, you’ll be able to:- Participate in all Tacoma discussion topics
- Communicate privately with other Tacoma owners from around the world
- Post your own photos in our Members Gallery
- Access all special features of the site
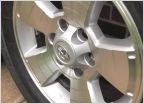 2002 wheel and tire upgrade
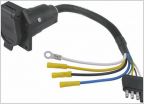 7 pin trailer wiring where to connect 95.5 truck
 Rear shock questions
 Evaporative Pressure Sensor needed
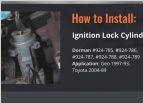 Ignition cylinder and door locks
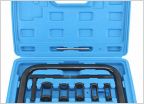 Which valve spring compressor tool?
P0442 Repair/Troubleshooting Log and Smoke Test
Discussion in '1st Gen. Tacomas (1995-2004)' started by goldentaco03, Oct 6, 2024.

