

-
Welcome to Tacoma World!
You are currently viewing as a guest! To get full-access, you need to register for a FREE account.
As a registered member, you’ll be able to:- Participate in all Tacoma discussion topics
- Communicate privately with other Tacoma owners from around the world
- Post your own photos in our Members Gallery
- Access all special features of the site
Quick Links: Suspension upgrade for loading up bed
 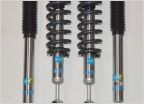 Advice please! What would you do differently first time purchasing a lift kit/suspension upgrade?
  Headlight Assembly Recs
  Differential Breather Mod for Dummies (Pics) Starting to get a vibration through the truck while accelerating
 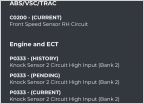 ABS light and wheel sensors help
P2440 the cheap way
Discussion in '2nd Gen. Tacomas (2005-2015)' started by Pyts, Nov 20, 2024.


