

-
Welcome to Tacoma World!
You are currently viewing as a guest! To get full-access, you need to register for a FREE account.
As a registered member, you’ll be able to:- Participate in all Tacoma discussion topics
- Communicate privately with other Tacoma owners from around the world
- Post your own photos in our Members Gallery
- Access all special features of the site
 90% off road, SR V6 double cab coming up a bit short, need to sort the setup for hard every day use.
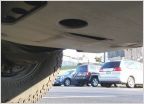 Fumoto Valve compatible with TRD PRO skid?
 Fire Extinguisher Mount?
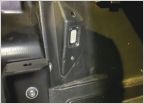 Added Tundra bed lights
 How to do a Power Steering Flush?
Passenger Door Smart Key System
Discussion in '3rd Gen. Tacomas (2016-2023)' started by Victory, Apr 22, 2018.
Page 29 of 50
Page 29 of 50
Products Discussed in


