

-
Welcome to Tacoma World!
You are currently viewing as a guest! To get full-access, you need to register for a FREE account.
As a registered member, you’ll be able to:- Participate in all Tacoma discussion topics
- Communicate privately with other Tacoma owners from around the world
- Post your own photos in our Members Gallery
- Access all special features of the site
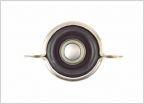 1st Gen Genuine OEM Carrier Bearing for $79
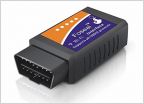 Shaky/low idle, CEL - Code P0301
 Outside air temp sensor/reader
 Steering rack bushing suggestions
 Parent's Tacoma. More aggressive tires
 5100 vs 5125 (or 5100+thread spacer)
Passenger floor board leak FIX
Discussion in '1st Gen. Tacomas (1995-2004)' started by TacosConQueso, May 15, 2016.
Page 2 of 5
Page 2 of 5


