1. Welcome to Tacoma World!

    You are currently viewing as a guest! To get full-access, you need to register for a FREE account.

    As a registered member, you’ll be able to:
    • Participate in all Tacoma discussion topics
    • Communicate privately with other Tacoma owners from around the world
    • Post your own photos in our Members Gallery
    • Access all special features of the site

Polished headlights due to fade

Discussion in 'Lighting' started by DAS Taco, Aug 15, 2020.

  1. Aug 15, 2020 at 1:51 PM
    #1
    DAS Taco

    DAS Taco [OP] Well-Known Member

    Joined:
    Mar 13, 2020
    Member:
    #322072
    Messages:
    2,215
    Gender:
    Male
    First Name:
    DAS
    Vehicle:
    2017 TRD Offroad
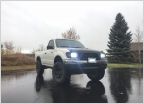
    One of other vehicles is a 2004 Honda Pilot that we bought new. I ended up buying a polishing kit from Mothers and I have to say...impressive. 20200815_133551.jpg 20200815_133456.jpg
     
  2. Aug 15, 2020 at 1:59 PM
    #2
    Tacospike

    Tacospike Semi-Unknown Custodial Member

    Joined:
    Nov 19, 2018
    Member:
    #273198
    Messages:
    14,420
    Gender:
    Male
    512
    Vehicle:
    16 Tacoma TRD Sport DCSB / 17 Tundra 5.7L 4X4 CM
    Two Trucks
    Night and Day
     
    DAS Taco[OP] likes this.
  3. Aug 15, 2020 at 2:02 PM
    #3
    IvanhoeTaco

    IvanhoeTaco Well-Known Member

    Joined:
    Aug 4, 2019
    Member:
    #301199
    Messages:
    2,890
    Gender:
    Male
    Eastern NC
    Vehicle:
    2005 Supercharged Converted Prerunner
    Total Chaos 3.5 LT, King Coilovers, 35x11.5r17 on Falcon T2, ADV 4 inch fiberglass, 4.88 gears, FJ cruiser transfer case, 4 runner front diff, Cab mount relocate, archive hangers, shackles, king 2.5x14 rear shocks, icon rxt leaf springs, king hydro bumps
    Now one without the auto filter on your phones camera! J/K ot looks like you did a good job and saved 200$ and having to take bunper off
     
  4. Aug 15, 2020 at 2:02 PM
    #4
    MagtechPA

    MagtechPA Thor

    Joined:
    May 10, 2019
    Member:
    #292870
    Messages:
    2,383
    Gender:
    Male
    Pittsburgh, PA
    Nice work! :thumbsup:
     
    DAS Taco[OP] likes this.
  5. Aug 15, 2020 at 2:11 PM
    #5
    Slick Taco

    Slick Taco Id Rather Be Airborne

    Joined:
    Aug 16, 2018
    Member:
    #263031
    Messages:
    1,776
    Gender:
    Male
    Lost somewhere in the PNW
    Vehicle:
    Current vehicles: 2019 Rav4 Lunar Rock. 2018 TRD OR DCSB KD Max tuned. 2010 Tundra Limited Crew Max . 1991 4Runner Crawler. Ivan Stewart Edition
    KD Max Tune, King 2.5 coil overs T.C. UCA's, Deaver leafs, 17x9 Black Rhyno Warlords, 33" Toyo M/T's, Metal Tech rear bumper, Westin HDX drop steps with Bullet Liner coating, K&N CAI, Baja Designs fog pods, Rigid Midnight addition 3" pod ditch lights. Cali Raised brackets and 32" behind the grill mounted light bar, Southern Style Offroad Lopro Stage II front bumper, Warn winch, FACTOR 55 Ultra Hook, FACTOR 55 Hawes Fairleed, full debadge, Cosmetic goodies such as 15% carbon tint, matte black in channel rain guards, interior LED's, Teton Workshop shift knob, Inferno vinyl detailing on the interior, Cali Raised multi rocker switch cubby insert with Mc Tuning LED switches and a few other mods I've probably left out.
    Nice work :thumbsup: As a retired auto detailer I can say headlight restorations were a descent money maker. $150 per set which usually took about an hour but considering the cost of new headlights people were more than happy to pay it.. Unfortunately any UV coating from the factory is gone from sanding and the headlight will need re-doing every year as the plastic continues to degrade. Again nice job OP now you'll be able to see down the road at night.
     
    davidstacoma and DAS Taco[OP] like this.
  6. Aug 15, 2020 at 8:51 PM
    #6
    DAS Taco

    DAS Taco [OP] Well-Known Member

    Joined:
    Mar 13, 2020
    Member:
    #322072
    Messages:
    2,215
    Gender:
    Male
    First Name:
    DAS
    Vehicle:
    2017 TRD Offroad
    Auto filter???, no such thing...it's 800,1500 then 3000 grit power polish brother!, then used Mothers plastic polish and finished the job with some car wax...tomorrow I'll do another vehicle...a Toyota Yaris 2012...:)
     
    Slick Taco and Steves104x4 like this.
  7. Aug 15, 2020 at 8:56 PM
    #7
    DAS Taco

    DAS Taco [OP] Well-Known Member

    Joined:
    Mar 13, 2020
    Member:
    #322072
    Messages:
    2,215
    Gender:
    Male
    First Name:
    DAS
    Vehicle:
    2017 TRD Offroad
    Thanks, i was meaning to do this for quite some time and to be honest I was a bit nervous...but yes it took me and my almost 9 years old son about 45 minutes per light...now I'm comfortable enough to do another one of our cars...a 2012 Toyota Yaris. I did apply two coats of car wax...I'll have problem re-waxing yearly. Thank you again.
     
    Slick Taco[QUOTED] likes this.
  8. Aug 15, 2020 at 8:58 PM
    #8
    DAS Taco

    DAS Taco [OP] Well-Known Member

    Joined:
    Mar 13, 2020
    Member:
    #322072
    Messages:
    2,215
    Gender:
    Male
    First Name:
    DAS
    Vehicle:
    2017 TRD Offroad
    If you look closely around the green masking tape you can actually see the spatter from paste when i was using a variable speed drill...you missed that!
     
  9. Aug 16, 2020 at 9:20 AM
    #9
    Sprig

    Sprig Well-Known Member

    Joined:
    Sep 28, 2017
    Member:
    #231426
    Messages:
    2,818
    Gender:
    Male
    First Name:
    Ken
    N. Calif. The Twilight Zone
    Vehicle:
    Tacoma TRD double cab 4x4, Barcelona Red
    If you want to keep them looking great use a clear headlight uv protective spray. I did my lights 3 or so years ago and apply uv protectant twice a year. They still look like new. It calls for once a year but I apply it twice a year. Easy peasy
     
  10. Aug 16, 2020 at 9:29 AM
    #10
    Marshall R

    Marshall R Well-Known Member

    Joined:
    May 28, 2015
    Member:
    #156224
    Messages:
    4,774
    Gender:
    Male
    First Name:
    Marshall
    Vehicle:
    07 White TRD double cab
    none
    I did my 07 Tacoma about 5 years ago, then again earlier this spring. While I had everything out I also did the lights on our 09 Honda Fit. I don't think either of mine turned out that well, but you have to get pretty close to see any imperfections now.
     
  11. Aug 17, 2020 at 2:23 PM
    #11
    RachaelSP

    RachaelSP Well-Known Member

    Joined:
    Feb 27, 2018
    Member:
    #245742
    Messages:
    67
    Gender:
    Female
    First Name:
    Rachael
    Florida
    Vehicle:
    2024 4Runner TRD Off-Road Premium
    This looks promising, it turned out pretty good. I'd rather not fork over the money for new headlights on a 15 year old truck, when I'm unsure of its future. I just need to get outside and use the polishing kit I bought a couple of months ago. I think its the Mothers kit.
     
  12. Aug 18, 2020 at 11:37 AM
    #12
    TacoFergie

    TacoFergie Well-Known Member

    Joined:
    Dec 21, 2015
    Member:
    #172832
    Messages:
    1,302
    Gender:
    Male
    First Name:
    Chris
    Iowa
    I understand if you are selling the vehicle doing it this way. But if the plan is to keep the vehicle for a while, why not clear coat them? Then the fix is permanent and costs about $35-$40 for materials.
     
  13. Aug 24, 2020 at 7:10 AM
    #13
    mitsch25

    mitsch25 Well-Known Member

    Joined:
    Oct 28, 2016
    Member:
    #200925
    Messages:
    80
    Gender:
    Male
    Asheville NC
    Vehicle:
    2013 Black Tacoma
    20180414_120208.jpg Headlights from my wife's Yaris I did last year and so far not much of a change. I used the Sylvania Kit from Amazon for $20. I really depends on where you live. This is the second time I did them, the first time was in Florida. Lasted perhaps 7 months or so. Now in North Carolina, we are 10 months in and still looking great.
    The lights on my Tacoma did take a serious toll in Florida and are halfway faded. Thought about getting new ones but I think I will restore them and try that headlight UV protection on it. Where can I buy that?
     
  14. Sep 14, 2020 at 10:47 AM
    #14
    Jacob

    Jacob Well-Known Member

    Joined:
    Sep 14, 2009
    Member:
    #22737
    Messages:
    69
    Gender:
    Male
    It's really amazing how well those kits work - the only downside on my first gen Taco is that the headlights still have the 3 little nubs of plastic on them that protrude out, which really tear up the buffing pads if you're not careful. However, for $17 for the kit that lasts a year or more, it's a great fix!
     
    mitsch25 likes this.
  15. Sep 15, 2020 at 8:09 AM
    #15
    TacoFergie

    TacoFergie Well-Known Member

    Joined:
    Dec 21, 2015
    Member:
    #172832
    Messages:
    1,302
    Gender:
    Male
    First Name:
    Chris
    Iowa
    So there is another way to do this..... You can sand down the nubs flush. Then.....

    This is my process when restoring headlights.
    -Remove the headlight from the vehicle. Not required, but it makes things much easier.
    -Dry sand with 340 grit sand paper using a flexible sanding pad until there is no more OEM clear coat left, you can also use a drill mounted sanding disc but make sure to be careful. You will be able to tell it is gone pretty easily. Some are more difficult to do than others though.(https://www.amazon.com/Motor-Guard-...80579&sprefix=flexible+sanding,aps,248&sr=8-5)
    -Wet sand with 340 grit. 32oz spray bottle with plain water with 1-2 drops of Dawn, more dawn is NOT better! The Dawn helps lubricate, lift debris and removes oils gently.
    -Wet sand 600 grit until you have the deep sanding marks from the 340 no longer showing.
    -Dry it off and inspect to ensure the deep marks are gone. Repeat above if needed.
    -Wet sand 800 grit with the same technique as above. Do NOT sand to 1000 grit or finer. The clear coat bonds to the surface best when sanded at 800 grit, don't worry.....it still comes out crystal clear.
    -Clean the lens with high percentage Isopropyl Alcohol or Automotive Wax and Grease remover.
    -Prep an area for spraying the clear coat. It is HIGHLY recommended you wear a MASK (respirator if you have one) and be in a VERY WELL VENTILATED space!!! This stuff is potent, it is a 2 part automotive grade clear coat.
    -Use ONLY Spraymax 2K Glamour or a 2 part clear coat from a local autobody supply store. Rustoleum 2X WILL NOT WORK, it will yellow over time. https://www.amazon.com/U-S-Chemical...words=spraymax+2k+clear&qid=1600180499&sr=8-5
    -Mix the clear per instructions, you now have 24hrs to use this can. Use the whole per pair for the best result.
    -Spray the first layer somewhat light and follow re-coat times per instructions. The first layer won't clear it up just yet, with the 2nd coat and further it will clear up perfectly!
    -Don't worry about runs or orange peel. You can use some 1500-2000 grit sand paper to wet sand the surface and then polish with a drill polisher and the polish of your choice. I prefer Meguiars M110 & M105.
    -Install your headlights and re-aim if needed.

    Why do this instead of the "kits"? Because this is a PERMANENT FIX!! Lasting longer than new OEM housings. The "kits" will buy you a year or so depending on your conditions until you have to repeat the process. Even using a high quality Ceramic Coating or UV coatings they will fade again, maybe a year, maybe 2. But it will need re-accomplished. This process sounds lengthy, but it takes less than an hour to do the sanding and prep and over night to dry. In total you will spend maybe $50 to do this, less if you already have some of the supplies.

    Here is a set I did on my in-laws G6 almost 3 years ago. The car is rarely washed, sees tons of gravel roads, interstate travel, winter road chemicals and is not garaged. The headlights are holding up great and is a testament to this process!

    Before and After
    headlight.jpg
     
    goforbroke123 and davidstacoma like this.
  16. Sep 15, 2020 at 2:04 PM
    #16
    Jacob

    Jacob Well-Known Member

    Joined:
    Sep 14, 2009
    Member:
    #22737
    Messages:
    69
    Gender:
    Male
    Thanks for the detailed write up! I'll have to give this a shot... and I'm definitely sanding those nubs off!
     
    TacoFergie likes this.
  17. Sep 16, 2020 at 9:39 AM
    #17
    Jacob

    Jacob Well-Known Member

    Joined:
    Sep 14, 2009
    Member:
    #22737
    Messages:
    69
    Gender:
    Male
    Could I use that SprayMax 2k on headlights after I've cleaned them with a 3M kit to provide longer protection?
     
  18. Sep 16, 2020 at 11:19 AM
    #18
    TacoFergie

    TacoFergie Well-Known Member

    Joined:
    Dec 21, 2015
    Member:
    #172832
    Messages:
    1,302
    Gender:
    Male
    First Name:
    Chris
    Iowa
    No, the surface needs to be sanded for proper adhesion since you cannot apply a primer. Thats why it is not recommended to sand any finer than 800 grit as you are relying on physical adhesion. Hopefully that makes sense.
     
  19. Sep 16, 2020 at 11:23 AM
    #19
    Jacob

    Jacob Well-Known Member

    Joined:
    Sep 14, 2009
    Member:
    #22737
    Messages:
    69
    Gender:
    Male
    Makes perfect sense. The 3M kit goes up to a 3200 wet sand, so adherence would be an issue.
     
  20. Sep 16, 2020 at 1:03 PM
    #20
    TacoFergie

    TacoFergie Well-Known Member

    Joined:
    Dec 21, 2015
    Member:
    #172832
    Messages:
    1,302
    Gender:
    Male
    First Name:
    Chris
    Iowa
    Thats absolutely correct. But if you can get the 3" 3M Trizac discs for a drill or polisher then those work really well. But they quite expensive so I would just stick with regular automotive grade sheets of sandpaper unless you want to make a business out of it.
     

Products Discussed in

To Top