

-
Welcome to Tacoma World!
You are currently viewing as a guest! To get full-access, you need to register for a FREE account.
As a registered member, you’ll be able to:- Participate in all Tacoma discussion topics
- Communicate privately with other Tacoma owners from around the world
- Post your own photos in our Members Gallery
- Access all special features of the site
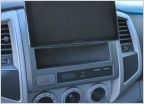 Which wiring bundles needed for new radio?
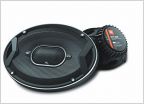 Audio upgrade help
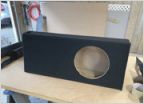 2020 Tacoma Subwoofer Install/ Enclosure DIMs
 Easy way to fish USB and microphone on Gen2 doublecab?
 How To Power Entune Outside Of Vehicle?
 Reverse Wiring Harness - Dimmer/Illumination
Pop&Lock 8520 and 8521 Guide
Discussion in 'Audio & Video' started by dk6487, Feb 25, 2010.
Page 2 of 3
Page 2 of 3


