1. Welcome to Tacoma World!

    You are currently viewing as a guest! To get full-access, you need to register for a FREE account.

    As a registered member, you’ll be able to:
    • Participate in all Tacoma discussion topics
    • Communicate privately with other Tacoma owners from around the world
    • Post your own photos in our Members Gallery
    • Access all special features of the site

Priddle's Build....pulling off Desert Sand Mica

Discussion in '2nd Gen. Builds (2005-2015)' started by Priddle, Jul 30, 2011.

  1. Sep 13, 2012 at 8:33 PM
    #21
    Jareds Toyota

    Jareds Toyota Well-Known Member

    Joined:
    Jul 23, 2011
    Member:
    #60368
    Messages:
    796
    Gender:
    Male
    First Name:
    Jared
    Washington
    Vehicle:
    2008 AC TRD Sport
    This may sound dumb to you, but I'm going to ask anyway. How do you pop your hood open with that grill??
     
  2. Sep 14, 2012 at 2:23 PM
    #22
    Priddle

    Priddle [OP] And now for something completely different....

    Joined:
    Aug 20, 2010
    Member:
    #41982
    Messages:
    417
    Gender:
    Male
    St. John's, NL Canada
    Vehicle:
    2014 Tacoma 4x4 TRD Sport DCSB
    Current: Pelfreybilt front and rear bumpers, winch, icon front coils/shocks, Icon rear shocks, Dakar leafs, Camberg UCAs, Pumpkin Android stereo, custom sub box w/ 2x10" RF subs and Kicker amp, short shifter kit, Fuel Beast 18" wheels w/ 1mm offset, BFG AT2 285/65/18
    I haul the hood lever in the cab. I go to the hood and lift up until the latch stops it and then put my finger in there and feel for the latch. I move it to the side and open the hood. That is how I did it with my stock grille too.
     
  3. Oct 13, 2012 at 3:56 AM
    #23
    GuamValor671

    GuamValor671 Well-Known Member

    Joined:
    May 28, 2012
    Member:
    #79618
    Messages:
    103
    Gender:
    Male
    First Name:
    Craig
    Las Vegas, Nevada

    What kind of paint did you use to color match the grille and clear coat it? (I hate the chrome on my dsm too)
     
  4. Nov 25, 2012 at 12:05 PM
    #24
    ChamYota

    ChamYota Crash Bandicoot Or Groot AKA Cham "Scottalot" Yota

    Joined:
    Jul 6, 2011
    Member:
    #59431
    Messages:
    12,353
    Gender:
    Male
    First Name:
    Cam
    Columbia,South Cakalacky
    Vehicle:
    05' Taco 4x4 swapped/ 2007 Toyota Land Cruiser
    H1 Morimoto projector with XB35 4300K bulbs with Mini-gatling gun shrouds, BHLM. Debadged,OEM roof rack,TW sticker,Sockmonkey Beside decals,265/70/16 Nitto terra grapplers with dick cepek DC'2 wheels,weathertech floor liners(front/back),USA Spec Ipod reader,Scanguage II,Bestop Supertopper and more in the works...
    Bump! Anything new going on my DSM brother?
     
  5. Nov 26, 2012 at 7:17 PM
    #25
    Priddle

    Priddle [OP] And now for something completely different....

    Joined:
    Aug 20, 2010
    Member:
    #41982
    Messages:
    417
    Gender:
    Male
    St. John's, NL Canada
    Vehicle:
    2014 Tacoma 4x4 TRD Sport DCSB
    Current: Pelfreybilt front and rear bumpers, winch, icon front coils/shocks, Icon rear shocks, Dakar leafs, Camberg UCAs, Pumpkin Android stereo, custom sub box w/ 2x10" RF subs and Kicker amp, short shifter kit, Fuel Beast 18" wheels w/ 1mm offset, BFG AT2 285/65/18
    @Guam - I had a backyard auto painter paint the grille for me. He used Toyota paint.

    @Cham - Since the grille, I added OEM smoked headlights. I also added foglights. The truck was pre-wired for foglights so it was not a hard install.

    The only thing I really want to do know is sell those crappy General Grabber AT2s and get BFGoodrich All Terrains...perhaps. 275 65r. The look tougher and are tougher than those P-Rated Generals. Thanks for checking in Cham!
     
  6. Nov 27, 2012 at 7:19 PM
    #26
    ChamYota

    ChamYota Crash Bandicoot Or Groot AKA Cham "Scottalot" Yota

    Joined:
    Jul 6, 2011
    Member:
    #59431
    Messages:
    12,353
    Gender:
    Male
    First Name:
    Cam
    Columbia,South Cakalacky
    Vehicle:
    05' Taco 4x4 swapped/ 2007 Toyota Land Cruiser
    H1 Morimoto projector with XB35 4300K bulbs with Mini-gatling gun shrouds, BHLM. Debadged,OEM roof rack,TW sticker,Sockmonkey Beside decals,265/70/16 Nitto terra grapplers with dick cepek DC'2 wheels,weathertech floor liners(front/back),USA Spec Ipod reader,Scanguage II,Bestop Supertopper and more in the works...
    BFG's are my favorite tire ever. They look good, preform well and they've lasted me over 35K miles so far, and they are about halfway worn so im happy about that.
     
  7. Jan 3, 2013 at 9:33 AM
    #27
    double_b

    double_b Well-Known Member

    Joined:
    Jul 14, 2010
    Member:
    #40165
    Messages:
    194
    Gender:
    Male
    Red Lion, PA
    Vehicle:
    '14 DCab Tacoma TRD Off Road
    I'm subbing to your thread because I am looking to do the thin lip Satoshi on my 2011. I didn't even think about opening the hood until it was mentioned here!!! How much of a pain is that??

    So with the 2011 grills you don't need to take inner grill apart like I see it done on older grills??

    Thanks!!
     
  8. Jan 5, 2013 at 7:34 AM
    #28
    Priddle

    Priddle [OP] And now for something completely different....

    Joined:
    Aug 20, 2010
    Member:
    #41982
    Messages:
    417
    Gender:
    Male
    St. John's, NL Canada
    Vehicle:
    2014 Tacoma 4x4 TRD Sport DCSB
    Current: Pelfreybilt front and rear bumpers, winch, icon front coils/shocks, Icon rear shocks, Dakar leafs, Camberg UCAs, Pumpkin Android stereo, custom sub box w/ 2x10" RF subs and Kicker amp, short shifter kit, Fuel Beast 18" wheels w/ 1mm offset, BFG AT2 285/65/18
    What do you mean about opening the hood? I don't have any problems. I just place my hand in between the bottom of the hood and top of the grille after I pop the lever. I flick the locking mechanism and open the hood. Nothing to it.

    I can't speak to 2011 grilles. Mine is a 2007.
     
  9. Jan 7, 2013 at 9:54 AM
    #29
    double_b

    double_b Well-Known Member

    Joined:
    Jul 14, 2010
    Member:
    #40165
    Messages:
    194
    Gender:
    Male
    Red Lion, PA
    Vehicle:
    '14 DCab Tacoma TRD Off Road
    Nevermind.......I re-read the post where someone asked about opening the hood...and your reply was you "haul" the hood lever in the cab...I think you meant you pull the hood lever. hahahha

    I was thinking you had to reach through the grill opening....but yeah, you don't.
     
  10. May 4, 2013 at 2:31 PM
    #30
    Priddle

    Priddle [OP] And now for something completely different....

    Joined:
    Aug 20, 2010
    Member:
    #41982
    Messages:
    417
    Gender:
    Male
    St. John's, NL Canada
    Vehicle:
    2014 Tacoma 4x4 TRD Sport DCSB
    Current: Pelfreybilt front and rear bumpers, winch, icon front coils/shocks, Icon rear shocks, Dakar leafs, Camberg UCAs, Pumpkin Android stereo, custom sub box w/ 2x10" RF subs and Kicker amp, short shifter kit, Fuel Beast 18" wheels w/ 1mm offset, BFG AT2 285/65/18
    Build update - 2013-05-04

    Ditched the General Grabber AT2s. I now have BF Goodrich All Terrain 285/65r18s. :bananadance:

    I already had a 1/4" spacer but was grazing the UCA on a full lock, and slightly rubbing the LCA and chassis at full lock. I didn't want to try a flex on a turn as I'd likely tear stuff up. So I got 1" spacers to replace the 1/4". Had to do quite a bit of extra trimming to get rid of the rubbing, and had to remove my front mudflaps. The tires don't stick out *too* much past the fender, a small bit I can live with.

    I may leave the center caps off and see how it looks.

    I didn't have spacers on the truck in the pic of the truck on the street.

    20130504_171439[1].jpg
    20130504_171312[1].jpg
    20130424_122121[1].jpg
     
  11. May 5, 2013 at 7:25 PM
    #31
    Stouticus

    Stouticus New Member

    Joined:
    May 5, 2013
    Member:
    #103585
    Messages:
    3
    Gender:
    Male
    First Name:
    Matt
    Vehicle:
    08 DSM 4x4
    Put up more pics of the smoked headlights?
     
  12. Aug 4, 2013 at 11:42 AM
    #32
    Priddle

    Priddle [OP] And now for something completely different....

    Joined:
    Aug 20, 2010
    Member:
    #41982
    Messages:
    417
    Gender:
    Male
    St. John's, NL Canada
    Vehicle:
    2014 Tacoma 4x4 TRD Sport DCSB
    Current: Pelfreybilt front and rear bumpers, winch, icon front coils/shocks, Icon rear shocks, Dakar leafs, Camberg UCAs, Pumpkin Android stereo, custom sub box w/ 2x10" RF subs and Kicker amp, short shifter kit, Fuel Beast 18" wheels w/ 1mm offset, BFG AT2 285/65/18
    I installed Light Racing UCAs a few days ago and got an alignment after. The stock LCA adjustment bolts were seized with rust and he couldn't move them. But he got it pretty close. My steering definitely improved. I copied my post from a LR UCA thread and pasted below:
    ------------------

    I took some pics of my LR UCA install. It was easier than I thought it be especially given the fact I didn't know how much bending would be needed on the inner fender. I bought new UCA bolts just in case that I hope I can take back. I even bought a large set of channel locks just for the job. But not much bending was required really.

    First, I did the harder side, the driver side. I removed the battery as shown:
    [​IMG]

    I had to remove that bracket to get it out of the way. Also eventually popped some clips for that wire. I just used a fork looking screwdriver. lol
    [​IMG]

    You can see the UCA bolt there prior bending
    [​IMG]

    Time to jack up the side. Here's how I did it. Floor jack under chassis, remove wheel, let LCA rest on jack stand.
    [​IMG]

    Time to bend fender
    [​IMG]

    I removed the clip that keeps that fender flap on. The end of the bolt is now exposed fully. That line you see going down is metal, but my socket wrench gets in there with little issue
    [​IMG]

    Next I removed that bracket on the UCA
    [​IMG]

    Next is to remove the tie rod bolt, I made sure the sway bar bolt was not seized. You need an allen key and a wrench to take it off. Otherwise, it just spins. The allen key is inserted in the center to keep the bolt from rotating as you remove the nut.
    [​IMG]

    Here is how I removed it:
    [​IMG]

    Now I am ready to tackle the old UCA
    [​IMG]

    I had a pitman arm puller that did the job perfectly. I forgot to secure it and when it popped, its a wonder I didn't bust that anti-lock line.
    [​IMG]

    I secured it after with a plastic tie.
    [​IMG]

    Now I can take the long bolt out. I tapped it from the other end and although it pressed against the fender, it stil came out. The large washer was getting stuck on the bolt and then bringing up on the fender which slowed me down.
    [​IMG]

    But it came out. I used a punch and a hammer on the other end to get it out most of the way.
    [​IMG]

    Time to grease the bushings. I dumped the grease from the baggie into a cup for convenience. At first I wondered if it would be enough but the fitting that goes in after pushes out excess to reuse. Read the instructions that came with it for applying grease.
    [​IMG]

    So install the UCA, I just laid the bolt inside so I could see the end under the fender and with the washer against the side of the UCA, fed the bolt though. Then tapped it further from under the hood. I managed it myself.
    [​IMG]

    I didn't tighten at this point, not until I bolted on the ball joint to the spindle.
    [​IMG]

    I think I tightened the ball joint nut to 85lbs. I reused the old bolt as that had a flange. The bolt that came with it did not and I was not fussy on using it. I then tightened the UCA bolt to 85lbs.

    Next was putting the sway bar bearing bolt back into the spindle. This was a problem as I didn't have enough muscle to push it down. No problem though. I got a ratchet strap and pulled it down that way but securing the other hook to the jack stand. It didn't take much to get the bolt in there.
    [​IMG]

    The little bolt for the line bracked cracked off in the UCA. I had to rig up something with zip ties. I didn't do that yet when I took this pic.
    [​IMG]

    So I re-attached that wire and bracket from earlier and put the battery back in. But that was the job. Repeat for the passenger side. That was easier. I learned my lesson from before and zip tied the spindle to the coil to keep it from falling over after popping the ball joint.

    The tie rod nut was seized on the passenger side which slowed me down. I applied some heat and eventually got it.

    Hope this helps other folks.
     
  13. Aug 4, 2013 at 4:06 PM
    #33
    Priddle

    Priddle [OP] And now for something completely different....

    Joined:
    Aug 20, 2010
    Member:
    #41982
    Messages:
    417
    Gender:
    Male
    St. John's, NL Canada
    Vehicle:
    2014 Tacoma 4x4 TRD Sport DCSB
    Current: Pelfreybilt front and rear bumpers, winch, icon front coils/shocks, Icon rear shocks, Dakar leafs, Camberg UCAs, Pumpkin Android stereo, custom sub box w/ 2x10" RF subs and Kicker amp, short shifter kit, Fuel Beast 18" wheels w/ 1mm offset, BFG AT2 285/65/18
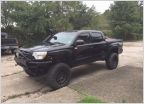
    This is not a bad pic for the Galaxy S3. I like the look of the truck in this shot. I ditched those plastic center caps. I like it now without them. I painted the rear hub to hide the rust. The BFGs definitely give it more of an aggressive look.

    20130801_154607.jpg
     

Products Discussed in

To Top