

-
Welcome to Tacoma World!
You are currently viewing as a guest! To get full-access, you need to register for a FREE account.
As a registered member, you’ll be able to:- Participate in all Tacoma discussion topics
- Communicate privately with other Tacoma owners from around the world
- Post your own photos in our Members Gallery
- Access all special features of the site
 Gen 3 rearview mirror no power to power version
 ARB Locker + ARB Compressor
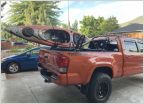 Kayak Ladder Rack with Deck railing System
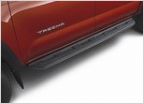 Double Cab Running Board Question
 Transmission Fluid Temperature PIDs for Torque Pro and NOW APPLE!
Rago Rear Window Molle Panel
Discussion in '3rd Gen. Tacomas (2016-2023)' started by Nomad13, Nov 16, 2024.


