

-
Welcome to Tacoma World!
You are currently viewing as a guest! To get full-access, you need to register for a FREE account.
As a registered member, you’ll be able to:- Participate in all Tacoma discussion topics
- Communicate privately with other Tacoma owners from around the world
- Post your own photos in our Members Gallery
- Access all special features of the site
 Toyota Super White paint
 Opticoat AND Solar guard?
 Small tint job, seeking advice
 What soap do you use?
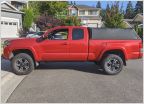 Short Mud Flaps
 Using an in cab push button switch to kill power to a Smittybilt winch.
Realistic bilstein lift install time
Discussion in '3rd Gen. Tacomas (2016-2023)' started by xxtavixx, May 12, 2019.
Page 1 of 3
Page 1 of 3

