1. Welcome to Tacoma World!

    You are currently viewing as a guest! To get full-access, you need to register for a FREE account.

    As a registered member, you’ll be able to:
    • Participate in all Tacoma discussion topics
    • Communicate privately with other Tacoma owners from around the world
    • Post your own photos in our Members Gallery
    • Access all special features of the site
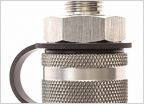
Rear cubby power door (pic heavy)

Discussion in '3rd Gen. Tacomas (2016-2023)' started by BirfMark, May 6, 2022.

  1. May 6, 2022 at 5:41 AM
    #1
    BirfMark

    BirfMark [OP] Member

    Joined:
    Nov 5, 2020
    Member:
    #345915
    Messages:
    19
    Gender:
    Male
    First Name:
    Mark
    Vehicle:
    2019 Tacoma TRD Pro
    I was getting ready to install a fridge, and instead of drilling holes in a my stock little cubby door (which is $52 to replace), I decided to see if I could 3D model a new one with the holes I was wanting, and then 3D print the result on my printer.

    Here was my design:
    [​IMG]
    (front, or bed facing)

    [​IMG]
    (rear, hidden)

    I printed this out of Carbon Fiber PLA, which while isn't ideal because of the temperatures back there, it has been working well so far, even in the Texas heat with a Softopper on.
    [​IMG]

    The catch mechanism for the door is retained in my design, and reuses the stock knob & catch parts. They come apart with a simple Phillips screw.
    [​IMG]

    Test fitting everything in the stock location:
    [​IMG]

    In the upper right of my panel, I installed a simple illuminated power switch. This switch is flush mounted so that things in the bed don't catch on it & possibly break it. The switch triggers a fused relay to power the three outlets.
    [​IMG]

    The three outlets I have are two 12v receptacles (on the left and right) and a USB3.0 quick charge outlet in the center:
    [​IMG]

    I'm happy with the design - I do need to change the 12v receptacles out for some true locking style Marinco pieces, as these ones don't hold the plug on my fridge very well at all.

    If anyone is interested, I've put the design & print files up on Thangs.

    I didn't get any pictures of the wiring I did, but I'm running a fused 10ga from my house battery back to a BlueSea 6blade fuse block with negative bus & cover. From there, I'm able to split things out as needed, with additional space for future needs. Using the two drain holes at the back of the cubby let me run the 10ga up into the box just perfectly, and the fuse box sits on the back wall like it was meant to be there. While not the cleanest wiring setup, I will try to get some pictures this weekend.
     
  2. May 6, 2022 at 5:42 AM
    #2
    six5crèéd

    six5crèéd Be the light

    Joined:
    Jul 9, 2019
    Member:
    #298734
    Messages:
    35,917
    Gender:
    Male
    First Name:
    Bruce, or Crèéd, neither is correct.
    Southern Virginia
    Vehicle:
    8 lugs no plugs
    Looks great, awesome job :101010:
     
    RustyGreen and Speedfreak like this.
  3. May 6, 2022 at 5:56 AM
    #3
    Speedfreak

    Speedfreak Member in poor standing

    Joined:
    Sep 22, 2017
    Member:
    #230756
    Messages:
    4,934
    First Name:
    Dave
    Canada Eh!
    Vehicle:
    2017 Tacoma TRD Sport DCSB 6MT, Blazing Blue Pearl
    Manual Mall Crawler
    Nice work :thumbsup:
     
    RustyGreen and six5crèéd like this.

Products Discussed in

To Top