

-
Welcome to Tacoma World!
You are currently viewing as a guest! To get full-access, you need to register for a FREE account.
As a registered member, you’ll be able to:- Participate in all Tacoma discussion topics
- Communicate privately with other Tacoma owners from around the world
- Post your own photos in our Members Gallery
- Access all special features of the site
 Trans cooler.....before or after radiator cooler
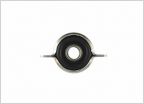 Driveshaft Center Support Bearing lifespan???
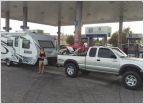 Suspension set up - Towing
 Need some parts numbers for U-Joints
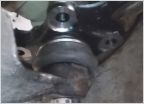 OEM Ball Joint doesnt fit right - Gurus Needed
 Resistance shifting into 3rd & 4th gear
Rear Seat Delete V2 - Electrical & Storage Solution
Discussion in '1st Gen. Tacomas (1995-2004)' started by SpokeWench, Sep 11, 2022.
Page 1 of 2
Page 1 of 2


