

-
Welcome to Tacoma World!
You are currently viewing as a guest! To get full-access, you need to register for a FREE account.
As a registered member, you’ll be able to:- Participate in all Tacoma discussion topics
- Communicate privately with other Tacoma owners from around the world
- Post your own photos in our Members Gallery
- Access all special features of the site
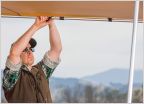 ARB 2000 Awning
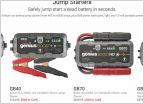 **CLOSED**NoCO Battery Jump starters Group buy 3.0**
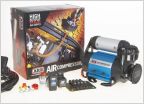 **CLOSED**ARB Compressors - Group Buy
 Gears and Lockers??
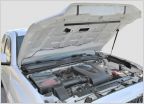 Spiker Engineering 15% off July 4th Group Buy - now through July 6th!
 **CLOSED**Magnaflow - Group Buy**
**** CLOSED **** Redline Tuning 20% off Hood QuickLIFT systems Group Buy! Ends May 31th!
Discussion in 'Automotive Group Buys' started by RedlineTuning, May 14, 2018.
Page 6 of 12
Page 6 of 12


