

-
Welcome to Tacoma World!
You are currently viewing as a guest! To get full-access, you need to register for a FREE account.
As a registered member, you’ll be able to:- Participate in all Tacoma discussion topics
- Communicate privately with other Tacoma owners from around the world
- Post your own photos in our Members Gallery
- Access all special features of the site
 SOLD
SOLD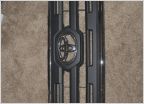 WTS: 2016 SR5 grill and bezel
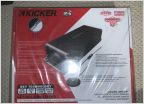 Kicker Key 180.4 amp with metro harnesses
 K&N Perfomance air intake
 Raptor Light Bezels for 20-21 Tacos only!
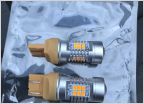 JDM ASTAR led front turn signal lightbulbs
Remote Start Kit for 2016 - 2017 Tacoma's IN STOCK
Discussion in '3rd Gen Tacoma Parts Marketplace (2016-2023)' started by KB Voodoo, Dec 8, 2016.
Page 10 of 25
Page 10 of 25


