

-
Welcome to Tacoma World!
You are currently viewing as a guest! To get full-access, you need to register for a FREE account.
As a registered member, you’ll be able to:- Participate in all Tacoma discussion topics
- Communicate privately with other Tacoma owners from around the world
- Post your own photos in our Members Gallery
- Access all special features of the site
 Remove 2012 Tacoma climate control panel
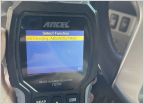 Bleeding the ABS/VSC system
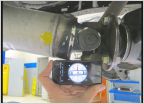 Vibes after Dakar install - replace 885 coils with 887?
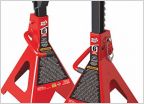 Jack Stand Height
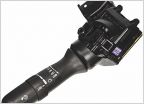 Wiper switch question
 Help with wheel bearing!
Removing cigarette lighter sockets, 2006 Tacoma
Discussion in '2nd Gen. Tacomas (2005-2015)' started by Wcd7109, Mar 24, 2022.
Page 2 of 3
Page 2 of 3


