1. Welcome to Tacoma World!

    You are currently viewing as a guest! To get full-access, you need to register for a FREE account.

    As a registered member, you’ll be able to:
    • Participate in all Tacoma discussion topics
    • Communicate privately with other Tacoma owners from around the world
    • Post your own photos in our Members Gallery
    • Access all special features of the site

Replacing front wheel hub

Discussion in '2nd Gen. Tacomas (2005-2015)' started by ekoziko, Oct 4, 2017.

  1. Oct 4, 2017 at 9:52 PM
    #1
    ekoziko

    ekoziko [OP] Member

    Joined:
    Jul 28, 2016
    Member:
    #193119
    Messages:
    9
    Gender:
    Male
    First Name:
    Eric
    Vehicle:
    most part stock 06 TRD sport double cab with long bed
    I was googling a few things on how to replace my front wheel hub on my 2006 Tacoma 4x4 Trd Sport and surprisingly found very few write ups on how to replace the hub assembly. Here’s a quick overview of what I did-

    1.Removed Wheel
    2. Removed Caliper (2 bolts on the back) and undo the brake line bracket to minimize bending of the line
    3. Remove the rotor
    4. Remove the axle dust cover (this one is a bit of a pain, take a skinny flat screwdriver and try to pry it off right at the seam. Don’t be afraid to use a hammer to help)
    5. Remove the axle but by first undoing the cotter pin, crown nut, then using a 35mm socket, remove the axle nut.
    6. Remove the 4 bolts that mount the hub assembly. You will have to partially undo those bolts then shimmy out the assembly a little bit, then undo some more of the nuts, and then shimmy the assembly some more (a bit tedious). If the assembly is really on there use wd-40 and hammer around from the back to loosen it up.
    7. Then just slide off the old assembly (take caution as the dust “pan” will come off with it)
    8. With a rag and we-40 clean any debris or dirt on the axle
    9. Align the dust pan back to the holes and slide the new hub assembly back on.
    10. Align bolts and torque down to specifications or till very tight.
    11. Screw on the axle nut and torque to 176 ft/lbs (If I remeber correctly), slide on castle nut, and replace cotter pin.
    12. Clean and reattach the axle dust cover using a hammer
    13. Slide on disk brake
    14. Reattach caliper
    15.Put wheel back on

    Tools I used-
    Impact wrench
    Hammer
    Flat end screwdriver
    Needle nose pliers
    35mm axle socket
    Metric socket assortment
    Metric wrench assortment

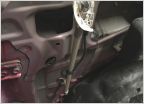
    C53E3B8F-0C5E-4C27-B457-A376809C1E3E.jpg
    56A2CD31-A6B0-4240-B832-EEA91C5D9582.jpg
    91349181-2599-4877-9C46-883D36A7E455.jpg
    71AE2F23-8791-4DA0-AB24-11B4D81C7B55.jpg
     
    Last edited: Oct 5, 2017
    r3c0il, Drainbung and JoefromPTC like this.
  2. Oct 5, 2017 at 8:18 AM
    #2
    Whitetrash

    Whitetrash Well-Known Member

    Joined:
    Oct 9, 2014
    Member:
    #140007
    Messages:
    234
    Gender:
    Male
    First Name:
    Jimmy
    San Diego CA and Enon OH
    Vehicle:
    2008 Prerunner Regular Cab SR5
    Wheeler's AAL, 5100s at 1.75, 265/75r16
    nice! good job :)
     
  3. Oct 5, 2017 at 10:40 AM
    #3
    Armkb

    Armkb Well-Known Member

    Joined:
    Nov 15, 2008
    Member:
    #10781
    Messages:
    373
    Gender:
    Male
    Hudson Valley, New York
    Vehicle:
    09 TRD Sport DCLB
    Bilstein 5100, OME 885X, LR UCA, ARB/EL095R, ES LCA Rack & Sway Bar Bushings, Yellow Wire Mod, ABS Switch, TPMS Mod, Scanguage, Toyota Bed Mat, WeatherTech Floor Liners, Extang Trifecta Cover, Fumoto Drain Valve
    Did you not disconnect the brake line bracket from the spindle? Looks as though you just disconnected the caliper and bent the solid brake line to remove the caliper. If so...not the way to do it!!!
     
  4. Oct 5, 2017 at 10:50 AM
    #4
    knottyrope

    knottyrope Well-Known Member

    Joined:
    Apr 13, 2017
    Member:
    #216122
    Messages:
    2,276
    Gender:
    Female
    First Name:
    Knotty
    Bahstun
    Vehicle:
    09 Taco CCLB 4x4 SR5 4.0
    Pads, rotors, ujoints, 5900K Super White Xenon HID Halogen Bulb Fog Light
    nice write up
     
  5. Oct 5, 2017 at 2:23 PM
    #5
    ekoziko

    ekoziko [OP] Member

    Joined:
    Jul 28, 2016
    Member:
    #193119
    Messages:
    9
    Gender:
    Male
    First Name:
    Eric
    Vehicle:
    most part stock 06 TRD sport double cab with long bed
    @Armkb totally slipped my mind to disconnect the bracket, I’ve done it before. I guess I had tunnel vision and was focused on not screwing up the hub that I forgot the basic things! Thanks for pointing it out.
     
  6. Oct 5, 2017 at 2:24 PM
    #6
    ekoziko

    ekoziko [OP] Member

    Joined:
    Jul 28, 2016
    Member:
    #193119
    Messages:
    9
    Gender:
    Male
    First Name:
    Eric
    Vehicle:
    most part stock 06 TRD sport double cab with long bed
    Thanks guys, hope it helps
     

Products Discussed in

To Top