

-
Welcome to Tacoma World!
You are currently viewing as a guest! To get full-access, you need to register for a FREE account.
As a registered member, you’ll be able to:- Participate in all Tacoma discussion topics
- Communicate privately with other Tacoma owners from around the world
- Post your own photos in our Members Gallery
- Access all special features of the site
 Where are you guys buying your OEM Rims
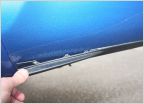 Tacoma Body Molding attachment
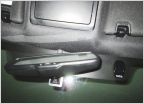 Need a 12V source for radar detector in rearview mirror area.
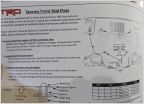 TRD Pro Skid Plate HW
 Clean CB installs?
 3rd Gen MT Drain Plug
Rigid Ignite LED pod rear factory Bumper install
Discussion in '3rd Gen. Tacomas (2016-2023)' started by GPsevinSixx, May 26, 2017.
Page 1 of 4
Page 1 of 4


