1. Welcome to Tacoma World!

    You are currently viewing as a guest! To get full-access, you need to register for a FREE account.

    As a registered member, you’ll be able to:
    • Participate in all Tacoma discussion topics
    • Communicate privately with other Tacoma owners from around the world
    • Post your own photos in our Members Gallery
    • Access all special features of the site

Rocky: An Overland Taco Build

Discussion in '3rd Gen. Builds (2016-2023)' started by andweb, Apr 7, 2020.

  1. Apr 7, 2020 at 7:24 PM
    #1
    andweb

    andweb [OP] Member

    Joined:
    Mar 27, 2020
    Member:
    #323161
    Messages:
    17
    Gender:
    Male
    First Name:
    Andy
    Leadville, CO
    Vehicle:
    2019 Cement Tacoma DCSB TRD Off-Road
    Overland Built and Outfitted. SEE BUILD PAGE
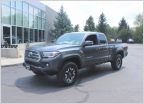
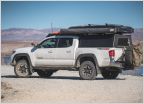
    Rocky The SwissArmyTaco
    2019 DCSB TRD OR Cement Grey

    [​IMG]
    I have many plans for this build and this is just the beginning. It will be a long process, but I will update this thread as I add on and modify. The end goal is to have built the ultimate overland rig for my families needs. I will be using this as my daily driver up in the Colorado mountains, but during our many overland adventures, Rocky will need to fit me(Andy), my wife(Lauren), our two dogs(Nova & Lola), and all our gear comfortably. We are off-roaders, snowboarders, skateboarders, wakeboarders, rock climbers, SUPers, fishers, hunters, bikers, and hikers. For short, we like to just say Adventurists. All that to say this build needs to be light and capable enough to get us way off the beaten path while at the same time serve as base camp and be able to carry our RTT, kitchen, and all the adventure gear. I hope you enjoy this build thread and can help me along my way!

    Here is an index for my build thread. Click the mod and it will take you to the location in the thread!

    Interior

    Center Console & Glove Box Organizers
    Rear Seat Delete w/ Custom Gear/Dog Platform
    Dometic CFX-50
    Bestek 1000W Power Inverter
    Bushwacker Rear Door Protectors

    Raingler Front Seat Barrier Net & Ceiling Attic Net
    Anytime Cameras Front & Rear
    Cali Raised OEM Switch Panel & CH4x4 OEM Style Switches
    Expedition Essentials 3TPAM
    iOtti Phone Mount/Charger
    Midland MXT275 GMRS Radio
    RAM Mounts EX Roller iPad Pro Mount
    Custom Delorme Inreach Ram Mount
    Rago Fab Center Console Molle Panels
    Mounted Smith & Wesson M&P Officer Fixed Knife
    Mounted Smith & Wesson M&P Officer RXP Flashlight
    Desert Does It Front and Rear Seat Jackers

    Exterior
    MAX Modular Aluminum 14" Bed Rack
    MAX Modular Traction Board Brackets and Maxsa Traction Boards
    TuffStuff Alpha II Roof Top Tent
    AVS Ventshades and Bugflector

    Truck Bed Interior Buildout

    Mountain Hatch
    Truck Bed Seal
    Custom Kitchen Slide
    Custom Gear Slide
    CaliRaisedLed Bed Channel Stiffeners

    Power
    Genesis Off Road Dual Battery Tray
    Optima group 34D Red Top
    Optima group 34D Yellow Top
    Powertrays Auxiliary Power Bracket
    BP Automotive Waterproof Off Road Fuse and Relay Power Distribution Center
    Truck Bed Cubby Power Distribution Center
    RTT Power
    Cascadia 4x4 Hood Mounted Solar Panel
    Redarc BCDC1225D

    Performance
    Roar Pedal

    Just For Looks

    TRD Off Road Hood Decal
    TRD Pro Grill
    Window Tint
    Tailgate Raptor Decal
    Interior Blackout Chrome Delete
    Debadging and TRD OR Emblem

    Armor
    RCI Offroad Rock Sliders

    Lighting

    ExtremeLED 44” X6S Slim Amber/White Light Bar
    ExtremeLED Rock Lights
    ExtremeLED Side Shooter LED Pods(Ditch Lights)
    CaliRaised LED Ditch Light Mounting Brackets
    ExtremeLED Scene Lights
    Under Hood Lights
    Cargo Lights
    Raptor Lights
    Truck Bed Lighting
    Meso Customs x Morimoto Ultimate Tail Lights
    Smoked Sequential Mirror Turn Signals

    Suspension

    Drivetrain

    Wheels & Tires

    17" Toyota 4Runner TRD Pro Wheels
    265/70/R17 Falken Wildpeak AT3s
     
    Last edited: Mar 26, 2022
    HickOnACrick, Amchuge and SoCal_Erik like this.
  2. Apr 7, 2020 at 7:25 PM
    #2
    SoCal_Erik

    SoCal_Erik Tiki Taka, Tika Taka

    Joined:
    Nov 11, 2015
    Member:
    #169295
    Messages:
    1,555
    Vehicle:
    ‘16 SR5 DCSB, ‘15 SR5 DCSB (sold), ‘16 4Runner SR5, ‘15 OR DCSB (sold), ‘05 SC (sold)
    Awesome build. Looking forward to more of your posts.

    Edit: post more pictures!!!
     
  3. Apr 7, 2020 at 8:45 PM
    #3
    andweb

    andweb [OP] Member

    Joined:
    Mar 27, 2020
    Member:
    #323161
    Messages:
    17
    Gender:
    Male
    First Name:
    Andy
    Leadville, CO
    Vehicle:
    2019 Cement Tacoma DCSB TRD Off-Road
    Overland Built and Outfitted. SEE BUILD PAGE
    So the first thing I decided to do when I bought Rocky was rip out the nice brand new leather rear seats. My two dogs ride in the back seat area a lot in the summer and I did not want them scratching/ripping into the leather. Plus I wanted a solid place inside the cab to mount our Dometic CFX-50 fridge/freezer so it made sense to pull out the seats and replace it with a solid platform. At first I wanted to but the goose gear 100% rear seat delete but after pricing it out to be about $1,000 just to put a platform into the rear of the cab I just couldn't justify it. So I decided since I have all this time that I am required to spend at home, I might as well buy what I need and build it. So I did.

    I designed a 1 piece system modeled after the goose gear platform I was previously considering buying. It needed to be thick enough to support the firdge and the dogs, but not so thick that it weights a ton. I wanted to still be able to access the under seat storage as well as the floor board easier than just side access. I also wanted it to be coated with a surface that my dogs could grip and not slip and slide around on. I wanted it to be water resistant and rattle proof. I wanted to be able to install and remove it easily as the dogs spend most of the time in the backseat in the summer, but I need to put the rear seats back in each winter to transport athletes I coach daily. I also wanted to remove the 40% plastic panel behind the seat to create more room for the fridge, and build a back panel that I could mount my 1000W inverter to. Its a perfect spot as I can run an extension cord out the back window at night and into the tent to charge phones, cameras, etc. Lastly, I wanted it to look as "OEM" as possible. Meaning, I wanted it to fit flush, match in color and style, install easily and securely, and use original bolt holes only.

    Below is the final product:

    [​IMG]
    Here is the full view of the end result. I chose 1/8" thick closed cell neoprene foam with adhesive on one side to cover the deck with. In hindsight, I would have chose a different material as this material is water resistant, sound deadening, and allows the dogs to grip but the dogs do put tiny holes in it everywhere. For the time being I have ordered a dog bed large enough to cover the whole area, but when I take the deck out in the winter I will try to find a more rubbery material to recover it with. Underneath the neoprene foam I painted the whole thing black and coated it with high gloss polyurethane to create a surface that would really allow the adhesive to stick to. Not sure how easy that will be to remove :notsure:. Also, one thing to note is I did have to cut a large radius in the deck where it meets the speakers on the doors as the speaker covers have a slight curve and were originally squeezing the deck on either side when the doors were closed. I also had to notch the area behind the center console for install.
    [​IMG]
    This is the rear bolt hole location. I drilled this hole to match with the closest seat mount bolt hole on both sides in the rear. I had to put 1" of wood underneath the 1/2" plywood to make it sit level with where the bottom of the plywood hits the middle bolt hole location on top rim of the rear seat storage compartment. Can't remember exactly what size the bolts are that I bought to fit the factory mount holes, but they were easy to match with the factory bolt. Stoked on how flush this ended up fitting... made the template by cutting cardboard and it all turned out to fit really nicely.
    [​IMG]
    Middle bolt hole location. You can see the marks the dogs claws are making in the foam. Not bad, but will need replacement by the end of summer.
    [​IMG]
    Under Seat Storage access lid and flush mount latch.
    [​IMG]
    Underseat storage lid opened. This is where I am currently storing all my recovery/emergency gear because it all fits perfectly. I have factory bottle jack and tools, shop towels, spotlight, flares, tire repair kit, nocco jumper battery, jumper cables, tow strap, first aid kit, flares, and a large knife.
    [​IMG]
    The floor board access allows you to reach passenger center and driver floor space all from the passenger side.
    [​IMG]
    The Dometic CFX-50 Mounts perfectly behind the driver seat with a little extra room to spare. I just mounted it by installing a d-ring on the floor towards the front and using the factory loop on the rear wall through the back panel to strap it down with black nrs straps.
    [​IMG]
    Here is the back panel with the bestek 1000W inverter mounted. Let me know if you all have ideas on how to use this wasted space... im not a fan of wasted space haha.
    [​IMG][​IMG]
    As a side note... I found Bushwacker Door Protectors these on Amazon for $25 and installed them to protect the door from the wrath of my dogs claws. Stoked on these because i can roll the windows up and down without these falling out, and the material is made out of a canvas feeling material so I am confident they will protect my doors. And they fit the shape of the doors really well for being universal.
     
    Last edited: Apr 7, 2020
    YOTA 4X4, ToroTaco and BlessThisMess like this.
  4. Apr 7, 2020 at 8:49 PM
    #4
    andweb

    andweb [OP] Member

    Joined:
    Mar 27, 2020
    Member:
    #323161
    Messages:
    17
    Gender:
    Male
    First Name:
    Andy
    Leadville, CO
    Vehicle:
    2019 Cement Tacoma DCSB TRD Off-Road
    Overland Built and Outfitted. SEE BUILD PAGE
    Thanks! Ill keep it updated as parts come in! I just posted the rear seat delete and custom deck build and ill post the rock light install soon!
     
  5. Apr 11, 2020 at 11:39 AM
    #5
    wapitiwagon

    wapitiwagon Member

    Joined:
    Apr 11, 2020
    Member:
    #324382
    Messages:
    8
    Gender:
    Male
    Bozeman, MT
    Vehicle:
    2019 TRD Off Road DCLB
    Looks stellar! Using this as beta. Do you know what d-rings those are? I'd like to use those same ones.
     
  6. Apr 11, 2020 at 12:23 PM
    #6
    andweb

    andweb [OP] Member

    Joined:
    Mar 27, 2020
    Member:
    #323161
    Messages:
    17
    Gender:
    Male
    First Name:
    Andy
    Leadville, CO
    Vehicle:
    2019 Cement Tacoma DCSB TRD Off-Road
    Overland Built and Outfitted. SEE BUILD PAGE
    Thank you! And yes, I got them here:

    https://www.amazon.com/gp/product/B01DEFD3N8/ref=ppx_yo_dt_b_asin_title_o07_s00?ie=UTF8&psc=1

    Let me know if you need any more info :hattip:
     
  7. Apr 11, 2020 at 12:36 PM
    #7
    wapitiwagon

    wapitiwagon Member

    Joined:
    Apr 11, 2020
    Member:
    #324382
    Messages:
    8
    Gender:
    Male
    Bozeman, MT
    Vehicle:
    2019 TRD Off Road DCLB
    Should have clarified -- What about those flush mount d-rings that you have on the platform?
     
  8. Apr 11, 2020 at 5:35 PM
    #8
    andweb

    andweb [OP] Member

    Joined:
    Mar 27, 2020
    Member:
    #323161
    Messages:
    17
    Gender:
    Male
    First Name:
    Andy
    Leadville, CO
    Vehicle:
    2019 Cement Tacoma DCSB TRD Off-Road
    Overland Built and Outfitted. SEE BUILD PAGE
    OOOOOh sorry. I thought you meant the d-rings that I used to anchor the fridge. I was wondering how you saw those in the pictures. The flush mount latches I also found on Amazon. Amazon for the win!

    https://www.amazon.com/gp/product/B016QTS0QO/ref=ppx_yo_dt_b_asin_title_o08_s00?ie=UTF8&psc=1

    Hope that helps!
     
  9. Apr 13, 2020 at 10:32 AM
    #9
    mountainqueen666

    mountainqueen666 Member

    Joined:
    May 13, 2018
    Member:
    #253400
    Messages:
    17
    Gender:
    Female
    First Name:
    Amber
    utah
    Vehicle:
    2017 Tacoma Off Road
    I am definitely into the rear seat delete and this is an awesome solution! do the dometics have to be inside for any reason or are they weather proof?
     
  10. Apr 13, 2020 at 6:35 PM
    #10
    andweb

    andweb [OP] Member

    Joined:
    Mar 27, 2020
    Member:
    #323161
    Messages:
    17
    Gender:
    Male
    First Name:
    Andy
    Leadville, CO
    Vehicle:
    2019 Cement Tacoma DCSB TRD Off-Road
    Overland Built and Outfitted. SEE BUILD PAGE
    Thank you! And the Dometic CFX 50 is weatherproof so I could mount it in the bed if I wanted to. We only really use the backseat for our dogs, so since there is plenty room back there I just put the fridge inside to leave room for more gear in the bed. And it keeps the fridge nice and clean and allows for cold snack and drink access without having to stop and get in the trunk :taco:
     
  11. Mar 13, 2021 at 9:43 PM
    #11
    andweb

    andweb [OP] Member

    Joined:
    Mar 27, 2020
    Member:
    #323161
    Messages:
    17
    Gender:
    Male
    First Name:
    Andy
    Leadville, CO
    Vehicle:
    2019 Cement Tacoma DCSB TRD Off-Road
    Overland Built and Outfitted. SEE BUILD PAGE
    I had a pretty great start on here with the rear seat delete and custom platform, and then I dropped off the face of the earth lol. Honestly just got too busy having fun in and building out the rig that I forgot to document it. Its something I would still really like to do, so I'm going to do my best to catch up on what I have missed up to this point. So the next several posts I am going to make are from months after the actual install. Rocky has seen a lot of changes and upgrades so check them out. Ill try my best to do them somewhat in the order that I actually installed them.
    :cheers:
     
    Last edited: Mar 13, 2021
    omegaman2 likes this.
  12. Mar 14, 2021 at 12:33 AM
    #12
    andweb

    andweb [OP] Member

    Joined:
    Mar 27, 2020
    Member:
    #323161
    Messages:
    17
    Gender:
    Male
    First Name:
    Andy
    Leadville, CO
    Vehicle:
    2019 Cement Tacoma DCSB TRD Off-Road
    Overland Built and Outfitted. SEE BUILD PAGE
    Ill start with some of the first "mods" I did for interior organization... more like additions than mods. But the first three are cheap and easy must haves. I bought these center console and glove box organizers off of Amazon for under $40 and they are organization game changers!

    Center Console Storage Tray
    [​IMG]
    I tend to keep the stuff I like to have quick access to up top

    Center Console Dividers
    [​IMG]
    In the dividers I have an emergency toiletry kit (aka toothbrush, toothpaste, deodorant, and lotion), tums & ibuprofen, air down tools & tape measure, spare dog leash, usb power banks, lightning, microusb, and usbc charging cables and a wall charging cube.

    Glove Box Organizer
    [​IMG]
    In the glove i keep some emergency cleaning stuff, my maintenance guide, lug nut lock, a bunch of napkins, my lightbar headlamp, and a tazer lol. You never know...

    On the more expensive side, I installed a cargo net attic and divider net over my rear seat and between the front and rear to act as a cage to keep the dogs in the back, as well as give me space to stuff light soft things up top like jackets, pillows, blankets, etc. I can also mount molle style bags to the cargo net as well for more organization. I plan to get some molle bags and mount them to the barrier to store the dog food and supplies in. This is also where I will mount my first aid kit down the road as well. I bought this set of cargo nets from Raingler and i will say that they were way on the expensive side. Mine were very standard and still ran me $400 something dollars shipped. However, they are very high quality nets. The hardware they send is a different story too. Beware.
    [​IMG]

    So far one of my favorite interior organization mods has been these from . I love them. They fit the shapes of the interior unlike the other brands out there, they are sturdy AF, they look pretty bad ass too, and man they are handy for storing things at your fingertips. I did change up the mounting design a bit though and decided to mount these using nutserts for quick removal to add or remove tools.
    [​IMG]
    On the Driver side I have mounted my M&P Officer Fixed Blade, my M&P Officer RXP Flashlight, and my Roar Pedal. I chose the Officer fixed blade because of its sturdy construction with a convenient windshield breaker on the bottom of the grip. The Officer RXP Flashlight is awesome because it comes with a charging mount so I just mounted it to the molle panel with some hardware I had laying around and ran the charging wire to my custom hidden dual USB charger. Now I will never go to grab my flashlight only to find out it is dead or out of batteries. I'd like to eventually mount a multitool to this panel as well, but that can wait for now.

    [​IMG]
    I currently only have two Midland FRS radios clipped to this panel, but I'm keeping this space free for future toys. Looking into getting my HAM or GMRS license and mounting either a Midland GMRS radio here, or a BAOFENG UV-5R. I like the baofeng because its small. There is a guy on etsy that makes some rad molle or ram mountable charging mounts for them and i can access HAM and GMRS channels on them. And they are CHEAP. Thoughts???

    Now, I mentioned a custom hidden dual USB charger earlier and this is probably a good spot to talk about that. I basically needed a way to charge accessories mounted to the center console molle panels like my flashlight and eventually most likely a Baofeng UV-5R, but I didn't want usb cables running all over the place on top of my center console. So behind/below the dash on the driver side I found a nice flat spot to mount a dual usb charger using some gorilla glue double sided tape. This way I can run the usb charging cables behind the molle panels, under the plastic of the center console and all the way back to my hidden usb charger without being seen for a clean & seamless look.
    [​IMG][​IMG]
    This USB charging port (that i found on Amazon for $12) is really awesome for situations that you want to have usb charging capabilities, but you don't have room to drill a hole for a standard 12v usb style charger. It also mounts really nicely with just some double sided tape so no drilling required if you don't want to.
     

    Attached Files:

    Last edited: Mar 14, 2021
  13. Mar 14, 2021 at 4:05 AM
    #13
    HickOnACrick

    HickOnACrick Member

    Joined:
    Sep 1, 2016
    Member:
    #196193
    Messages:
    19
    Gender:
    Male
    Vehicle:
    2016 Taco Sport
    None...yet
    Great job on the seat delete - looks very clean and functional. I need to do the same - I also carry dogs more often than humans.
     
    andweb[OP] likes this.
  14. Mar 14, 2021 at 10:45 AM
    #14
    andweb

    andweb [OP] Member

    Joined:
    Mar 27, 2020
    Member:
    #323161
    Messages:
    17
    Gender:
    Male
    First Name:
    Andy
    Leadville, CO
    Vehicle:
    2019 Cement Tacoma DCSB TRD Off-Road
    Overland Built and Outfitted. SEE BUILD PAGE
    Thanks!! It’s proven to be very functional and gives the dogs plenty of space on trips. If I had to do it again though I think I’d cover it in a more durable material. The foam isn’t holding up as well as I’d hoped. Just thought I’d let ya know if you try to do something similar!
     
  15. Mar 15, 2021 at 8:45 PM
    #15
    andweb

    andweb [OP] Member

    Joined:
    Mar 27, 2020
    Member:
    #323161
    Messages:
    17
    Gender:
    Male
    First Name:
    Andy
    Leadville, CO
    Vehicle:
    2019 Cement Tacoma DCSB TRD Off-Road
    Overland Built and Outfitted. SEE BUILD PAGE
    Before I get too far ahead of myself bringing up things like my hidden usb charging ports, I should probably post on my power supply situation.

    I have a dual battery setup that I put together myself for my specific needs. It starts with a Genesis Offroad Dual Battery Tray made specifically for the 3rd gen tacoma, and I have a brief rabbit hole Id like to take on this product. I installed this battery tray last April and then enjoyed my dual battery system camping and offroading all summer long, and this winter I began to hear a clicking noise coming from the front driver side of the truck when hitting bumps in the road or going over speed bumps at around 20-50 mph. I took out the battery tray a couple weeks ago and sure enough, all the offroading with those heavy batteries in that tray attached to the thin sheet metal in the stock battery location had shook the tray so much that it cracked the sheet metal where the 2 nutserts were crimped closest to the driver side of the truck!!! :eek: I basically had two large holes in places where I needed nuterts to be able to mount the tray back to the truck. :confused: I came up with a solution that ended up being a way more secure mount for the dual batteries, and now if I grab the battery tray and try to shake it, it shakes the whole truck. Those suckers are ON THERE. Basically, I ordered a 12" x 12" 1/8" thick sheet of aluminum from Amazon. I used some CAD(cardboard-aided-drafting) to create a template for a bracket that would replace the existing mounting surface that my battery tray had rattle holes into. I then traced it onto the aluminum and cut out my bracket using a cutting wheel and a vice. I cleaned up the holes on the surface I was going to mount my custom bracket to, drilled 6 new holes, painted it all up with some color matched duplicolor paint, set 6 5/8-16 nutserts in those holes, drilled 6 holes to match on my bracket, covered the surface with flex seal, and mounted my bracket using 6 stainless steel bolts. This is what the end result looks like:

    [​IMG]

    I then placed the battery tray back into its spot, remarked the bolt hole locations, drilled 4 new holes into the custom bracket surface, and set 4 1/4-20 nutserts in the bracket:

    [​IMG]

    The last thing I need to do was to fab up a set of brackets for the lower mounting location. So I cut these two brackets out of the remaining aluminum and used them to sandwich the sheet metal to prevent any further rattling from cracking the sheet metal down there.

    [​IMG]

    Sorry for the rabbit hole, but if anyone would like to use the Genesis Dual Battery tray in their Tacoma, I highly suggest doing something like this on the front end so you don't have to deal with the nightmare of finding holes torn into your brand new truck :rant:

    SOOOOOO... I mounted in this Genesis Dual Battery tray and then I put Optima Red Top Group 34 and and Optima Yellow Top Group 34 Batteries into the tray. To charge the yellow top battery i mounted a 140amp battery isolator by KeyLine on top of the battery tray top bracket, ran the appropriate wiring, and bingo! That's my dual battery system setup!

    [​IMG]

    Now I needed a way to distribute the power from my dual battery power source, and my plan was to have one distribution center in the front and one in the rear of the truck so that I would have to run minimal wires under the truck.

    In the front, I mounted an Overland Engineering Bracket meant for blue sea fuse boxes in the location behind the stock fuse box under the hood. To it, I mounted a Mictuning Voltmeter and a Blue Sea Systems 80 amp breaker I bought on Amazon, and a prebuilt and sealed off-road fuse and relay box from BP Automotive. I wanted to be able to easily see how much power each battery had, and didnt like having the voltmeter inside the cab like I did in my jeep. So it made sense to mount one on the empty space on this bracket. Also, I wanted a breaker in place for extra in-line protection for my electrical system; as well as a way that I can shut off all power to the accessories powered by my front end power dist. center with the flip of one switch. And the BP Automotive Off-Road Fuse and Relay box is AWESOME. Click on the link and give it a read. They use high quality components, it comes pre-wired with 8' wires, it looks clean, and its waterproof. What more could you want?

    [​IMG] [​IMG]
    The accessories I chose to power on the front end of the vehicle are obviously the ones that are closest to the front end, and/or need to be wired to a switch in the cab of the truck. There are 5 "hot" fused wires (F2, F4, F6, F8, F10) and 5 wires with a fuse and a relay(F1R1, F3R3, F5R5, F7R7, F9R9). I wired my accessories as listed:

    F1R1 Scene Lights
    F2 Switch LEDs
    F3R3 Roof Light Bar
    F4 CB Radio
    F5R5 Rock Lights
    F6 Engine Bay Light(Under Hood Lights)
    F7R7 Bumper Light Bar
    F8 Hidden USB Charger
    F9R9 Ditch Lights
    F10 Anytime Camera System

    and I used my DYMO label maker that I got on amazon as well to make some labels for a index/key inside the lid of the box:

    [​IMG]

    That's pretty much it for the front end power distribution center. My next post will be covering my truck bed power distribution center for the rear of the vehicle!

    [​IMG]
     
    HPPH and Scontroneboy like this.

Products Discussed in

To Top