

-
Welcome to Tacoma World!
You are currently viewing as a guest! To get full-access, you need to register for a FREE account.
As a registered member, you’ll be able to:- Participate in all Tacoma discussion topics
- Communicate privately with other Tacoma owners from around the world
- Post your own photos in our Members Gallery
- Access all special features of the site
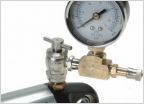 Need to refill nitrogen in my king shocks
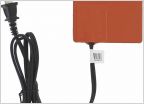 Engine block/Oil pan heater.
 Air-Fuel sensor issue
 3.4 Supercharger help needed (02 tacoma)
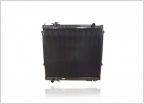 Radiator Swap
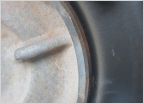 Do I need hub rings or caps for these wheels?
Rust repair project (and a buch of other stuff)- my build thread?
Discussion in '1st Gen. Tacomas (1995-2004)' started by Jakuku Pahwheenis, Jun 13, 2022.
Page 8 of 8
Page 8 of 8


