1. Welcome to Tacoma World!

    You are currently viewing as a guest! To get full-access, you need to register for a FREE account.

    As a registered member, you’ll be able to:
    • Participate in all Tacoma discussion topics
    • Communicate privately with other Tacoma owners from around the world
    • Post your own photos in our Members Gallery
    • Access all special features of the site

RUSTED crankshaft & water pump engine block -- AM I FREAKED UP?

Discussion in '1st Gen. Tacomas (1995-2004)' started by windnsalsa, Feb 8, 2017.

  1. Feb 8, 2017 at 4:57 PM
    #1
    windnsalsa

    windnsalsa [OP] Active Member

    Joined:
    Jan 25, 2017
    Member:
    #208607
    Messages:
    26
    Vehicle:
    2001 Green Tacoma TRD 3.4 manual [110k+ mi as of 02/2017]
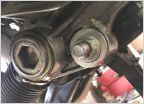
    IMG_20170208_163121.jpg IMG_20170208_163121.jpg IMG_20170208_163156.jpg Hi, during a timing belt and water replacement project, I removed all the pertinent items except for the cam and crank seals. Then, I decided to also replace the valve cover gasket replacement. So, I paused the belt & water pump replacement project and wait on the parts for the valve cover gasket project to arrive. Parts arrived a week later during which there were few days of rain [California], I continued with the project.

    But, now, I see rust forming on the crankshaft and inside water pump part of the engine block. How freaking FUK am I? I am quite concern. Advice is much appreciated.

    Attached are some pictures.
     
  2. Feb 8, 2017 at 5:01 PM
    #2
    harper7

    harper7 Well-Known Member

    Joined:
    Jun 16, 2011
    Member:
    #58360
    Messages:
    142
    Gender:
    Male
    First Name:
    Gary
    Tulsa/Claremore OK
    Vehicle:
    00 Imperial Jade 4x4 TRD,01 TRD 5sp
    Not a big deal! Clean it up with a little steel wool or scotch brite pad with light oil on it. It's just surface rust.
     
    COMAtized99 likes this.
  3. Feb 8, 2017 at 5:26 PM
    #3
    BartMaster1234

    BartMaster1234 Well-Known Member

    Joined:
    Aug 21, 2016
    Member:
    #195197
    Messages:
    45,885
    Gender:
    Male
    First Name:
    Tyler
    Pittsburgh, Pennsylvania
    Vehicle:
    1998 PreRunner 4x4 2.7l Supercharged
    Flux Capacitor
    If you think that's bad you should look at your frame. It's just a little surface rust don't worry about it.
     
  4. Feb 8, 2017 at 6:57 PM
    #4
    CD20H

    CD20H Well-Known Member

    Joined:
    Oct 25, 2014
    Member:
    #141019
    Messages:
    773
    Gender:
    Male
    First Name:
    Ben
    North Texas
    Vehicle:
    2004 Double Cab TRD 4x4 Limited
    Magnuson Kompressor, OME lift kit, JBA Headers, junky Sony radio.
    I think you have a bigger problem than rust. You have a SCREW in your seal.
     
  5. Feb 8, 2017 at 7:13 PM
    #5
    BartMaster1234

    BartMaster1234 Well-Known Member

    Joined:
    Aug 21, 2016
    Member:
    #195197
    Messages:
    45,885
    Gender:
    Male
    First Name:
    Tyler
    Pittsburgh, Pennsylvania
    Vehicle:
    1998 PreRunner 4x4 2.7l Supercharged
    Flux Capacitor
    Haha wow how did I not notice that. What in god's name is a screw doing there?
     
  6. Feb 8, 2017 at 7:24 PM
    #6
    01GreenTacoma

    01GreenTacoma Well-Known Member

    Joined:
    Jan 9, 2017
    Member:
    #207086
    Messages:
    848
    Gender:
    Male
    Yeah what he said ^^^
     
  7. Feb 8, 2017 at 7:29 PM
    #7
    DJB1

    DJB1 Well-Known Member

    Joined:
    Jun 8, 2013
    Member:
    #105835
    Messages:
    2,223
    Gender:
    Male
    First Name:
    Dave
    SLC, UT
    Vehicle:
    2003 Regular Cab 4X4 5MT
    That screw is an old-school trick for removing a seal. No need to panic.
     
  8. Feb 8, 2017 at 7:37 PM
    #8
    CD20H

    CD20H Well-Known Member

    Joined:
    Oct 25, 2014
    Member:
    #141019
    Messages:
    773
    Gender:
    Male
    First Name:
    Ben
    North Texas
    Vehicle:
    2004 Double Cab TRD 4x4 Limited
    Magnuson Kompressor, OME lift kit, JBA Headers, junky Sony radio.
    We know.
     
  9. Feb 8, 2017 at 8:02 PM
    #9
    RedManRocket

    RedManRocket Well-Known Member

    Joined:
    Mar 18, 2015
    Member:
    #151238
    Messages:
    2,297
    Gender:
    Male
    First Name:
    Red
    Sonora, Central Cali
    Vehicle:
    2002 Double Cab LT
    Esb 5.5 with Kings Mcneil 6.5 fenders Other stuffs
    He's telling the OP
     
  10. Feb 8, 2017 at 8:37 PM
    #10
    windnsalsa

    windnsalsa [OP] Active Member

    Joined:
    Jan 25, 2017
    Member:
    #208607
    Messages:
    26
    Vehicle:
    2001 Green Tacoma TRD 3.4 manual [110k+ mi as of 02/2017]
    I wouldn't think rust would build so fast. Steel wool & 600 sandpaper worked decently on the crank. I will try to remove some rust in the waterpump engine well tomorrow, but any concern of the debris from the sanding? Probably will use the vacuum. Easy & effective ways to sand inside the WP well?

    OT: oil seals...
    hehe, yea, the screw trick works, but not by pulling it with pliers. At least not even close to easy. I just removed and installed the left cam and crank seals today. The cam seal was very snug, compared to the crank. I didn't have one of those
    tools used for "prying" off a car's door panel retainer clips from vehicle's door panel. I had only a 15" pry bar and carefully made it worked.

    https://www.google.com/imgres?imgurl=http://4.bp.blogspot.com/-vq65uJY8j_w/Uuxh1jyH3YI/AAAAAAAABE0/MM02gWETzIY/s1600/prying+crank+seal.JPG&imgrefurl=http://www.originalmechanic.com/2013/03/30-l-engine-chrysler-replace-water-pump.html&docid=tGuj7ne5b_8OwM&tbnid=XVdELWxTBYBxqM:&vet=1&w=1600&h=900&bih=611&biw=1280&ved=0ahUKEwjejazdk4LSAhVB2mMKHaq0CgkQMwh-KBUwFQ&iact=c&ictx=1

    Tip:
    There was much resistance hammering in the cam oil seal [using PVC pipe]. Half way in, I had to remove it after seeing a small white piece bulging out from the seal and metal well/housing of the engine. The metal well had a small nick which had cut the side of the seal. I sanded that off and was able to insert the seal. Still, there was some resistance. I am not going to take a chance and used another new seal. Will need to buy another seal for the other cam.

    Should the cam seals have more resistance than that of the crank? I barely had to hammer in the crank seal.
     
  11. Feb 8, 2017 at 10:01 PM
    #11
    DrZ

    DrZ Well-Known Member

    Joined:
    Dec 14, 2014
    Member:
    #144262
    Messages:
    1,459
    Gender:
    Male
    Mesa, AZ
    Vehicle:
    96 2.4L 5-speed
    I was going to say just use a brass or steel brush to clean the rust up. No particulates like with sandpaper. As long as there's no more water it won't rust any more.

    You can remove the bearing cap that holds the cam seal to place the seal in without having to force it. I don't know how the head looks on the V6, but I'm guessing there is a bearing cap like other Toyota engines.

    It's important to check the sliding surface of the cams and cranks to make sure it's still smooth and won't chew up the new seals. Especially if you used any metal tools to get the seal out. You don't want to accidentally nick it.
     
  12. Feb 9, 2017 at 1:06 AM
    #12
    windnsalsa

    windnsalsa [OP] Active Member

    Joined:
    Jan 25, 2017
    Member:
    #208607
    Messages:
    26
    Vehicle:
    2001 Green Tacoma TRD 3.4 manual [110k+ mi as of 02/2017]
    Unfortunately, the building surface rust has been from me procrastinating reassembling the timing belt & water pump & seals compartment project and wanting to wait on the valve cover gaskets project. All this while having days of rain.

    Any good brush shape types to easily get through these openings and contours?

    I am assuming the bearing cap that you mentioned is that by the half moons which can be seen after removing the valve covers, which I have not. I might do that for the other cam seal this weekend. But, after seeing this rusting, I want to complete the TBelt project and close the compartment before finishing removing the valve covers project. I already removed the both the upper and lower intake/plenum, having paused at the stage where the head cylinders are exposed, which I have paint tape over for covering. Hoping no building of rust their. Until the weekend coming up, I can try finishing up the projects.

    I am such a noob. Every major steps, things don't go very smoothly as written in the forums or recorded on Youtube. Also, I get a little bit OCD trying to clean the areas around the engine before installing anything. It has not been as simple as 1, 2, 3.
     
  13. Feb 9, 2017 at 6:19 AM
    #13
    DrZ

    DrZ Well-Known Member

    Joined:
    Dec 14, 2014
    Member:
    #144262
    Messages:
    1,459
    Gender:
    Male
    Mesa, AZ
    Vehicle:
    96 2.4L 5-speed
    I do the same thing, waste time cleaning things, but if it's a sealing surface better safe than sorry later.

    I was saying brass brush on the water pump gasket area and crankshaft. I wouldn't sorry about the rust internally in the block. The coolant corrosion inhibitors should neutralize that, at least that's my theory. You could flush it first before putting the coolant in.
     
  14. Feb 9, 2017 at 9:31 AM
    #14
    skeezix

    skeezix Well-Known Member

    Joined:
    Oct 31, 2010
    Member:
    #45512
    Messages:
    2,326
    Gender:
    Male
    Colorado
    Vehicle:
    1998 Limited
    Hey I've been doing my own car and truck maintenance since 1961, and things RARELY go smoothly as written... but the videos and write-ups are extremely helpful. Just review them right before starting work, and don't be afraid to look at them again at the first sign of trouble while doing the job.
     
  15. Feb 9, 2017 at 1:45 PM
    #15
    windnsalsa

    windnsalsa [OP] Active Member

    Joined:
    Jan 25, 2017
    Member:
    #208607
    Messages:
    26
    Vehicle:
    2001 Green Tacoma TRD 3.4 manual [110k+ mi as of 02/2017]
    yea i was speaking out of frustration. I know that the knowledge from forums such as this and youtube videos are invaluable. I would not have attempted these projects without them.

    Anyways, I managed to do some sanding of the WP block [what is the name of this area of the block?]. Decent but not ideal result [see pic]. BUT...BUT...BUT I may have goofed up something. How genius...I used a big straw from bubble tea drinks to extend the hand vacuum hose to collect all the sanding particulates. It worked great. BUT...BUT...BUT... I inserted the straw up a narrow canal several times and suddenly saw a small flow of clear oil running down. The flow stopped shortly afterwards. I inserted my finger up there to see what the #$%$% was up. My finger goes along the canal, then something rubbery/plastic(?). Then, I slowly moved upward feeling as if that rubbery material had pivoted upwards. Afterwards, I felt my finger going through a narrow vertical cylinder [metal?], then something soft [like plastic/rubber?] again. I removed my finger and there was no oil. Maybe residual. I tried going through the same path again, but the 2nd time, I don't feel the iinitial rubber material until after the vertical cylinder area.

    Then, I tried vacuuming again. But this time, I consciously didn't insert the straw extension too far up the path and a small amount of oil started to flow again. I put a napkin under the flow and will see later if it will accumulate oil. It seems as if the vacuuming sucks oil from the head area? I'll have to clean up that cavity area with acetone later.

    What did I just do?
    What is the pad circled and the area under that in the picture?
    Did I puncture something I shouldn't have?
    Did I just dig a deeper grave? Bury me now!

    water-pump-block-rust-cleaning (5).jpg
    water-pump-block-rust-cleaning-1-edit-a.jpg
    water-pump-block-rust-cleaning (7).jpg
     
  16. Feb 10, 2017 at 11:03 AM
    #16
    mechanicjon

    mechanicjon They call me "Jonny Stubs"

    Joined:
    Dec 2, 2016
    Member:
    #203828
    Messages:
    10,149
    Gender:
    Male
    First Name:
    Jon
    Scottsdale Arizona
    Vehicle:
    04 Taco SC 4dr SR5 TRD Prerunner
    Supercharged, AEM FIC/6, Meth Inj, ION Alloy's, Radio & Phone steering Wheel controls,Fabtech AAL, Billie's wrapped with 880's , Tundra big brake conversion, bully bars and Pioneer DDin Stereo/dvd with exterrnal usb ports. 290K and going strong.
    I have no idea what/were you talking about. Maybe put you finger back in and take a pic.
     
  17. Feb 10, 2017 at 11:47 AM
    #17
    windnsalsa

    windnsalsa [OP] Active Member

    Joined:
    Jan 25, 2017
    Member:
    #208607
    Messages:
    26
    Vehicle:
    2001 Green Tacoma TRD 3.4 manual [110k+ mi as of 02/2017]
    My index finger would be the same location as the straw, upwards through a passage way towards the vicinity of the area within the purple rectangle.
     
  18. Feb 10, 2017 at 12:14 PM
    #18
    mechanicjon

    mechanicjon They call me "Jonny Stubs"

    Joined:
    Dec 2, 2016
    Member:
    #203828
    Messages:
    10,149
    Gender:
    Male
    First Name:
    Jon
    Scottsdale Arizona
    Vehicle:
    04 Taco SC 4dr SR5 TRD Prerunner
    Supercharged, AEM FIC/6, Meth Inj, ION Alloy's, Radio & Phone steering Wheel controls,Fabtech AAL, Billie's wrapped with 880's , Tundra big brake conversion, bully bars and Pioneer DDin Stereo/dvd with exterrnal usb ports. 290K and going strong.
    That is all coolant passages. Shouldn't been any oil.
     
  19. Feb 10, 2017 at 3:15 PM
    #19
    DrZ

    DrZ Well-Known Member

    Joined:
    Dec 14, 2014
    Member:
    #144262
    Messages:
    1,459
    Gender:
    Male
    Mesa, AZ
    Vehicle:
    96 2.4L 5-speed
    My guess is that you felt a piece of the head gasket. There are coolant passage areas that line up on the head and block but sometimes the head gasket doesn't have a hole there, so you may have just broken that piece like a hanging chad. You'd have to find some pictures of the head, block and gasket if you can't visualize this.

    Does this theory match your description? Was your finger tip about where the head and block meet?

    If this were true then it shouldn't hurt anything. Maybe just a loose piece of gasket material in there.

    The oily material could have just been some accumilated deposits of corrosion.
     
  20. Feb 10, 2017 at 9:14 PM
    #20
    windnsalsa

    windnsalsa [OP] Active Member

    Joined:
    Jan 25, 2017
    Member:
    #208607
    Messages:
    26
    Vehicle:
    2001 Green Tacoma TRD 3.4 manual [110k+ mi as of 02/2017]
    With help from this forum members, I came to the understanding that it was coolant afterall. My finger probably touched part of the silcon gasket of the tube through the head carrying the coolant from the front to the back of the block. Sorry for the false alarm, I was a bit alarmed at the sight yesterday and feeling the oil like slipperyness through my gloves. All this removing engine parts is quite new to me and I am definately learning. Thanks everyone for the support.
     

Products Discussed in

To Top