1. Welcome to Tacoma World!

    You are currently viewing as a guest! To get full-access, you need to register for a FREE account.

    As a registered member, you’ll be able to:
    • Participate in all Tacoma discussion topics
    • Communicate privately with other Tacoma owners from around the world
    • Post your own photos in our Members Gallery
    • Access all special features of the site

Seatbelt Chime Fix

Discussion in '2nd Gen. Tacomas (2005-2015)' started by Jake3773, Aug 9, 2024.

  1. Aug 9, 2024 at 10:43 AM
    #1
    Jake3773

    Jake3773 [OP] New Member

    Joined:
    Aug 9, 2024
    Member:
    #454840
    Messages:
    4
    Vehicle:
    2014 trd 6speed manual
    Got tired of reading no solution/dealership/wear your seatbelt/techstream comments so I just went and figured out a DIY solution myself. Truck is a 2014 V6 manual TRD with access cab.

    *Disclaimer* I wear my seatbelt on public roads and bumpy offroading. I did this because I'm tired of my truck thinking my backpack is marauding as a small child. It's an easy fix, reversable, requires no wires being cut, and takes about five minutes. *Small plastic pieces are easily breakable and you should be careful as to keep them intact if you attempt this*

    Without further ado:

    Remove the nut holding the seatbelt receptacle with a #14 crescent wrench. Push the seat all the way back for easier positioning on the nut from the backseat. Pull the buckle up a bit to get to the piece circled below. Don't snatch it, those wires are still being held under the seat and we need them intact. Take a small flathead and pop out the black plastic piece at the bottom of the gray recepticle (just a little bit, not all the way. This provides tension for the next part).

    Step 1.jpg

    Rotate to the other side and you'll see a small hole with a plastic tab inside. Depress the tab at the lowest point/catch point. This took a fair amount of force but the whole piece should slide right out after it's released.

    Step 2.jpg

    Remove the assembly you just freed. The spring circled is what resets the contact point when the seatbelt is removed. We're gonna remove it and set the white plastic piece so the contact points always touch.

    Step 3.jpg

    There's four small tabs at the top of this white piece. They attach to a little guide piece. Carefully push the tabs to the sides with a small flathead to remove the large white piece from the guide piece.

    Step 4.jpg

    Now just pull the spring off. Store it somewhere safe if you feel you might restore these to factory for resale purposes.

    Step 5.jpg

    Replace the large white piece by seating it back into the guide piece. Should snap right in without much fuss. Make sure you seat it all the way down so the contacts...well so they contact. Circled both parts that should touch.

    Step 6.jpg

    Slide the whole assembly back into the recepticle. This part took a bit of finagling. You have to squeeze the outsides of the white plastic piece while inserting it. I, once again, used my small flathead. At this point you should test the buckle release button and seatbelt buckle by inserting it then removing it. They should feel the same way they did before. If there's extra tension, you didn't put the little assembly in correctly. Pull the assembly out and put it back in. Test again.

    Lastly put the recepticle back on the seat bolt and put the nut back on. The whole piece should rotate without much pressure. If it doesn't then it isn't seated right on the bolt and the nut is therefore not tightened as far as it should go. Reset, do it right. Failure to properly reinstall this piece could cause malfunction in your safety equipment in the incident of a crash and uhhh "result in severe injury or death". If you question what it was supposed to feel like, just grab the one you aren't working on and feel it. Simple as.
     
  2. Aug 9, 2024 at 11:53 AM
    #2
    Texas

    Texas Well-Known Member

    Joined:
    Sep 16, 2010
    Member:
    #43384
    Messages:
    243
    Gender:
    Male
    Good to know. The internals of my seatbelt buckle are a little different it seems like from what I remember. Need to check again but I already resorted to removing the chime/light by modifying the wiring when I did the bench to bucket mod. This would have been a lot easier.
     
  3. Aug 9, 2024 at 11:58 AM
    #3
    Dm93

    Dm93 Test Don't Guess

    Joined:
    Mar 3, 2015
    Member:
    #150066
    Messages:
    13,714
    Gender:
    Male
    Texas
    Vehicle:
    2014 DC OR 6spd 4x4
    Predator tube steps, Ranch Hand grill guard, Magnaflow CatBack exhaust, Toyota tool box & bed mat, 2LO Module by @Up2NoGood, Rearview Compass/Temp Mirror, Tune by @JustDSM.
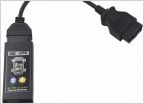
    You do realize you can turn the seatbelt chime off via a scan tool or a button sequence instead of modifying the buckle....
     
    Naveronski and HondaGM like this.
  4. Aug 9, 2024 at 11:59 AM
    #4
    Texas

    Texas Well-Known Member

    Joined:
    Sep 16, 2010
    Member:
    #43384
    Messages:
    243
    Gender:
    Male
    That works to turn off the chime but the light still stays on/flashes in the dash which also bugs me.

    Some people get those seat belt extenders and call it a day but I don't personally care for those either.
     
  5. Aug 9, 2024 at 12:21 PM
    #5
    Jake3773

    Jake3773 [OP] New Member

    Joined:
    Aug 9, 2024
    Member:
    #454840
    Messages:
    4
    Vehicle:
    2014 trd 6speed manual
    My $100 scan tool doesn't have the option, "button sequence" is not an option for this year.
     
  6. Aug 9, 2024 at 1:03 PM
    #6
    Dm93

    Dm93 Test Don't Guess

    Joined:
    Mar 3, 2015
    Member:
    #150066
    Messages:
    13,714
    Gender:
    Male
    Texas
    Vehicle:
    2014 DC OR 6spd 4x4
    Predator tube steps, Ranch Hand grill guard, Magnaflow CatBack exhaust, Toyota tool box & bed mat, 2LO Module by @Up2NoGood, Rearview Compass/Temp Mirror, Tune by @JustDSM.
    The light doesn't bother me, I turned the chime off because my driveway is 1/2 mile of dirt road and I spend alot of time off highway and I didn't like the beeper griping. I wear my seatbelt all other times.

    Ah I was thinking the button sequence worked on all 2nd gens, I turned mine off with my scan tool.
     
    mit88 and HondaGM like this.
  7. Aug 9, 2024 at 1:29 PM
    #7
    GilbertOz

    GilbertOz Driver

    Joined:
    Oct 18, 2018
    Member:
    #269844
    Messages:
    1,883
    Gender:
    Male
    CA
    Vehicle:
    2014 AC V6 MT 4WD, 84K miles
    FOX 2.5, Deavers, ARB, OTT, 4xInnovations
    Just curious, does setting this option (Seat belt beeper off) via scan-tool persist even through battery disconnections?
     
  8. Aug 9, 2024 at 1:32 PM
    #8
    Dm93

    Dm93 Test Don't Guess

    Joined:
    Mar 3, 2015
    Member:
    #150066
    Messages:
    13,714
    Gender:
    Male
    Texas
    Vehicle:
    2014 DC OR 6spd 4x4
    Predator tube steps, Ranch Hand grill guard, Magnaflow CatBack exhaust, Toyota tool box & bed mat, 2LO Module by @Up2NoGood, Rearview Compass/Temp Mirror, Tune by @JustDSM.
    Yes, I turned mine off not too long after I got the truck and it has never turned itself back on.
     
    mit88 likes this.
  9. Aug 9, 2024 at 1:41 PM
    #9
    mit88

    mit88 Well-Known Member

    Joined:
    Oct 5, 2009
    Member:
    #23837
    Messages:
    2,278
    Gender:
    Male
    Planet earth
    Glad you are able to share the info. Thanks
     
  10. Aug 9, 2024 at 2:18 PM
    #10
    tacoman45

    tacoman45 Well-Known Member

    Joined:
    Feb 20, 2019
    Member:
    #283801
    Messages:
    1,369
    Gender:
    Male
    Orygun
    Vehicle:
    2014 TRD OR DCSB - MGM
    Do you have said button sequence? I did a quick search and couldn't find anything. I'm also away from my truck computer at the moment or I'd just turn off the chime in Techstream
     
  11. Aug 9, 2024 at 2:32 PM
    #11
    Steelhead Bum

    Steelhead Bum Well-Known Member

    Joined:
    Aug 11, 2021
    Member:
    #373986
    Messages:
    1,111
    Gender:
    Male
    First Name:
    Mitchell
    Eastern WA
    Vehicle:
    13 DCLB Sport 4x4, 92 AC MT 4x4
    GilbertOz likes this.
  12. Aug 9, 2024 at 2:49 PM
    #12
    Regnar

    Regnar Well-Known Member

    Joined:
    Apr 25, 2018
    Member:
    #251674
    Messages:
    250
    Kodiak,AK
    Vehicle:
    2014 DCSB PreRunner SR5
    My 30ish dollar Mini VCI with Techstream has the option. LOL
     
    Naveronski likes this.
  13. Aug 9, 2024 at 5:59 PM
    #13
    Naveronski

    Naveronski Well-Known Member

    Joined:
    Sep 14, 2013
    Member:
    #112501
    Messages:
    9,517
    Gender:
    Male
    Fort Worth
    Vehicle:
    2014 MGM DCSB TRD:OR
    This is a whole lot of effort to avoid Techstream.
     
    tacoman45 likes this.
  14. Aug 9, 2024 at 6:08 PM
    #14
    Jake3773

    Jake3773 [OP] New Member

    Joined:
    Aug 9, 2024
    Member:
    #454840
    Messages:
    4
    Vehicle:
    2014 trd 6speed manual
    10min vs sifting through to find the right one cable, buying a cable that only does a handful of things on 2nd gens, known software issues, costs $40 (?), waiting for shipping, and having to figure out how the program works. You're right, I really took the hard way out.
     
    GilbertOz likes this.
  15. Aug 9, 2024 at 6:56 PM
    #15
    Dm93

    Dm93 Test Don't Guess

    Joined:
    Mar 3, 2015
    Member:
    #150066
    Messages:
    13,714
    Gender:
    Male
    Texas
    Vehicle:
    2014 DC OR 6spd 4x4
    Predator tube steps, Ranch Hand grill guard, Magnaflow CatBack exhaust, Toyota tool box & bed mat, 2LO Module by @Up2NoGood, Rearview Compass/Temp Mirror, Tune by @JustDSM.
    Apologies if we came off as rude, I'm just not a fan of modifying stuff on modern vehicles especially when it has to do with safety systems and something like this is a 2 minute fix for someone with the appropriate scan tool (doesn’t necessarily have to be Techstream) but hey if it works for you and your comfortable with it go for it.
     
  16. Aug 9, 2024 at 7:42 PM
    #16
    Naveronski

    Naveronski Well-Known Member

    Joined:
    Sep 14, 2013
    Member:
    #112501
    Messages:
    9,517
    Gender:
    Male
    Fort Worth
    Vehicle:
    2014 MGM DCSB TRD:OR
    My dealer's service department did it in about 3 minutes, cost me nothing, and no inconvenience.

    So yeah, you did... :playball:
     
  17. Aug 9, 2024 at 8:49 PM
    #17
    Texas

    Texas Well-Known Member

    Joined:
    Sep 16, 2010
    Member:
    #43384
    Messages:
    243
    Gender:
    Male
    Some people figure it out their own way to a solution. Some people go to the dealer and say fix it. Different strokes, different folks. No shame either way.

    Also, not all dealers are going to change something SRS related in techstream for you.
     
  18. Aug 10, 2024 at 9:03 AM
    #18
    Jake3773

    Jake3773 [OP] New Member

    Joined:
    Aug 9, 2024
    Member:
    #454840
    Messages:
    4
    Vehicle:
    2014 trd 6speed manual
    It's all good, these threads tend to carry...tension lol. To me the only difference in doing work myself or having a mechanic do it is if I'm paying in time or money.
     
  19. Aug 11, 2024 at 3:27 PM
    #19
    Texas

    Texas Well-Known Member

    Joined:
    Sep 16, 2010
    Member:
    #43384
    Messages:
    243
    Gender:
    Male
    Trust me, what you did was (IMHO) the better option. Of course it is a little more work but at least it is still reversible and you don't see the red seatbelt light on the dash.
     

Products Discussed in

To Top