

-
Welcome to Tacoma World!
You are currently viewing as a guest! To get full-access, you need to register for a FREE account.
As a registered member, you’ll be able to:- Participate in all Tacoma discussion topics
- Communicate privately with other Tacoma owners from around the world
- Post your own photos in our Members Gallery
- Access all special features of the site
 Dealers with cheap OEM bed mats?
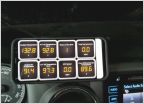 2016 gauge pod
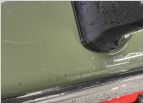 Paint Surface Rust
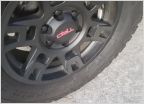 Lug nuts for black 17" TRD rims
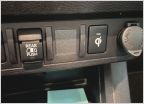 Carplay Modifications
 Side steps off amazon
SOS Concepts Sliders Install Tips
Discussion in '3rd Gen. Tacomas (2016-2023)' started by lanmaster53, Nov 7, 2018.


