

-
Welcome to Tacoma World!
You are currently viewing as a guest! To get full-access, you need to register for a FREE account.
As a registered member, you’ll be able to:- Participate in all Tacoma discussion topics
- Communicate privately with other Tacoma owners from around the world
- Post your own photos in our Members Gallery
- Access all special features of the site
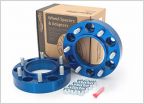 Spidertrax S2PWHS007 vs WHS007?
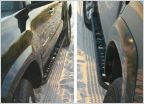 Running Board or Step
 Power source for rear dashcam?
 3rd gen dash switch question
 Need help finding SR grill surround part #
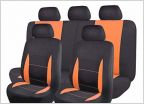 Heated Seat Covers
SPC 25470 Upper Control Arm, '16 Tacoma
Discussion in '3rd Gen. Tacomas (2016-2023)' started by Opihi59, Aug 8, 2018.
Page 2 of 2
Page 2 of 2


