1. Welcome to Tacoma World!

    You are currently viewing as a guest! To get full-access, you need to register for a FREE account.

    As a registered member, you’ll be able to:
    • Participate in all Tacoma discussion topics
    • Communicate privately with other Tacoma owners from around the world
    • Post your own photos in our Members Gallery
    • Access all special features of the site

Speaker Sub and Amp Upgrade on 2013 Access cab with stock Entune Radio

Discussion in 'Audio & Video' started by ronmanfredi, Aug 7, 2019.

  1. Aug 7, 2019 at 8:46 AM
    #1
    ronmanfredi

    ronmanfredi [OP] Member

    Joined:
    Feb 23, 2019
    Member:
    #284195
    Messages:
    17
    Gender:
    Male
    First Name:
    Ron
    Leander Texas
    Vehicle:
    2013 Metallic Gray SR5 Prerunner
    Bed Cover
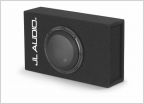
    After reading many articles on this forum, I decided to tackle replacing the stock front door speakers, added rear door speakers, adding an amp and building a sub box with a 8" JL Audio Sub. I wanted to use the stock 2 channel radio if possible, which I did and the results are pretty fantastic. Step one was to install the 4 speakers and set them up on the front channel of the Rockford Fosgate 4 channel amp. It has a rating of 50 Watts RMS per channel. I bridged the rear outputs which provided me with 200 Watts RMS for a 4 ohm sub. Since it is an Access Cab, I wasn't too concerned with front to rear fade. Also, the stock radio works well with this set up and there doesn't appear to be any problem with base fade at high volume. The JL Audio 6x9 60 Watt component speakers and the JL Audio 5x7 60 Watt Coaxials both sound great. I chose those because I love base and they can provide that. The front JL Audio 1" tweeters are excellent as well. I ran these 4 speakers by themselves for a couple of weeks and tuned the amp for them without the sub. The amp is set at around 25% of output. Base sound is really really good. The door panel thumb with the speakers at higher volumes. Lastly I installed the sub and found that I could run it with the amp set up at around 25% of output for a nice clean sound. I did install a Dyna Mat type product on the inside of the outer door skins, covered the holes on the inner door panels and installed on the rear wall. The sub box was made from scratch and sized for the sub and had the correct amount of poly fill added. I didn't take the time to do photos of the sub box before carpeting it but did after I installed it. Hope you like it.

    Power Supply:

    Electrical 1.jpg

    Speaker wires back and forth to amp:

    Electrical 2.jpg

    Amp install under Driver Seat:

    Electrical 3.jpg

    Rear Wall with Dyna mat:

    Rear Insulation.jpg

    Front Speakers installed and Dyna Mat:

    Speaker 1.jpg

    The rear doors were not set up for speakers, especially 5x7's so the first thing was to cut out the door panels, make a basic door speaker mount out of 3/4 material and then trace out the speaker hole onto the mount:

    Speaker 2.jpg

    Next, the mount was made allowing about 1/4" clearance between the speaker and door panel. The speaker was installed with a thick foam seal wrapped around it to seal against the door panel. The inner and outer door panels had Dyna Mat installed. Speaker wires had to be run from the rear door to the amp as well:

    Speaker 3.jpg

    Next, the door panel was installed the last time. It had been on and off a few times during the process. I removed the snap in fasteners during the fitment time so as not to destroy them during the process:

    Speaker 4.jpg

    Next was to make a grille using a similar process of another member on this forum. I used 1/8" plastic, heated it up and formed it to match the door. Cut out the hole for sound, for the mounting pins and covered it with gray speaker cloth. I used the small push pins from Lowes to secure it to the door panel:

    Speaker 5.jpg

    On the sub box, I had already carpeted it before I thought to take photos. This shows the 4oz of poly fill in the box. I installed it in layers and trimmed out the area where the sub will go:

    Sub 1.jpg

    Sub Installed, JL Audio 8W3v3 4ohm with Grille in down fire position:

    Sub 2.jpg

    Next is the sub box installed. The front of it doesn't block all of the floor area past the seats like others. The sub down fires into the factory tray of the access cab floor. It attached to the seat mounts in the rear and uses a hidden mount at the front on the floor. There isn't any interference with the operation of any of the seats.

    Sub 3.jpg

    With the seat down, you can see the amount of room still left in the floor. The rear seat belts have pockets cut out to hold them when not in use also which was a real pain to come up with. Corners are rounded as well to look nicer. The carpet matches the interior a little better than what the camera shows also. Hope you like it !

    Sub 4.jpg
     
    Last edited: Aug 7, 2019
    jayway likes this.
  2. Aug 7, 2019 at 3:11 PM
    #2
    jayway

    jayway Well-Known Member

    Joined:
    Jun 9, 2016
    Member:
    #189190
    Messages:
    335
    Gender:
    Male
    First Name:
    Josh
    Nevada City CA
    Vehicle:
    13 SR5 4x4 DCLB
    Nice job, looks like fun! how did you mount the amp to the floor? And did you use anything to fill the holes in the door or just covered them with dynamat?

    I'm putting together an upgrade plan for my truck. Similar to yours with keeping the HU but I don't plan to run a sub so just a 2 way system.
     
  3. Aug 7, 2019 at 4:22 PM
    #3
    ronmanfredi

    ronmanfredi [OP] Member

    Joined:
    Feb 23, 2019
    Member:
    #284195
    Messages:
    17
    Gender:
    Male
    First Name:
    Ron
    Leander Texas
    Vehicle:
    2013 Metallic Gray SR5 Prerunner
    Bed Cover
    The amp is mounted with sheet metal screws into the floor pan. I left the carpet underneath it. I just covered the holes with Dynamat. The front door has a large metal access panel that the Dynamat goes over. Other holes were just covered up. Thinking about future repairs, I left the window regular area untouched in case I ever had a need to work on it.
     

Products Discussed in

To Top