1. Welcome to Tacoma World!

    You are currently viewing as a guest! To get full-access, you need to register for a FREE account.

    As a registered member, you’ll be able to:
    • Participate in all Tacoma discussion topics
    • Communicate privately with other Tacoma owners from around the world
    • Post your own photos in our Members Gallery
    • Access all special features of the site

StevenP’s 37s + IFS ¯\_(ツ)_/¯ build

Discussion in '1st Gen. Builds (1995-2004)' started by StevenP, Jun 23, 2020.

  1. Jul 8, 2020 at 1:32 PM
    #61
    Kwikvette

    Kwikvette Chief Executive Officer at Kwik Fab

    Joined:
    Feb 27, 2019
    Member:
    #284735
    Messages:
    70,034
    Gender:
    Male
    Stock
    G'damn

    Aren't you glad I told you to make a build thread and take tons of pics? :rofl:
     
    JasonLee, POSTacoMike and StevenP[OP] like this.
  2. Jul 8, 2020 at 1:41 PM
    #62
    StevenP

    StevenP [OP] Well-Known Member

    Joined:
    Jun 27, 2019
    Member:
    #297659
    Messages:
    669
    Gender:
    Male
    First Name:
    Steven
    Alta, Ca
    Vehicle:
    2003 Tacoma DCSB TRD
    Build thread in Signature
    I have a long way to go before I feel like I’m taking pictures that are helpful :laugh:
     
    POSTacoMike likes this.
  3. Jul 8, 2020 at 1:54 PM
    #63
    Broke Okie Ty

    Broke Okie Ty Well-Known Member

    Joined:
    Aug 27, 2014
    Member:
    #137043
    Messages:
    1,114
    Gender:
    Male
    First Name:
    Ty
    California/Oregon/ Now in Montana
    Vehicle:
    01 trd with some stuff
    Armor, winch, other stuff
    Wow that escalated quickly lol
     
    Kwikvette and StevenP[OP] like this.
  4. Jul 8, 2020 at 1:56 PM
    #64
    StevenP

    StevenP [OP] Well-Known Member

    Joined:
    Jun 27, 2019
    Member:
    #297659
    Messages:
    669
    Gender:
    Male
    First Name:
    Steven
    Alta, Ca
    Vehicle:
    2003 Tacoma DCSB TRD
    Build thread in Signature
    :rofl:
     
    Broke Okie Ty[QUOTED] likes this.
  5. Jul 8, 2020 at 2:25 PM
    #65
    Broke Okie Ty

    Broke Okie Ty Well-Known Member

    Joined:
    Aug 27, 2014
    Member:
    #137043
    Messages:
    1,114
    Gender:
    Male
    First Name:
    Ty
    California/Oregon/ Now in Montana
    Vehicle:
    01 trd with some stuff
    Armor, winch, other stuff
    I'm interested to see what all you do with the supercharger. I picked one up recently and it seems we have the same goals in mind.
     
    StevenP[QUOTED][OP] likes this.
  6. Jul 8, 2020 at 8:20 PM
    #66
    theesotericone

    theesotericone Well-Known Member

    Joined:
    Jul 27, 2018
    Member:
    #260800
    Messages:
    12,114
    Gender:
    Male
    Bishop CA
    The LBJ bolts shearing is a pretty common failure. If you plan on wheeling it get rid of them and replace them all with 10.9s. Red-Loctite them in. Trust me. I broke 8 of them before I switched over. Since going to 10.9 bolts I've broken none.
     
    StevenP[QUOTED][OP] likes this.
  7. Jul 8, 2020 at 8:24 PM
    #67
    StevenP

    StevenP [OP] Well-Known Member

    Joined:
    Jun 27, 2019
    Member:
    #297659
    Messages:
    669
    Gender:
    Male
    First Name:
    Steven
    Alta, Ca
    Vehicle:
    2003 Tacoma DCSB TRD
    Build thread in Signature
    I definitely plan on wheeling it, that’s really good to know! Happen to know the size @theesotericone ?
     
  8. Jul 8, 2020 at 8:34 PM
    #68
    theesotericone

    theesotericone Well-Known Member

    Joined:
    Jul 27, 2018
    Member:
    #260800
    Messages:
    12,114
    Gender:
    Male
    Bishop CA
    M10 1.25 x 30mm.

    You'll be able to find them in hex head flanged which works perfect. No washer. Just loctite them. Set the torque and wheel away. I check mine after every trip and sometimes mid trail just for piece of mind.

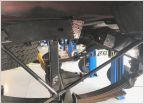
    The other PSA for the evening. If you wheel hard carry a field weld kit. Then you can just do this on the trail and keep on wheeling. lol


    [​IMG]


    [​IMG]
     
    StevenP[QUOTED][OP] likes this.
  9. Jul 8, 2020 at 8:47 PM
    #69
    StevenP

    StevenP [OP] Well-Known Member

    Joined:
    Jun 27, 2019
    Member:
    #297659
    Messages:
    669
    Gender:
    Male
    First Name:
    Steven
    Alta, Ca
    Vehicle:
    2003 Tacoma DCSB TRD
    Build thread in Signature
    Sweet, thanks for the info, I’ll definitely be picking some up as I was pretty skeptical torquing them down on round 2. And that LBJ is definitely committed now lol
     
  10. Jul 8, 2020 at 9:08 PM
    #70
    theesotericone

    theesotericone Well-Known Member

    Joined:
    Jul 27, 2018
    Member:
    #260800
    Messages:
    12,114
    Gender:
    Male
    Bishop CA
    The stories that spindle/LBJ could tell.

    I was curious to see how strong those welds where. 3 of 4 LBJ's sheared on the way into Coyote Lake about 1 mile before Red Lake. I couldn't extract one so just welded the whole thing good and solid.

    Then finished Coyote and drove home. Then over the next 6 weeks ran, and drove home from, Rubicon, Buck Lake, Slick Rock, Wheeler Crest(twice), Fordyce, and some of the Dusy. Had to bail about 1/2 mile before Thompson Hill because a buddy blew his ADD tube and intermediate shaft. So, yeah, those welds are strong.

    I finally replaced it a few months ago when that LBJ had way to much play in the ball and socket. I did have spare spindles with new LBJ's in my rig for every trip after Coyote but never needed to use them. lol
     
    StevenP[QUOTED][OP] likes this.
  11. Jul 9, 2020 at 11:16 AM
    #71
    StevenP

    StevenP [OP] Well-Known Member

    Joined:
    Jun 27, 2019
    Member:
    #297659
    Messages:
    669
    Gender:
    Male
    First Name:
    Steven
    Alta, Ca
    Vehicle:
    2003 Tacoma DCSB TRD
    Build thread in Signature
    That sounds like an epic 6 week or so stretch! goals for sure!
     
    theesotericone likes this.
  12. Jul 10, 2020 at 12:53 PM
    #72
    StevenP

    StevenP [OP] Well-Known Member

    Joined:
    Jun 27, 2019
    Member:
    #297659
    Messages:
    669
    Gender:
    Male
    First Name:
    Steven
    Alta, Ca
    Vehicle:
    2003 Tacoma DCSB TRD
    Build thread in Signature
    Picked up a Prinsu rack from the 1st gen for sale section courtesy of @mstudt , it was off his 4Runner so a little different, but he was kind enough to cut the crossbars to 44” and tap the cut side for me. All said and done quite the bargain. I have to find the appropriate hardware to buckle it down to my ARE rails and make some final adjustments, but here is a rough idea of how the cap will look from here on out.

    8D184176-A31F-46F2-9FF6-8EB5A0DA45A2.jpg

    Ps. Unlikely to get a rack on the cab. I don’t want to drill into the roof, and when the ARE is off the truck I don’t think I’d want the rack on it. If I can find a way to use towers or feet that would allow me to take a rack on and off and keep me from drilling then I’d be all over that, but I have so many other projects to do at the moment, that’ll come waaay down the road if ever.
     
  13. Jul 10, 2020 at 6:46 PM
    #73
    mstudt

    mstudt Well-Known Member

    Joined:
    Jan 22, 2014
    Member:
    #121201
    Messages:
    2,091
    Gender:
    Male
    First Name:
    Mike
    Eugene, Oregon
    I glad it showed up OK, and worked out for you.

    Mike
     
    StevenP[QUOTED][OP] likes this.
  14. Jul 15, 2020 at 8:04 AM
    #74
    Sociopenguin

    Sociopenguin 2 Fang Engineering

    Joined:
    Jun 16, 2017
    Member:
    #221657
    Messages:
    7,218
    Gender:
    Male
    First Name:
    Tate
    NW MO
    Vehicle:
    DevilPenguin
    Schtuff
    Moose just chillin.....
     
    StevenP[QUOTED][OP] likes this.
  15. Jul 15, 2020 at 8:41 AM
    #75
    StevenP

    StevenP [OP] Well-Known Member

    Joined:
    Jun 27, 2019
    Member:
    #297659
    Messages:
    669
    Gender:
    Male
    First Name:
    Steven
    Alta, Ca
    Vehicle:
    2003 Tacoma DCSB TRD
    Build thread in Signature
    She’s typically a bit too mischievous to be my wrenching buddy, but it’s always nice when she’s feeling mellow enough to hang out. Puppy life :goingcrazy:
     
    Sociopenguin likes this.
  16. Jul 16, 2020 at 3:11 PM
    #76
    StevenP

    StevenP [OP] Well-Known Member

    Joined:
    Jun 27, 2019
    Member:
    #297659
    Messages:
    669
    Gender:
    Male
    First Name:
    Steven
    Alta, Ca
    Vehicle:
    2003 Tacoma DCSB TRD
    Build thread in Signature
    So I have the day off due to a re-evaluation on my knee because insurance doesn’t want to pay disability.. surprise surprise.

    Anyways, that gave me a free morning, so I decided to pull my valve body and get it ready to ship off to IPT Performance to have them work their magic. Forgot how messy this job can be, seemed to be quite a bit more messy than when I did it for my bronco.

    It’s a pretty straightforward job, only requires a 10mm tool of your choice. I started by removing the drain plug and letting the pan empty out as much as possible, then removed all the bolts from the pan and getting a small pry tool in there to break the FIPG.
    40F972D0-2210-4ACF-9E80-052E2FBABA81.jpg

    After getting the pan loose I started wiggling it out. I was unable to get it out initially because my dip stick tube needed to be disconnected from the bracket point on the engine, this did require a 12mm socket, but you may not have to do this. I did manage to get a big face and mouthful of ATF, which was thrilling - rinsing with dish soap to try and get that nastiness out of my mouth was a joy, forgot how much that shit foams up. Gross. Anyways, be careful when trying to wiggle the pan out so you don’t slosh a big cup full of ATF on yourself!
    EB114F28-D52A-4DE4-9977-F405BDF0D7FD.jpg

    With that out of the way I removed the filter.3810560F-18DA-47A0-8153-186BB6196D6A.jpg

    now apparently I forgot about my camera, my apologies. I removed the valve body next, first I disconnected the 4 electrical plugs, then removed a ton of 10mm bolts that hold it in. Once it is removed, and if you are doing it with the transmission on the truck, there will be a few things that fall down, a couple springs and a check valve. I gathered those up as they’re important. Turned it over in all sorts of positions over my drain pan to try and get as much out of it as possible, that sucker holds a ton of fluid! With the valve body removed you can pull out the three spring bodies (sorry for lack of the right term, or a picture, it’s obvious once you have eyes on it).

    While I waited for things to empty out a bit more I checked out my pan. The threads are shot, so I just ordered a new pan. In time I’ll fix the threads on this one and have it as a spare. The rest of the pan looked good, no massive chunks, magnets covered in a typical sludge but all very uniform and fine (windy day, anything that looks abnormal is just shit flying in the wind that settled on the pan as it was draining on its side). Filter looked pretty good too, but I’ll probably replace it anyways since it’s out.
    E416A96C-5B28-4A1C-9BF8-585C1AB32728.jpg

    I put the old pan back on with a couple bolts just to keep any debris from blowing into the transmission while I wait for the new valve body.

    Packaged up the valve body, springs and check valve, spring body thingies, and shipped them off, making sure to have lots of padding and no movement in the box :thumbsup:

    I used this video from IPT as reference:


    I also got a box of goodies from URD, but didn’t have time to open it up and check it out. Maybe later when I’m done with the doctor.
     
    Sociopenguin and Broke Okie Ty like this.
  17. Jul 17, 2020 at 8:20 PM
    #77
    StevenP

    StevenP [OP] Well-Known Member

    Joined:
    Jun 27, 2019
    Member:
    #297659
    Messages:
    669
    Gender:
    Male
    First Name:
    Steven
    Alta, Ca
    Vehicle:
    2003 Tacoma DCSB TRD
    Build thread in Signature
    I think tomorrow I’m going to start cutting and tubbing. I have a welder now, but still haven’t set it up or done any actual welding. I may be putting the cart in front of the horse, but I’m hoping it’ll motivate me to get the ball rolling on my welder.

    I have a ton of stuff that I need to weld; coastal Offroad rear bumper w/ swing out, 4xinnovations sliders, my front bumper from trail gear doesn’t quite fit so I need to rework some of the mounting points up there, and then of course the actual tubbing of the firewall dissection.

    If any of y’all are local and know how to weld I’d absolutely LOVE some help with getting set up and maybe a quick run through of some basics!
     
    Last edited: Jul 17, 2020
    nudavinci64 and jubei like this.
  18. Jul 17, 2020 at 8:55 PM
    #78
    jubei

    jubei would rather be doing something else

    Joined:
    Mar 17, 2016
    Member:
    #181549
    Messages:
    5,958
    Gender:
    Male
    First Name:
    Jason
    NoCo
    Vehicle:
    White 2002 XC TRD and Yellow 1971 JEEP CJ5
    Stuff. Also things.
    Best of luck with the tubbing, man! Take your time and don’t rush it and you’ll be fine. I highly suggest getting yourself some sheet metal to practice on before you tackle the body, tho. And do your best to get the best fit up possible with the patch that you weld in. It’s super easy to blow holes through under the best of circumstances, much less when there’s even the slightest gap. In my opinion, there’s no shame in just stacking tacks on that ridiculously thin Toyota sheet metal since you’ll likely be body sealing the weld area anyway.

    I’ll be really interested to see if you’ll have to relocate the cab mount for 37s. I had to grind mine down quite a bit just for 35s.

    Anyway, sweet rig! You’re definitely getting after it!
     
    StevenP[QUOTED][OP] likes this.
  19. Jul 17, 2020 at 9:04 PM
    #79
    StevenP

    StevenP [OP] Well-Known Member

    Joined:
    Jun 27, 2019
    Member:
    #297659
    Messages:
    669
    Gender:
    Male
    First Name:
    Steven
    Alta, Ca
    Vehicle:
    2003 Tacoma DCSB TRD
    Build thread in Signature
    Thanks @jubei

    I definitely need to find all sorts of scrap to practice on, I have a bunch of different thicknesses that I’ll be tackling with all these projects. I think the sheet metal will be the toughest though as I’m only set up for 0.035 flux core and I keep reading you really want to be 0.030 or 0.023 gas for it. I’m hoping I’ll be able to eek it out by just jumping from spot to spot and not running a continuous bead. We’ll see lol.

    As far as the cab mount and lower door hinge goes.. I’m curious about it as well hahaha. I’m really hoping that the combination of the 1” body lift and the SPC UCAs pushing the castor further will help save me from having to relocate. I should know more tomorrow, and I’ll try to remember to take a ton of pictures.
     
  20. Jul 18, 2020 at 8:14 AM
    #80
    theesotericone

    theesotericone Well-Known Member

    Joined:
    Jul 27, 2018
    Member:
    #260800
    Messages:
    12,114
    Gender:
    Male
    Bishop CA
    Just to give you some tips from another dumb ass that had never welded before tackling the front tub. This dumb ass also did it with .035 flux core. He also didn't practice on shit. He just went to town as they say.

    1: Get some Quik Steel. You'll need it.
    2: Get some 3/4" self tappers to hold the sheets in place.
    3: Get a very, very wet towel under the dash before you weld anything.
    4: Start with very small tacks.
    5: Keep doing very small tacks. Do not weld a true bead or you will blow through.
    6: Clean up the "welds" and material then quick seal all the seams.
    7: Use 3M rubberized undercoating to seal it all. Use a lot.

    I did the fronts and drove down to SoCal so a buddy could finish the rears for me. He used .023 gas and the difference was night and day. I've since bought a 180A dual voltage gas welder so I can weld better. I don't want to bomb your thread with photo's of my rig but if you want some I'd be happy to show you the finished fronts.
     

Products Discussed in

To Top