1. Welcome to Tacoma World!

    You are currently viewing as a guest! To get full-access, you need to register for a FREE account.

    As a registered member, you’ll be able to:
    • Participate in all Tacoma discussion topics
    • Communicate privately with other Tacoma owners from around the world
    • Post your own photos in our Members Gallery
    • Access all special features of the site

Sub-Zero SAC

Discussion in '2nd Gen. Builds (2005-2015)' started by Sub-Zero, Aug 8, 2016.

  1. Aug 8, 2016 at 4:51 PM
    #1
    Sub-Zero

    Sub-Zero [OP] NOOB

    Joined:
    Oct 15, 2014
    Member:
    #140388
    Messages:
    4,524
    Gender:
    Male
    First Name:
    Ryan
    Frederick, CO
    Vehicle:
    '06 DCSB
    None
    *SAC starts here*

    Like many others, I am starting to lose track of everything I've done so I will organize it all here. I also would love to help anyone trying to do any of these mods, which is why I try to post the hardware and details for any tricky steps when I can.

    Most things I had to find out the hard way so helping other ppl avoid problems is one of my main goals.

    Also, I will admit that i am proud of my truck and the work I've put in so Ill take this opportunity to exhibit my work.
    Be warned, this is a long first post with some of my recent life story and is continuously updated.
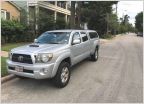
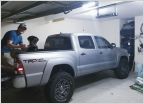
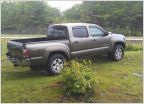
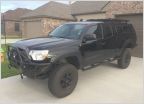
    Quick look, day one / most recent:
    20141109_114257.jpg
    20170128_152529.jpg
    Screenshot_20160928-213406.jpg
    IMG_20161108_150245.jpg
    Quick mods list:

    Interior:
    Rubber floor mats
    Black Seat covers
    Back scratcher
    Power inverter
    Radar detector
    Trailer brake controller
    Small fire extinguisher
    First aid kit
    8 packets of Raman :thumbsup:
    4 water bottles
    Road rage defense:
    18" hitch ball wrench in driver's door
    Springfield XD 9mm

    Suspension:
    Ome 886s with 90000 struts
    Dakar leaf packs w d29xl aal
    Bilstein 5125 14" shocks forward facing
    Lower shock mount relocate
    Rear f250 shock towers
    Subzerofab u bolt flip
    Sway bar delete
    Subzero and Mohawk fab shackle flip kit

    Armor:
    4x Innovations weld on sliders with kick out
    Steel plate front bumper "the eBay bumper"
    Subzerofab 3/16" ifs/trans skid, reinforced
    Subzerofab 3/16" tank skid, reinforced

    Shoes:
    37" Cooper STTs
    Subzerofab 17" Wheels
    Rock rings

    Communication:
    Uniden in center console
    Dual 4' Fire sticks
    Relentless fab hood mount
    Pyle Pa speaker behind grill
    External speaker under drivers seat

    Exterior accessories:
    Airflow snorkel
    In channel vent shades
    Black headlight mod
    Color changing halos
    Blue Sea fuse box
    Plastidipped
    -side emblems
    -tail gate emblems
    -rear bumper
    Black mesh front grill
    Trailer plug relocate
    Led bed lights
    Led brake/reverse light strip
    2nd Fire extinguisher on subzerofab bed mounts

    Recovery:
    Smitty 12k lb with steel cable
    Snatch block
    Tree saver
    2 d rings in front
    D ring in hitch mount rear
    60" hi lift extreme on subzerofab bed mounts
    Shovel and axe on subzerofab bed mounts
    4"x30' heavy duty snatch strap, looped ends

    Drive train:
    4.88:1 differential gearing
    ECGS Bushing (needle bearing replacement)
    E locker full rear axle swap, heavy duty spring perches
    Locker anytime mod
    Eaton front e locker

    Background: my name is Ryan, I live in Frederick, Colorado, but grew up in Middletown nj. I went to school in Colorado which is where I bought the truck. I am a mechanical engineer.

    Now the truck:
    2006 Double Cab Short Bed V6 6spd Manual
    Bought in October 2014 with 50,000 miles.
    I became a member of tw shortly after.
    Came with color matched cap, hankook Dynapro 265s, brush guard, wired for trailer brakes with controller.
    Photo of day I got it:

    20141109_114257.jpg
    20141114_082446.jpg

    First time I got it stuck:
    20150320_153208.jpg

    First decent sized haul (when i was a motorcycle mechanic):
    IMG_20150326_111916.jpg

    Snow day:
    20150416_092323.jpg

    Hauling the cruiser:
    20150410_192400.jpg

    Front yard flexing:
    20150418_172500.jpg
    20150418_172512.jpg

    Kept the truck like this for the better part of a year and a half. A few mods here and there (rubber floor mats and seat covers, in channel vent shades). At some point I added the back scratcher mod.
    20161220_231502.jpg

    Fast forward to spring 2016, I have moved back to Jersey. I got the leaf spring recall done and the frame coated. I have been searching for trails and ppl to ride with and decide I need to lift the truck to get over moar rocks. I went on a few wheeling trips by my new place and started really thinking about Modding the truck:
    20160522_135409.jpg
    IMG_20160403_192434-1.jpg

    Then, I rear end a beamer on the parkway and the front end got a makeover. I had already been thinking about new lights and grill:
    20160319_144155.jpg
    20160319_144209.jpg
    20160415_175239.jpg

    So while searching for parts I remembered my tw account and began reading and searching tw for advice and products.

    Here's where I started losing my mind.

    So I got a new grill, new brush guard, and new lights with halos paid for by my deductible. I also installed a led brake light strip with reverse under tailgate, throws a lot of light. Installed bed lights as well (pictured later with shovel and axe mount):


    I then notice the ome group buy and order the light kit with 885s, 90021s, and Dakar leaf packs. Still wasn't planning on anything crazy, hence the 885s.

    While waiting for the lift, I did several things.

    Installed dual cb antennas, radio, and pa.
    Removed last remaining mud flap.
    Plasti dipped emblems
    Black headlight mod:
    20160518_185031.jpg
    20160605_155648.jpg
    20160606_192850.jpg
    20160606_194252.jpg

    I also got a hi lift and then decided to get sliders. Went with 4x innovations weld on with kick out. Thanks to @stairgod for helping get them welded up.
    20160708_234519.jpg

    After thinking about all the rocks I scraped across on my first few trips I started thinking about skids.

    Then the lift came and @JLink helped me put it on at the end of June. My drive line vibration went away with the lift. I also threw a 35 on to see how it would be... Wasn't planning on 35s for a long time tho. (We see how that worked out)
    20160629_130208.jpg

    Then I made some hi lift mounts:
    20160704_122510.jpg

    Details on the bed rail mounting hardware:
    For anyone looking for an alternative to the t slot nuts for the bed rail, Lowes has spring nuts in the electrical isle. They had 3/8" ones that I got and they fit in the bed rail well, they do not rotate after putting them in, they just snap in as is, I will post a pic. $4 or something for 5 of em . And you don't have to slide them in from the end of the rail.... I'm building a hi lift mount and shovel/axe/fire extinguisher mounts.

    It took me forever to find them and nobody that worked at the store had ever seen them before apparently.

    http://m.lowes.com/pd/SUPERSTRUT-3-8-in-Straight-Strut-Nut/3284278


    Made a ridiculous impulse buy on front bump. Dad took the brush guard.
    20160630_200241.jpg
    20160704_165040.jpg

    With Rausch creek takeover quickly approaching, I decided to make a set of skid plates. I used 3/16" steel with 1x1x1/8" angle iron reinforcement. Bends made with an angle grinder and pipe wrench, then I welded the seams (my first real attempts at welding).
    20160716_120515.jpg
    20160716_151201.jpg
    20160724_124847.jpg
    20160717_194347.jpg
    20160724_124905.jpg
    20160724_153649.jpg

    Also made fire extinguisher, shovel, and axe mounts.
    20160724_182114.jpg

    (Good photo of bed lights):


    Then Plasti dipped rear bumper and relocated trailer plug.
    20160721_183747.jpg

    Then I went to Rausch creek. While there, I relocated my rear diff breather. And scraped the crap outta my new skids (thank god I had em).


    The week after Rausch, I kept with the full idiot trend and found a set of 315/70r17 Dick Cepek Crushers to try and stuff under there.

    My ifs skid is sitting at about 9" off the ground. With 886s and 35s I'm hoping for at least 12" to the skid. That's enough for now, sorry for the long post. I'm sure I'll edit this as I remember more mods I've done.

    If anyone has any questions on anything let me know!

    8/16/16
    Well it took me all day by myself, and Damn was it hot out. But I got the bushing and seal in and the 886s. Sitting much better and feels great on road. Phew glad that's over, I had trouble with every step, but learned a few tricks. Used a shop vac tube to tap seal in. Also could not get the axle back in, the snap ring was caught at the beginning of the splines. Put my hi lift handle on the end of the axle and hit it with a sledge, went right in....I figured out the easy way to do most of it after struggling on each step for an hour or so


    Installed an oem roof rack I got from a member. He didn't have the hardware so I had to figure that out..
    In case any one is trying to find what bolts to use, like I was...these work pretty well.

    (6) M6-1.00 x 35mm hex
    (4) M6-1.00 x 16mm hex
    (4) M6-1.00 x 16mm Phillips machine screw
    Could probably use small washers under each, wouldn't hurt

    I put Teflon tape on all, hopefully it's sealed

    I need to paint the roof rack on the bed cap black to match. Also this pic shows the front end sits way higher with the 886s, about 2" higher.


    8/18/16
    I've officially gone crazy:
    Finished making room for 35s...

    this weekend should be fun.

    Thanks to Tim for letting me work at his place so I don't have so much to do over the weekend.

    Thanks to Mike, @cynicalrider, I used the same plastic trim, and emblem adhesive stuff you did to finish the fenders

    Also thanks to Josh for letting me use the spare to fit test.


    8/21/16
    This weekend got the tires mounted on the new wheels. I tried to dismount and mount the new tires myself but I new it was a losing battle. Used my truck to break the beads, that's as far as I got.

    Then I had sears do the rest. I had to bore out the wheels with a Router because they were the wrong size, hopefully that works out well. They seem to fit great and look like they were done on a CNC.


    I also cleaned them up and painted the bead lock rings and d rings. Then I sprayed all the wheel wells with matte black paint to help it blend in better. I think it looks much better.


    8/23/16
    Installed 1.25" wheel spacers.

    D rings are also blue now


    8/29/16
    *Be warned, I'm about to unload too many photos*

    Well... here we go, before and afters...
    Gotta say, I'm pretty happy with it

    Don't mind the missing bolts in the rings, still have to helicoil a few

    #dirty5s


    Had to remove 1.25" spacers because they caused bad rub on cab mount. Doesn't seem to rub ucas and frame much if at all without spacers so I may be ok. If anything, I think 1/2" spacer will do the trick. There will be more cmc in the future tho.

    Baby test flex after removing spacers


    10/8/16
    Did more cmc and banging.
    Flares are cut and plastidipped, also realized my exhaust dented my bedside, so I chopped the exhaust to dump after the axle in the parking lot at Rausch, thanks Tim for the grinder.

    Screenshot_20160928-213406.jpg

    11/14/16
    Update, I re soldered and re routed my cb Mic plug to be permanently mounted in the front of the console


    12/17/16
    Roof leak fixed
    Redline Hood struts installed (thanks @Tatts521 )
    Halos re paired and re soldered.
    Then went and did some donuts


    #whoneedsaproprod

    1/1/17
    Got the e locker axle welded up, cleaned up, new brakes, and got it installed with full oem wiring woohoo!

    [​IMG]
    [​IMG]
    [​IMG]

    02/03/17
    Finally got the airflow snorkel from group buy...installed that night...earlier in the week I installed the smittybuilt x20 12k winch with wireless remote
    20170127_192038.jpg
    20170128_152529.jpg

    03/19/17
    Did an exhaust reroute so I can have flat belly skids....Idk why more ppl don't do it this way, pretty simple

    [​IMG]
    [​IMG]

    Also last week @stairgod and i made a shackle flip, still gotta install it.

    IMG_20170312_104827_134.jpg

    4/7/17

    Got my shackle flip on. Custom made by Jon and I. Came out great! The extended travel shocks, towers, and add a leaf are on their way to my house! Thanks @stairgod for all your help!

    [​IMG]

    4/30/17
    Made a u bolt flip, added a leaf to my Dakars, and added 14" bilsteins with f250 shock towers, both shocks in front of axle and lower shock mounts in line with bottom of axle tube. The Dakars limit travel up and down now....about 12" of travel

    [​IMG]
    [​IMG]
    [​IMG]
    [​IMG]
    [​IMG]

    5/7/17
    Weldedup spindles today and added steering gusset

    [​IMG]
    [​IMG]
    [​IMG]
    [​IMG]

    7/18/17
    Started work on the high clearance rear with swing out
    20170701_152224.jpg
    20170702_141408.jpg
    20170702_141416.jpg
    20170723_200909.jpg
    20170723_200904.jpg
    20170726_210026.jpg
    20170726_213307.jpg
    20170726_213313.jpg
    20170729_161241.jpg


    Thanks for reading.

    -Ryan
     
    Last edited: Mar 24, 2023
    This site contains affiliate links for which the site may be compensated.
    #1
  2. Aug 8, 2016 at 5:33 PM
    #2
    stairgod

    stairgod NOOB

    Joined:
    Aug 16, 2015
    Member:
    #161924
    Messages:
    7,965
    Gender:
    Male
    First Name:
    Jo n
    PA/NJ
    Vehicle:
    2011 MGM Trail Limo
    Locked Boosted 35s
    Nice job Ryan!
     
    Sub-Zero[OP] likes this.
  3. Aug 8, 2016 at 5:43 PM
    #3
    Sub-Zero

    Sub-Zero [OP] NOOB

    Joined:
    Oct 15, 2014
    Member:
    #140388
    Messages:
    4,524
    Gender:
    Male
    First Name:
    Ryan
    Frederick, CO
    Vehicle:
    '06 DCSB
    None
    Thanks! And thanks again for your help with the truck!
     
    stairgod[QUOTED] likes this.
  4. Aug 8, 2016 at 10:38 PM
    #4
    JLink

    JLink Well-Known Member

    Joined:
    May 9, 2010
    Member:
    #36795
    Messages:
    12,579
    Gender:
    Male
    First Name:
    Josh
    Ocean, NJ
    Lifted, Locked, Armored. Ready To Wheel.
    Looking good! I love the picture with the 35 on the front. Just proves you made the right choice with the new tires!

    Can't wait to see what's next.
     
    Sub-Zero[OP] likes this.
  5. Aug 19, 2016 at 4:59 AM
    #5
    Sub-Zero

    Sub-Zero [OP] NOOB

    Joined:
    Oct 15, 2014
    Member:
    #140388
    Messages:
    4,524
    Gender:
    Male
    First Name:
    Ryan
    Frederick, CO
    Vehicle:
    '06 DCSB
    None
    New edits with fender cuts.
     
  6. Aug 20, 2016 at 1:25 AM
    #6
    fatfurious2

    fatfurious2 IG: great_white_taco

    Joined:
    Jun 28, 2014
    Member:
    #132884
    Messages:
    48,533
    Gender:
    Male
    First Name:
    David
    Ashburn, VA
    Vehicle:
    2010 TRD OR Access Cab
  7. Aug 21, 2016 at 5:03 PM
    #7
    Sub-Zero

    Sub-Zero [OP] NOOB

    Joined:
    Oct 15, 2014
    Member:
    #140388
    Messages:
    4,524
    Gender:
    Male
    First Name:
    Ryan
    Frederick, CO
    Vehicle:
    '06 DCSB
    None
    This weekend got the tires mounted on the new wheels. I tried to dismount and mount the new tires myself but I new it was a losing battle. Used my truck to break the beads, that's as far as I got. Then I had sears do the rest. I had to bore out the wheels with a Router because they were the wrong size, hopefully that works out well. They seem to fit great and look like they were done on a CNC.
    20160820_104649.jpg
    20160820_115148.jpg
    I also cleaned them up and painted the bead lock rings and d rings. Then I sprayed all the wheel wells with matte black paint to help it blend in better. I think it looks much better.

    20160820_120514.jpg
    20160820_193807.jpg
    20160821_103410.jpg
    20160820_130852.jpg
     
    TheTacoma, tacoma16 and fatfurious2 like this.
  8. Aug 28, 2016 at 2:19 PM
    #8
    TheTacoma

    TheTacoma Well-Known Member

    Joined:
    Oct 11, 2015
    Member:
    #166371
    Messages:
    5,480
    Gender:
    Male
    First Name:
    Chris
    Birmingham, AL
    Vehicle:
    2017 DCSB, TRD OR 4x4, Quicksand. SOS Bolt-on Sliders. 285x75r16. Kings
    Truck is looking great man! those 35s are crazy! :drool::cheers:
     
    Sub-Zero[OP] likes this.
  9. Aug 28, 2016 at 2:24 PM
    #9
    Yamaha_TacoR1

    Yamaha_TacoR1 Very slow racer

    Joined:
    Jun 3, 2015
    Member:
    #156692
    Messages:
    1,496
    Gender:
    Male
    NJ/NY, USA
    Vehicle:
    2015 Black TRD Sport 4x4 Limo
    - 5100/885's, 5100/Icon 3leaf progressive AAL with overload left in, 1/4" Taco lean spacer - ARE Z Series camper shell with Yakima rack system - Tepui Ayer Rooftop Tent - Prinsu Design Cabrac with heavy duty anadized bars - WeatherTech window deflectors/floor liners/bug deflector - Ultragauge MX1.3 - PopnLock codable locking tailgate handle - TRD shift knob - 3M tint - Extang solid fold2.0 tonneu cover - OEM Tacoma muffler tip - OEM Tacoma side steps - OEM Tacoma bed mat - OEM Tacoma roof rack - OEM TRD PRO front grille in matte black - OEM TRD PRO headlights - Fastway FLASH "Solid-Tow" adjustable aluminum ball mount hitch - Reese dual hitch ball covers - Masterlock locking J pin - GoPro windshield mount - Door trim protectors - Side mirror 'fish eyes' - Thule T2 hitch mount 2 bike carrier - LEDs: Map/Dome, 3rd brake, license plate, parking lights, reverse CREE's - SEMA TRD PRO 17" black matte wheels - 265/70/17 BFG A/T KO2s - Black Widow 40" x 95" 3 piece powder-coated folding bed ramp - Mobtown Offroad ribbed tailgate reinforcement skin - GRIDiT center console organizer - Salex center console organizer - Marco Extreme Blast black premium train air horn - 'ImmrYo' Rearview mirror relocate bracket - Mattgecko's Sliding window security bar - Rigid tow rear hitch shackle - Plasti-dipped gunmetal emblems - Blacked out ACEkraut's front license plate relocate bracket - De-flapped (OEM mud flaps gone) - Uniden XL520 CB Radio - Shmellmopwho's CB antenna bed mount - 3ft Firestik II CB antenna - BirdDawg Industries Tech Deck Extreme version w/ 3 Ram 1" ball mounts - Ram Mounts: iPhone6/iPad Mini4 X Grips with 1" dual ball sockets - Garmin GLO portable GPS & GLONASS receiver - Depo LED tail lights with blacked-out inner housing - Various Velcro backed patches on the headliner - 3D-Cell LED Maglite mounted to the driver seat - 4XInnovation DOM weld on sliders with kickouts (welded at 20degree angle) - 4XInnovation Hi Lift bed mounting system - Hi Lift All cast 60" jack with optional handle holder - Lotus Development Hi Lift slider adapter - Relentless Fabrifacfions dual bed rail mounts with dual Quick Fists - Salex glovebox organizer system - YETI vintage bottle opener mounted to the bed - TRD Sport style aftermarket epoxy resin decals for WT front mats - Rigid Industries LED D2 spot lights (Midnight edition) - CBI spot light hood mounts - Air on Board "Zombie Lights" switch - Rebadged WeatherTech floor liners with custom TRD Sport emblems - GoPro Hero 3+ windshield mounted - Mattgecko's cool white LED bedlight kit v2 - 1.25" Spidertrax wheel spacers - Maxsa Escaper Buddy traction boards (mounted on top of Prinsu Cabrac) - 42" Plano Weatherproof gun case (mounted on top of Prinsu Cabrac) - 2gal Rotopax gasoline can, mounting plate, DLX pack mount (mounted on top of Prinsu Cabrac) - Bestek 150W power inverter DC 12V to 110 V - DBPower 600A car jump starter/booster - SOS Off-road Concepts Factory recovery replacement mount - ARB 30' Recovery strap - ARB EZDeflator - Smittybilt receiver hitch D ring with 3/3" shackle - Bosch Icon wiper blades - RCI IFS steel skid plate - Trasharoo trash bag - mounted on tailgate - Lamin X yellow fog lamp covers - Aftermarket illuminated air conditioning/heater/vent knobs - Toyota full frame replacement - Spring 2023 ================================ Future mods: - Rear diff breather relocate - Foglights anytime - Install external speaker for CB - Install mattgecko bedlight kit
  10. Aug 28, 2016 at 3:07 PM
    #10
    stairgod

    stairgod NOOB

    Joined:
    Aug 16, 2015
    Member:
    #161924
    Messages:
    7,965
    Gender:
    Male
    First Name:
    Jo n
    PA/NJ
    Vehicle:
    2011 MGM Trail Limo
    Locked Boosted 35s
    The 35s look awesome. Now I am kicking myself for going with 33s.
     
    Subway4X4 and Sub-Zero[OP] like this.
  11. Aug 29, 2016 at 7:11 PM
    #11
    Sub-Zero

    Sub-Zero [OP] NOOB

    Joined:
    Oct 15, 2014
    Member:
    #140388
    Messages:
    4,524
    Gender:
    Male
    First Name:
    Ryan
    Frederick, CO
    Vehicle:
    '06 DCSB
    None
    Updated with photos of 35s and test flex after removing spacers
     
  12. Aug 29, 2016 at 7:11 PM
    #12
    Sub-Zero

    Sub-Zero [OP] NOOB

    Joined:
    Oct 15, 2014
    Member:
    #140388
    Messages:
    4,524
    Gender:
    Male
    First Name:
    Ryan
    Frederick, CO
    Vehicle:
    '06 DCSB
    None
    :D:cool: glad I finally did something right the first time lol
     
    stairgod[QUOTED] likes this.
  13. Sep 2, 2016 at 1:58 PM
    #13
    Acerwin

    Acerwin The unNORM NORM

    Joined:
    Nov 20, 2014
    Member:
    #142732
    Messages:
    32,629
    Gender:
    Male
    First Name:
    Andrew
    South Carolina
    Vehicle:
    Toyota Tundra
    What's the adhesive do with the flare trim?
     
    This site contains affiliate links for which the site may be compensated.
    #13
  14. Sep 2, 2016 at 2:12 PM
    #14
    Sub-Zero

    Sub-Zero [OP] NOOB

    Joined:
    Oct 15, 2014
    Member:
    #140388
    Messages:
    4,524
    Gender:
    Male
    First Name:
    Ryan
    Frederick, CO
    Vehicle:
    '06 DCSB
    None
    Helps seal the fender to keep out rust and keeps the trim on
     
    Acerwin[QUOTED] likes this.
  15. Sep 2, 2016 at 2:14 PM
    #15
    Sub-Zero

    Sub-Zero [OP] NOOB

    Joined:
    Oct 15, 2014
    Member:
    #140388
    Messages:
    4,524
    Gender:
    Male
    First Name:
    Ryan
    Frederick, CO
    Vehicle:
    '06 DCSB
    None
    Thank you :cheers:
     
  16. Sep 2, 2016 at 2:19 PM
    #16
    Acerwin

    Acerwin The unNORM NORM

    Joined:
    Nov 20, 2014
    Member:
    #142732
    Messages:
    32,629
    Gender:
    Male
    First Name:
    Andrew
    South Carolina
    Vehicle:
    Toyota Tundra
    Thanks I'll have to do that
     
    Sub-Zero[QUOTED][OP] likes this.
  17. Sep 6, 2016 at 5:55 PM
    #17
    Manual man74

    Manual man74 Well-Known Member

    Joined:
    Jun 13, 2015
    Member:
    #157349
    Messages:
    842
    Gender:
    Male
    First Name:
    Garrett
    Goshen NY
    Vehicle:
    2015 trd off road dcsb mt
    Just getting started
  18. Sep 6, 2016 at 6:54 PM
    #18
    Subway4X4

    Subway4X4 Shameless Copy Cat

    Joined:
    Nov 10, 2015
    Member:
    #169260
    Messages:
    11,647
    Gender:
    Male
    First Name:
    Lloyd
    NY/NJ
    Vehicle:
    05 Speedway Blue DCSB OR TRD
    Everything TW members recommend
    Damn. Nice build thread.
    I can't believe you did all this in such a short period of time after the Takeover.
     
    Sub-Zero[OP] likes this.
  19. Sep 6, 2016 at 7:57 PM
    #19
    Sub-Zero

    Sub-Zero [OP] NOOB

    Joined:
    Oct 15, 2014
    Member:
    #140388
    Messages:
    4,524
    Gender:
    Male
    First Name:
    Ryan
    Frederick, CO
    Vehicle:
    '06 DCSB
    None
    Me either
     
    stairgod likes this.
  20. Sep 16, 2016 at 11:03 PM
    #20
    Gaunt596

    Gaunt596 Well-Known Member

    Joined:
    Jun 19, 2013
    Member:
    #106627
    Messages:
    5,790
    Gender:
    Male
    First Name:
    Matthew
    Central Maryland
    Subd.
     
    Last edited: Sep 16, 2016

Products Discussed in

To Top