1. Welcome to Tacoma World!

    You are currently viewing as a guest! To get full-access, you need to register for a FREE account.

    As a registered member, you’ll be able to:
    • Participate in all Tacoma discussion topics
    • Communicate privately with other Tacoma owners from around the world
    • Post your own photos in our Members Gallery
    • Access all special features of the site

T4RH33L's long overdue build

Discussion in '1st Gen. Builds (1995-2004)' started by T4RH33L, Jun 1, 2016.

  1. Jun 1, 2016 at 1:09 PM
    #1
    T4RH33L

    T4RH33L [OP] Helping to find Jimmy since 2017

    Joined:
    Nov 3, 2015
    Member:
    #168524
    Messages:
    891
    Gender:
    Male
    First Name:
    Al
    Raleigh, NC
    Vehicle:
    2013 MGM DCSB TRD OR
    5100s with Eibach coils and zombie Dakars.
    First, let me give a little background. I bought this truck in 2005 after coming home from my first deployment. I didn't know anything about a Tacoma, nor had I ever owned one before. I just knew that I wanted a truck and not a full sized one. So, I picked this one up and have driven it as my daily ever since. I've never had any urge to upgrade or add anything to her. Until last year when I came upon this site. I had been plagued by a serious of CELs, there's a thread on here about it, and I didn't know what to do. I found this site when I Googled a factory service manual for my engine. Thanks to @bellassaiw10 I found the FSM and in addition I now had this overwhelming urge to make my truck look similar to his old (bad ass) Tacoma. So, I finally got my CEL taken care of and while I was at it I began to take care of other tiny issues that I was just now noticing. Since then, I've spent quite a bit of time making minor changes, mostly cosmetic and on a budget, until I am able to get started on the upgrading process. Unfortunately, I do not have any old photos from when I bought her or of during the steps when I was making a change. But, I am now actively adding the upgrades and I am taking pictures along the way. So, with all of that said, on to the pictures!

    IMG_2872.jpg
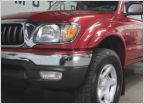
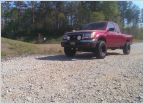
    This is the most recent picture that I have from before I started the major upgrades. So far, all that has been done is that I have plasti dipped a set of 16" factory wheels, the front bumper, flares, door handles and other miscellaneous interior work. I removed the old carpet and installed vinyl. I painted over the old bluish/gray console and got rid of the old and cracked leather boot for the shifters. I was inspired by another thread somewhere on this site by someone that made their own boot and I altered a few things for my own design.

    IMG_2965.jpg
    This was actually my second attempt. The first one did not go down low enough and the rubber boots kept popping out of the holes that I cut for them to fit in. I used some vinyl fabric, a hot glue gun and some "U" staples to put this together.

    IMG_2719.jpg
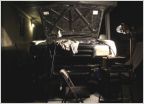
    This is my second major project to date so far in the history of owning this truck. After the engine issues and my newfound urge to be proactive in learning more and making my truck more enjoyable I decided it was time to replace the clutch. Fortunately, my dad (in the background) has an old buddy from high school that has this awesome man cave garage set up on his property that has every tool I could ever need. The bad part is that it's several hours away. Anyways, we got the clutch installed and while we were there we gave it a nice lube job. God knows it had not been done since I've owned it.

    IMG_2915.jpg
    Next came the beginning stages of my suspension upgrades. I mentioned earlier that I was on a budget. So, I've been setting aside funds just for the parts I needed all while also looking for deals or cheaper ways to accomplish what I want. Thanks to @Sandman614 pointing me over to the awesome thread by @4WD I found a method to rebuild my existing leaf spring packs. So, I went to the junkyard and pulled a pair of springs from an old Chevy S-10. I cut them down, sanded and painted them. The plan was to add two leafs to the bottom of my existing packs to begin with and see what I'm left with.
    new.springs.jpg
    IMG_2962.jpg IMG_2967.jpg IMG_2968.jpg
    With the help of the awesome @Blkvoodoo and his wealth of experience, knowledge and tools we rebuilt the packs and (in the mud and rain) installed them along with new bushing and two new rear Bilstein struts. We ran out of time for the day and will be reconvening in the near future to get the front coils and shocks done. (Oh, and we cut off the tail end of the exhaust pipe. It was in my way...I still need to go back and clean up the hacksaw cut)

    IMG_2966.jpg

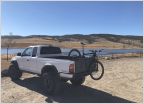
    And here she sits today. I haven't decided if I have too much lift yet. I'm going to wait to see how we look once I get the front finished and decide if I need to take one of the leaf springs out.

    More to come....

    Specs:
    2000 SR5 2.7L 3RZ engine 5speed
    Mileage when bought: 77k
    Current Mileage: 183k

    Current additions:
    Replaced chrome grille
    22" LED light bar on front
    LED bulbs behind console and dome lamp
    Vinyl flooring
    Bilstein 5100s
    Toytec coils
    Custom fab AAL or two
    285/75R16 Cooper Discoverer AT3s
    Extended brake lines (front and rear)

    Future additions:
    LCE header - done 6/11/16 - Thanks @Blkvoodoo
    LCE big bore throttle body
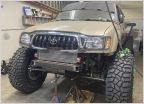
    Steel plate front bumper (in progress - Thanks @EddyRRT )
    Steel plate rear bumper
    full length skids
    Rock sliders
    Cruise control (kit purchased, just needs installing)
    Replace catalytic converter and muffler (haven't decided on the models)
    Rhino lining the bed
    New paint job (gun metal gray)
    Swapping out stock seats for 4Runner seats (thanks @Smiley52 )
    UCAs?
    LIGHTS!
     
    Last edited: Jun 13, 2016
    Blkvoodoo likes this.
  2. Jun 1, 2016 at 2:57 PM
    #2
    bellassaiw10

    bellassaiw10 Formally afroman5015

    Joined:
    Jun 16, 2010
    Member:
    #39032
    Messages:
    5,531
    Gender:
    Male
    Currituck NC
    Vehicle:
    09 LMM 2500HD Duramax
    Looks good man, Ill be watching this build for sure
     
    T4RH33L[OP] likes this.
  3. Jun 13, 2016 at 11:14 AM
    #3
    T4RH33L

    T4RH33L [OP] Helping to find Jimmy since 2017

    Joined:
    Nov 3, 2015
    Member:
    #168524
    Messages:
    891
    Gender:
    Male
    First Name:
    Al
    Raleigh, NC
    Vehicle:
    2013 MGM DCSB TRD OR
    5100s with Eibach coils and zombie Dakars.
    Ok, so this past weekend was hot as hell but with the help of @Blkvoodoo and a drop-in by @Sandman614, we were able to finish up the front suspension lift and install the header. At first, we weren't sure if we were going to be able to use the coils I had bought because we could not get them compressed. We ended up breaking the compressors that we had.

    IMG_20160611_125156.jpg

    oops.jpg

    But, we got lucky and found a local shop that got the struts put together for us. Then, after a quick lunch, we were back at it.

    strut.jpghot.as.hell.jpg front.pass.strut.jpg

    Next, we started on pulling the exhaust manifold so that we could put in the header.

    IMG_2977.jpg

    After that was done it was time for a test drive. I rode it around the yard for a few and then took it out on the road. The ride was smooth. Much better than before when I had on a set of shot struts. The next day, I fabricated a mount to move the load sensing proportioning rod back up to where it was before the lift.

    IMG_2981.jpg

    And now this is how she's sitting.

    IMG_2983.jpg
     
    Dcsleeper408, ERMB and Blkvoodoo like this.
  4. Jun 13, 2016 at 11:47 AM
    #4
    Blkvoodoo

    Blkvoodoo a Hooka smoking caterpillar has given me the call

    Joined:
    Jul 23, 2015
    Member:
    #160098
    Messages:
    4,187
    Gender:
    Male
    First Name:
    Kevin
    Near Clayton NC
    Vehicle:
    08 PreRunner SR5 DCSB
    We also learned the the 2nd gen 16" steel wheels that are on the truck have more offset than the 1st gen wheels, which would be ugly if they had more meat on the tires currently on the truck.
    2nd gen is a 30mm offset, 1st gen is 15mm, doesn't sound like much, but when several parts are trying to occupy the same space, it gets crowded quick
     
    T4RH33L[OP] likes this.

Products Discussed in

To Top