

-
Welcome to Tacoma World!
You are currently viewing as a guest! To get full-access, you need to register for a FREE account.
As a registered member, you’ll be able to:- Participate in all Tacoma discussion topics
- Communicate privately with other Tacoma owners from around the world
- Post your own photos in our Members Gallery
- Access all special features of the site
 New fox shocks
 WTS: Roof/Cargo Basket, 16" Spare Rim, OEM Headlights, and bump stops
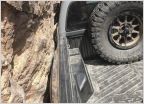 Wtb BED RAIL TIRE CARRIER 2021 Toyota Tacoma
 Misc. 3rd Gen OEM Parts - Take a look - Local Pickup: Northern Colorado
 FS: Brand New OEM TRD PRO Skid Plate
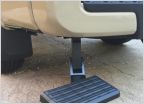 WTB: OEM Toyota Bedstep PT392-35100
TACO GARAGE - The R2-T2, our humble attemp at a roof rack.
Discussion in '3rd Gen Tacoma Parts Marketplace (2016-2023)' started by FreshMexicanTaco, Feb 15, 2023.
Page 4 of 4
Page 4 of 4


