1. Welcome to Tacoma World!

    You are currently viewing as a guest! To get full-access, you need to register for a FREE account.

    As a registered member, you’ll be able to:
    • Participate in all Tacoma discussion topics
    • Communicate privately with other Tacoma owners from around the world
    • Post your own photos in our Members Gallery
    • Access all special features of the site

The Adventures of Trouble

Discussion in '2nd Gen. Tacomas (2005-2015)' started by Trouble_The_Tacoma, Apr 10, 2018.

  1. May 14, 2018 at 11:22 PM
    #21
    OSUTacoma

    OSUTacoma Well-Known Member

    Joined:
    Dec 7, 2015
    Member:
    #171697
    Messages:
    697
    Gender:
    Male
    OHIO
    Vehicle:
    2012 Dbl cab 4X4
    Jumpers LEDS , ImMrYo mirror bracket , Cali Raised light bar w/Mojavemadman flush mount bracket , Gator trifold tonneau cover , Redline hood lift kit
    Your dipped wheels , did you do the inside / backside too ? I'm getting ready to do something with mine but havent seen what people have done to the other side yet.
     
  2. May 15, 2018 at 4:55 AM
    #22
    Trouble_The_Tacoma

    Trouble_The_Tacoma [OP] Well-Known Member

    Joined:
    Dec 26, 2016
    Member:
    #205749
    Messages:
    2,235
    Gender:
    Male
    First Name:
    Conrad
    Nope. I just left them on the truck and painted the fronts and sides of the “spokes”. But if you flipped wheel around it would be stock silver. There aren’t too many holes on my rim to see through so I didn’t bother. If it as a more open wheel I would suggest taking them off
     
  3. May 15, 2018 at 5:16 PM
    #23
    OSUTacoma

    OSUTacoma Well-Known Member

    Joined:
    Dec 7, 2015
    Member:
    #171697
    Messages:
    697
    Gender:
    Male
    OHIO
    Vehicle:
    2012 Dbl cab 4X4
    Jumpers LEDS , ImMrYo mirror bracket , Cali Raised light bar w/Mojavemadman flush mount bracket , Gator trifold tonneau cover , Redline hood lift kit
    Thanks a lot . I appreciate it
     
  4. May 15, 2018 at 6:55 PM
    #24
    Trouble_The_Tacoma

    Trouble_The_Tacoma [OP] Well-Known Member

    Joined:
    Dec 26, 2016
    Member:
    #205749
    Messages:
    2,235
    Gender:
    Male
    First Name:
    Conrad
    No problem, let me know if you have any more questions. I wrote up a tips and tricks in a PM to another guy on here if you're interested. It's all about the prep work.
     
  5. May 16, 2018 at 5:11 PM
    #25
    recomr

    recomr Well-Known Member

    Joined:
    Apr 15, 2017
    Member:
    #216348
    Messages:
    77
    Gender:
    Male
    Vehicle:
    2007 Access Cab 6spd
    5100's. Eibach. ST Maxx 255/85. Bestop. Pro Comp 252.
    Coming along nicely!
     
  6. May 16, 2018 at 8:46 PM
    #26
    Trouble_The_Tacoma

    Trouble_The_Tacoma [OP] Well-Known Member

    Joined:
    Dec 26, 2016
    Member:
    #205749
    Messages:
    2,235
    Gender:
    Male
    First Name:
    Conrad
    Thanks! Saving for a wedding so progress is slowing a bit. Coming soon should be snorkel, dual battery setup, spod, ditch lights, eventually upgraded suspension, softopper, roof rack with solar panel for charging batteries.

    Also working on getting drone license so I’d like to figure out how to add drone antennas to the truck.
     
  7. Jun 10, 2018 at 12:01 PM
    #27
    Trouble_The_Tacoma

    Trouble_The_Tacoma [OP] Well-Known Member

    Joined:
    Dec 26, 2016
    Member:
    #205749
    Messages:
    2,235
    Gender:
    Male
    First Name:
    Conrad
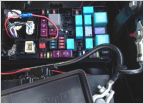
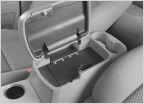
    Installed twin Black Oak LED 40w pods on top of Rago Fabrication 2nd gen ditch light mounts today. Mounts took 10 minutes, lights about an hour fifteen. So far so good. Used the little fuse box tray for switches as I don’t keep anything in it. Hopefully will be getting Spod soon to help clean up the wire nest I now have in my engine bay.

    F50F0A29-D44D-4FC6-AEF1-9469EBA6F23E.jpg
    3269AE25-5E9D-4348-8673-8FAE08E9122B.jpg
    5E09E595-C1F8-4009-9D3B-D9CCC4157894.jpg
    AAA3B7A3-37AB-4842-B3F7-E94CCA752ADD.jpg
    4A99F471-5A73-450C-8808-103A5CC34DE9.jpg
    C7ED0E17-A6FB-43DB-92D7-CCEE136FBFD8.jpg
     
    lo2hi likes this.
  8. Dec 11, 2018 at 9:24 PM
    #28
    Trouble_The_Tacoma

    Trouble_The_Tacoma [OP] Well-Known Member

    Joined:
    Dec 26, 2016
    Member:
    #205749
    Messages:
    2,235
    Gender:
    Male
    First Name:
    Conrad
    Been a while since I’ve posted but lots of changes to the truck. Meso finally released the overhead rack so I bought one during the opening sale, added a soft topper, unfortunately with the way my ammo cans were the softopper wouldn’t collapse down so I had to reorganize the gas and ammo cans. Then added Christmas lights because it’s that time of year. Also added a magnet mount diamond antenna for VHF/UHF comms. Will try and get a picture of MESO customs rack installed and with gear. It’s pretty nifty.

    613ED66F-AB35-401B-B315-F192EB54E181.jpg
    598418D2-11CA-43F9-BC32-E2A0A4C19FDB.jpg
    0BD971E7-904D-4F83-B561-0B30C0F59250.jpg
    5C3C68D3-2728-4EBA-B06B-D0CC95188F08.jpg
    39A09F45-BFA7-47BB-9C83-E19A0EA3AB0B.jpg
    CF9C2931-F5A7-4247-B015-57DE7757DE95.jpg
     
    Bobby_Boulevard, lo2hi and Murph133 like this.
  9. Dec 12, 2018 at 6:36 AM
    #29
    Trouble_The_Tacoma

    Trouble_The_Tacoma [OP] Well-Known Member

    Joined:
    Dec 26, 2016
    Member:
    #205749
    Messages:
    2,235
    Gender:
    Male
    First Name:
    Conrad
    I have a problem

    7B1525EF-0C8C-40E9-9D36-61149E5D980D.jpg
     
    Bobby_Boulevard and MuddyJackson like this.
  10. Dec 12, 2018 at 7:28 AM
    #30
    vwbuggsy

    vwbuggsy Well-Known Member

    Joined:
    Apr 9, 2011
    Member:
    #54641
    Messages:
    360
    Gender:
    Male
    Clinton, MD
    Vehicle:
    09 DC 4X4 LB Black Sand Pearl
    N-fab steps, Wet Okole Covers, line-x, tint, vent shades, budget stereo upgrades, weathertech floor liners
    Just dropping in to take a look. Nice truck!

    If you still have the helpful tips for plasti-dipping the wheels handy please send that my way. My wheels are looking pretty rough. I actually powder coat at home but between de and remounting the tires from the rim, r&r for the tpms and all that just to powder coat them, plasti-dip is looking pretty good!
     
  11. Dec 12, 2018 at 8:27 AM
    #31
    96carboard

    96carboard Well-Known Member

    Joined:
    Sep 14, 2018
    Member:
    #266237
    Messages:
    1,600
    Really? The first thing you did is you installed a beer bottle opener? On a CAR? For real?
     
    MuddyJackson likes this.
  12. Dec 12, 2018 at 9:41 AM
    #32
    USMCtaco88

    USMCtaco88 Common sense isn't always a common trait

    Joined:
    Aug 6, 2018
    Member:
    #261949
    Messages:
    292
    Gender:
    Male
    First Name:
    My names Jeff
    Savannah, Georgia
    Vehicle:
    2015 Silver Sky DCSB TRD OR
    I did some stuff.
    Why not? I have one on mine and some carbonated beverages I like to enjoy at tailgating events require a bottle opener. Not all have a twist cap. :thumbsup:
     
  13. Dec 12, 2018 at 10:25 AM
    #33
    96carboard

    96carboard Well-Known Member

    Joined:
    Sep 14, 2018
    Member:
    #266237
    Messages:
    1,600
    Right, and you're hanging around your car because you DON'T intend to drive.
    :rolleyes:
     
  14. Dec 12, 2018 at 5:22 PM
    #34
    Trouble_The_Tacoma

    Trouble_The_Tacoma [OP] Well-Known Member

    Joined:
    Dec 26, 2016
    Member:
    #205749
    Messages:
    2,235
    Gender:
    Male
    First Name:
    Conrad

    Yeah man here's my quick write up. (Mostly copy pasted from another message but Still reach out and ask any questions when needed.)

    I'll try and outline what I focus on as best a job as I can. Dipping your wheels definitely gives the vehicle a different personality. Be confident! It's super easy, it's just all about the prep work.

    I recommend budgeting an entire day to do this, but you can get it done in like 4 hours if you do it efficiently/spray all 4 at once. Also helps to do it where it's warm. If you can take off all of your wheels and lay them flat it comes out better. If not, it's ok. I did mine while on the truck.

    • Watch tons of videos on the subject online. DipYourCar.com is a great resource. You want the guy named Fonzie with the huge arms. here's a good one.
    • One can of dip per wheel for durability (Keep the cans next to the wheel you're spraying it on so you don't mix them up and put too much on one wheel)
    • Brake Dust Cleaner - Kind of expensive, the bottle I got was $20 But I did my wheels, my buddy's wheels and I still have a lot left over. Spray it on, it will turn magenta/purple and then wipe off with towel/rags then rinse.
    • Pre-dip spray - After brake dust is removed, apply generous amount of pre-dip spray. Wipe dry with paper towels/rags. It is important that your wheels are completely dry before you start painting.Otherwise you get bubbling and places that want to peel.
    • Dip Release - This will save your bacon to remove dip from your tires/side walls. Like if you went neon yellow on your rims, the overspray onto your rubber would also be neon yellow. If you go matte black, you can't really tell. This stuff is slippery and does not allow the dip to stick to whatever you apply it to. So that being said, apply only to the rubber on your sidewalls, if you get it on your rim, no big deal, paper towel it off. It's a good idea to wipe down rim again after applying this, incase you get splatters. Also, focus on edge of rim not having this stuff on it.
    • Painting - This is the fun part. First coat should go on kinda light/splattery. About 50% coverage. Second coat to last coats can be denser/heavier. Depending on humidity, you can wait 10-15min between coats. Also, it's not like spray-paint where you want to "dust" from like 12in away. You kind of have to be close like 6-8in. If you're too far away, the dip starts to create bumps/hairs and it doesn't look right. Try and do it in a garage or other well vented area that doesn't have a lot of wind.
    • Spraying techniques. Try and start off the wheel (start on the tire) then move onto the wheel. This avoids puddling on the wheel and excessive wet paint on the wheel increasing drying time. I always end each paint coat with a circle around the edge of the rim. That is where it's going to peel first and where the most abuse is, so I try and protect that edge. If you begin puddling in a certain spot on accident, carefully try and even it out. It will eventually "level" out if laying flat.
    • Painting on truck - Get some trash bags, weave them through the wheel and cover your brake system. You don't want to get your brakes gummed up with this crap. Try and make sure the bags don't end up moving or touching the wet paint. Could cause a peeling point when it dries. If you're painting with wheels on the truck, about halfway through your cans, move your truck a few feet to make sure you're hitting the wheel from every angle. Try and go lighter with your coats to avoid dripping.
    • Final coat - Let the final coat dry for about 30min -45min, and then when putting wheel back on truck, try and lift from tire and not painted areas. Let cure for 24 hours and you should be good to go to get wet.
    My paint is still on there and going strong. The only thing that is messed up is a few parts where they were rough putting on the new tires. But I pressure wash and all sorts of stuff and it's still on there good.


    Hope this helps, Good luck!
     
    Last edited: Jan 8, 2019
    vwbuggsy[QUOTED] likes this.
  15. Dec 12, 2018 at 5:23 PM
    #35
    Trouble_The_Tacoma

    Trouble_The_Tacoma [OP] Well-Known Member

    Joined:
    Dec 26, 2016
    Member:
    #205749
    Messages:
    2,235
    Gender:
    Male
    First Name:
    Conrad
    The wife drinks a lot of topo chico. ;)
     
  16. Dec 12, 2018 at 7:49 PM
    #36
    vwbuggsy

    vwbuggsy Well-Known Member

    Joined:
    Apr 9, 2011
    Member:
    #54641
    Messages:
    360
    Gender:
    Male
    Clinton, MD
    Vehicle:
    09 DC 4X4 LB Black Sand Pearl
    N-fab steps, Wet Okole Covers, line-x, tint, vent shades, budget stereo upgrades, weathertech floor liners
    Thanks, time to check out some videos.
     
  17. Jun 17, 2019 at 7:06 AM
    #37
    tacom08

    tacom08 Well-Known Member

    Joined:
    Feb 14, 2012
    Member:
    #72831
    Messages:
    804
    Gender:
    Male
    First Name:
    Isaac
    Simpsonville, SC
    Vehicle:
    08 DCSB 2WD Rugged Trail Edition
    Flowmaster Super 10, K&N CAI, bumpers, LED taillights
    I spy 3 sneks
     
  18. Oct 30, 2023 at 9:24 AM
    #38
    Trouble_The_Tacoma

    Trouble_The_Tacoma [OP] Well-Known Member

    Joined:
    Dec 26, 2016
    Member:
    #205749
    Messages:
    2,235
    Gender:
    Male
    First Name:
    Conrad
    Somewhere along the way I added Fia saddle blanket seat covers in burgundy.

    IMG_0849.HEIC.jpg
    IMG_0850.HEIC.jpg
     
    MarX likes this.
  19. Oct 30, 2023 at 9:25 AM
    #39
    Trouble_The_Tacoma

    Trouble_The_Tacoma [OP] Well-Known Member

    Joined:
    Dec 26, 2016
    Member:
    #205749
    Messages:
    2,235
    Gender:
    Male
    First Name:
    Conrad
    August, 2023 got the lift installed. Ironman Foam Cell Pro Stage 2 with SPC Upper Control arms. Had the springs powder coated red. Wasn't gunna do the lime green.

    IMG_3542.HEIC.jpg
    IMG_3543.HEIC.jpg
    IMG_3546.HEIC.jpg
    IMG_3549.HEIC.jpg
     
    MarX likes this.
  20. Oct 30, 2023 at 9:26 AM
    #40
    Trouble_The_Tacoma

    Trouble_The_Tacoma [OP] Well-Known Member

    Joined:
    Dec 26, 2016
    Member:
    #205749
    Messages:
    2,235
    Gender:
    Male
    First Name:
    Conrad
    Here's the truck outfitted for a dove hunt. Ironman also sent me two traction boards in grey for free because the suspension kit took so long to ship. So got $300 worth of stuff for free.99

    IMG_5416.HEIC.jpg
    IMG_3559.HEIC.jpg
     
    MarX likes this.
To Top