

-
Welcome to Tacoma World!
You are currently viewing as a guest! To get full-access, you need to register for a FREE account.
As a registered member, you’ll be able to:- Participate in all Tacoma discussion topics
- Communicate privately with other Tacoma owners from around the world
- Post your own photos in our Members Gallery
- Access all special features of the site
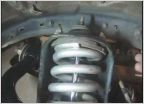 "Bowing" NEW OME Coils? Anyone had this happen?
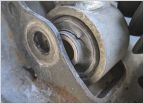 Front clunk/pop/bind noise *solved*
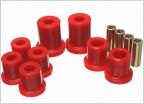 2n gen Lower control arm
 Diff drop for 3.5 inch lift?
 All-pro or dakar?
Tools I'll need to install my kings, rxt's, uca's.
Discussion in 'Suspension' started by Shwankin407, Mar 20, 2020.
Page 1 of 2
Page 1 of 2

