

-
Welcome to Tacoma World!
You are currently viewing as a guest! To get full-access, you need to register for a FREE account.
As a registered member, you’ll be able to:- Participate in all Tacoma discussion topics
- Communicate privately with other Tacoma owners from around the world
- Post your own photos in our Members Gallery
- Access all special features of the site
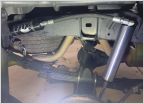 Fox 2.0 setup for mild lift and light offroading?
 Side steps off amazon
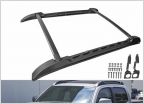 Anyone have success with a low profile, foldable roof rack like this?
 ELECTRICAL PROBLEMS - 2017 Powerless truck
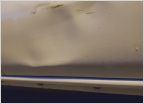 2018 Tacoma Passenger Door Dent
 The Battle Between Appearance & Functionality (and Cost)
Trim Removal. How to? [SOLVED]
Discussion in '3rd Gen. Tacomas (2016-2023)' started by VangaSTL, Jan 14, 2017.
Page 10 of 13
Page 10 of 13


