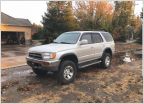
@turbodb's 1997 4Runner Build and Adventures

Discussion in '4Runner Builds' started by turbodb, May 1, 2019.

  1. May 1, 2019 at 10:15 AM
    #1
    turbodb

    turbodb [OP] AdventureTaco

    Joined:
    Feb 9, 2016
    Member:
    #177696
    Messages:
    7,777
    Gender:
    Male
    First Name:
    Dan
    PNW
    Vehicle:
    2000 Tacoma Xcab 4x4 SR5 V6 TRD
    AdventureTaco
    1997 Toyota 4Runner 4WD SR5

    Guess it's time to start a build for this puppy too. As always, you can get the latest news and updates from my build and adventure chronicles
    adventuretaco.com

    I mean, it's really just a 1st gen Tacoma with a topper, right? :rofl:

    [​IMG]
    Orientation
    These topics don’t cover all of the story, but they’ll jump you to specific parts...

    Full list of specs as it sits now:

    Completed Modifications
    1. Appropriate Wheels (4Runner 5-spoke) and Tires (265/75R16 Duratracs)
    2. Installing Tundra Brakes on a 3rd Gen 4Runner
    3. Old Man Emu for Four Corners of the 4Runner
    4. Sliders
    5. Slowly Turning the 4Runner into a Tacoma...New LBJs and OTREs
    6. Roof Rack
    7. Rear Storage and Sleeping Platform

    Planned Modifications
    None at this time. Famous last words.

    Trips
    1. January 2019 - We Go Sledding and @mini.turbodb Didn't Hate It!
    2. May 2019 - "Best Day of My Life" - @mini.turbodb's First Trip in the 4Runner

    [​IMG]

    "Notable in some way" Maintenance

    1. Slowly Turning the 4Runner into a Tacoma...New LBJs and OTREs
     
    Last edited: Jun 5, 2019
    HappyGilmore likes this.
  2. May 1, 2019 at 10:16 AM
    #2
    turbodb

    turbodb [OP] AdventureTaco

    Joined:
    Feb 9, 2016
    Member:
    #177696
    Messages:
    7,777
    Gender:
    Male
    First Name:
    Dan
    PNW
    Vehicle:
    2000 Tacoma Xcab 4x4 SR5 V6 TRD
    AdventureTaco
    September 21, 2018.

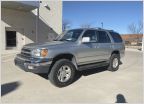
    Well, we're now a two-Toyota family. For the last several months, @mrs.turbodb and I have been talking about getting a 4Runner so that our adventures with @mini.turbodb can be more comfortable for her - the extended cab of the Tacoma becoming a tight space for a growing kiddo.

    A 4Runner - especially an older 3rd gen one - seemed like a good choice. Proven Toyota reliability, a similar platform (and the same engine) to the Tacoma, and four doors! So when this beauty came along, we were quick to go check it out. It's a 1997 with 270,000 miles on it.

    [​IMG]

    Basically stock, it appears to have been well maintained and loved by it's previous family. Our plan is to do the same - leaving it mostly as-is, with only a few minor mods to make it fit our needs. Or at least, that's what we're telling ourselves right now! :wink:

    So, what's in store? Only the following:
    1. Change most of the fluids (engine, diffs, transfer case, brakes, power steering, transmission).
    2. Remove the side steps and replace them with sliders.
    3. Replace the brakes, which are clearly in need of replacing.
    4. Get some new tires. We need something a bit more capable than these passenger-rated tires off a second-gen Tacoma :).
    And that's it for now.

    [​IMG]

    [​IMG]
     
  3. May 1, 2019 at 10:17 AM
    #3
    turbodb

    turbodb [OP] AdventureTaco

    Joined:
    Feb 9, 2016
    Member:
    #177696
    Messages:
    7,777
    Gender:
    Male
    First Name:
    Dan
    PNW
    Vehicle:
    2000 Tacoma Xcab 4x4 SR5 V6 TRD
    AdventureTaco
    We Go Sledding and @mini.turbodb Didn't Hate It!
    January 1, 2019.

    With Christmas vacation in full swing, we've been having a great time. There are lots of new toys to play with around the house, there are activities to keep us busy during the day, and the newly introduced household chores - and associated weekly allowance - have @mini.turbodb in high spirits.

    Oh, to be eight years old.

    But, when @mrs.turbodb suggested that we get bundled up and head up into the mountains to get in some sledding and enjoy the snow, the child was having none of it. "I hate the snow, it's too cold." - The words spilled out of her mouth with such ease that I had a hard time believing that this was the same child who immediately takes off her shoes and socks upon entering the house in the dead of winter, complaining that she's "too hot" after walking 50 feet from the car to the house.

    Obviously - as loving parents - we made the executive decision that we were going anyway because, snow is awesome. So we donned our warmest of clothes, packed up the sled, and took the new-to-us 4Runner on it's maiden off-pavement adventure.

    Our destination was one we've visited before - a little place up I-90 that we seem to frequent on an annual basis for one reason or another - a place we've even led other 4Runners on their maiden adventures. A place that we hoped would have enough snow for sledding and some snow balls, but not so much that it was impassable for the as-good-as-grip-less passenger tires we are still sporting on the 4Runner.

    Things didn't look good at first - as we exited the freeway, there was no snow to be seen, but as the FS road climbed into the mountains, we started to see patches of white - then white on the road - and finally, snowy conditions.

    The 4Runner was doing it. Perhaps not with as much confidence as the Tacoma, but with four wheel drive, it was plodding along OK.

    [​IMG]

    For a while. There are two semi-sticky spots on this trail, the first being just after a water crossing where the road is a bit rutted and so you end up with the majority of your weight on two wheels. As tame as it looks, the 4Runner wasn't having any of that - it's wheels spinning, hunting for traction they couldn't find.

    [​IMG]

    Just look at that rear - all flexed out. Droop for days. Eat your heart out Tacoma! :rofl:

    [​IMG]

    [​IMG]

    Not wanting to get all this way only to turn around, I decided that a little skinny pedal momentum was just what this situation called for - so I rolled back a few feet and gave it the juice. Oh, how I wish I could have caught the looks and screams from the two ladies in the car - though their smiles seemed to suggest that they were enjoying being terrified! :wink:

    We'd made it.

    [​IMG]

    A bit further up the road we came to a long, gentle downhill, curvy section that I knew would be perfect for sledding. It was just steep enough that the kiddo would get going the perfect speed - "so fast" to her, "way too fast" to @mrs.turbodb, and "slow enough that I could run and catch her if I needed to" for me.

    With only about 8 inches of relatively compacted snow, there was just enough that the tire tracks made the perfect sled run - pre-compacted and structural enough to keep the sled on the road for a good 500 feet or so - a 50 second run!

    Everyone had a blast! @mini.turbodb went solo, solo with a starting push, and with all combinations of parents as copilots. We even had one run where we all piled in together, our mass allowing us to reach speeds - judging from the screams - just short of the sound barrier.

    [​IMG]

    [​IMG]


    Eventually, many sledding runs and a few snowball fights later, we decided it was time to call it an afternoon. We piled back into the 4Runner - everyone in high spirits and backed our way down much of the trail, our tires too wimpy to climb up and out of the ruts to turn around. :rofl:

    We did make one pit stop on our way "back(ing) out" - at the small creek we couldn't resist building a snowman for anyone else coming this way - our little white dude guarding the landmark culvert on this trail.

    [​IMG]

    [​IMG]

    [​IMG]

    Then, eventually, we were able to get turned around - the snow shallow enough that even our wimpiest of tires could gain traction on the rocks below - and we continued down the mountain - the snow line clearly visible across the valley.

    [​IMG]

    The trip had been a rousing success. I wouldn't be surprise to hear a little voice around the house bugging us to "do it again." To which my response - of course - can only be, "I thought you hated the snow?!" :wink:

    [​IMG]
     
    Beretta4x4 likes this.
  4. May 1, 2019 at 10:33 AM
    #4
    turbodb

    turbodb [OP] AdventureTaco

    Joined:
    Feb 9, 2016
    Member:
    #177696
    Messages:
    7,777
    Gender:
    Male
    First Name:
    Dan
    PNW
    Vehicle:
    2000 Tacoma Xcab 4x4 SR5 V6 TRD
    AdventureTaco
    What's On Tap for Our 3rd Gen 4Runner
    March 31, 2019.

    Ever since we picked up the 3rd Gen 4Runner back in September 2018, we knew that it needed some work to really be a viable family adventure vehicle. Some of that work is cosmetic, and some is mechanical - but all of it took a back burner to the various trips that we had planned and the winter weather that prevented too much work on any of the trucks.

    But now, things are starting to look up for the 4Runner. Spring is here - or at least threatening to be - and it's time to start getting on the list that I created when we bought this beast:
    1. Change most of the fluids (engine, diffs, transfer case, brakes, power steering, transmission).
    2. Remove the side steps and replace them with sliders.
    3. Replace the brakes, which are clearly in need of replacing.
    4. Get some new tires. We need something a bit more capable than these passenger-rated tires off a second-gen Tacoma :).
    And - of course - there are a few more items that have popped up since we've started driving it:
    1. The interior smells...perfumed. I think two things are needed here: some seat covers, and a thorough washing of the rug. And by thorough, I mean it needs to be taken out and pressure washed. And I wonder if we can somehow was the seats too.
    2. It needs a roof rack. I mean, if we're going to mount the @Cascadia Tents (CVT) Mt. Shasta RTT on it when we venture out, we aren't going to be able to use the OEM rack.
    3. It needs a storage system for the back to hold the fridge, our gear, and provide a sleeping area for @mini.turbodb.
    4. I want to get the lower ball joints (LBJs) changed as preventative maintenance - especially since we'll be taking it off-pavement. I'll likely switch these to the 1st gen Tacoma variant, so that the parts are interchangeable between trucks.
    5. It's got some sort of oil leak, somewhere. This needs more investigation before I even know what the issue is.
    :spending:

    So, that's what's in store for the 4Runner in the reasonably near future. Well, most of it is in store - I did already take care of two of these items already...

    First, all of the fluids got changed before we really started driving it - because it's always good to know that the fluids are in good shape. Second, a few weeks ago, it got some new shoes.

    [​IMG]

    I knew what I wanted here from my previous experience with the Tacoma. I wanted something that would:
    • Fit without rubbing - that would mean that it's smaller, but that's fine for how we'll use this truck.
    • Provide good on- and off-road performance - since this is going to be our daily driver as well.
    • Be C-load, rather than the much heavier E-load that I have on the Tacoma, because I'm getting too old to lift those E-load tires all the time, and because I still care about MPGs.
    With those things in mind, it took me about 7 seconds to decide on the tire I was going to run: Goodyear Wrangler Duratracs, in a 265/75R16 size, and with C-load range. I ran similar Duratracs on the Tacoma for a couple of years and really liked them. They were reasonably quiet on-road and did amazingly well on the dirt and snow - performing flawlessly through The De-Tour, my first two week trip.

    Oh, and while I was at it, I got some new wheels to replace the 2nd Gen Tacoma wheels that looked a bit funky in my opinion - so now I'm running the Duratracs on the same Limited 4Runner wheels that I have on the Tacoma, and they look just as sharp if you ask me. :D

    [​IMG]
     
  5. May 3, 2019 at 8:47 AM
    #5
    turbodb

    turbodb [OP] AdventureTaco

    Joined:
    Feb 9, 2016
    Member:
    #177696
    Messages:
    7,777
    Gender:
    Male
    First Name:
    Dan
    PNW
    Vehicle:
    2000 Tacoma Xcab 4x4 SR5 V6 TRD
    AdventureTaco
    Installing Tundra Brakes on a 3rd Gen 4Runner
    April 1, 2019.

    You know that feeling when you've got a project to do that you're a little apprehensive of because you're not sure if it'll go well, or if you've got all the right stuff to make it happen?

    Well, for once, I wasn't feeling that way! It was a great feeling, and one that I can only hope to have again - perhaps sometime in the distant future when I finally know what I'd doing around these Toyota trucks.

    Today, it was time for a project that I was completely comfortable with - installing Tundra brakes on a 3rd gen 4Runner. See, I'd done this twice before - once on the Tacoma, and on Mike's (@Digiratus) Tacoma. Today, I hoped to complete the entire project in less than two hours - one hour per side - since from everything I knew, it would be an easier upgrade on the 4Runner than it was on the Tacoma.

    And, the 4Runner really needed this. When we bought it, the previous owner mentioned that the brakes were the worst thing on the vehicle. The rotors had warped over time and the whole front end wobbled when the brakes were applied - definitely not a fun feeling. Oh, and there was the time that the driver side caliper stuck - we got a nice wobble at 45mph and a smell "to die for" that let us know that something was "a bit off." :rofl:

    At any rate - I got started as I always do - I assembled the parts and tools that I'd need. For a bunch of reasons - which I covered last time - I once again decided to go OEM on this upgrade. As I've said to many people who've asked about the best way to do this - when you're upgrading your brakes to have more braking power, you want to go with the highest quality, most surface area components you can - and in this case, that means OEM. For even more background, check out this article.

    [​IMG]
    I also got all the tools together that I knew I'd need - there's not much for this project actually, especially on a 4Runner.
    And then - hoping my confidence wasn't misplaced - I was off! And soon, so were the 4Runner wheels. I really do love this Milwaukee impact wrench. I debated for several months whether or not I should get it, and it's one of my favorite tool purchases to date. I smile every time I use it.

    [​IMG]

    Next, it was time to remove the brake line from the caliper. This is the only part of the process that's different on the 4Runner than the Tacoma - the 4Runner has a hard line into the brake caliper where the Tacoma uses a soft line. The 4Runner design is a much better design, and made this part of the process go much easier.

    First, locate the bracket that holds the brake line to the spindle. Using a 12mm socket, remove the single bolt so that the line is free to move. Next, using a 10mm flare nut wrench, remove the hard line from the caliper. When you do this, brake fluid will want to start leaking out, so use a small rubber vacuum cap to seal off the end of the line (Hint: push the fitting up the line so you can get a tight fit on the flared end of the line itself).

    [​IMG]

    [​IMG]

    Having seemingly just started, the job of removing the old components is nearly done! With a 17mm socket, the next step is to remove the two bolts that hold the brake caliper to the hub. I've never had any problem removing these, but some people report that they rust into place. If that's the case for you, I guess you could be nearly done for quite a while. :sorry:

    [​IMG]

    Of course, once you have the bolts removed, just pull that caliper off and keep it oriented so any brake fluid it contains doesn't spill all over your pants. Ask me why. Then, pull off the old rotor as well - you won't need either of these parts again. Or, rather - you'll want to return the calipers to get your core charge refunded, and you can try to see the rotors to your local scrap guy. Or give them to him for free. Or just put them in the recycle bin.

    Or, do what I did - stack them in the garage and hope to forget about them in time.

    [​IMG]

    With all the parts removed, there's one step before installation of the new parts - and that's cutting the dust shield a bit so that the new rotor and calipers fit. This is reasonably straight forward for the most part. Hold the caliper in place and mark on the dust shield where it interferes with the caliper.

    Then, cut that bit off and hit it with a bit of spray paint to prevent rust. Don't spend too much time on this part - get the cut close but it doesn't need to be perfect.

    Oh, and make sure to check the portion of the dust shield that fits "inside" the center of the rotor. That seems to rub sometimes / for some people - but not for others. For me, it's rubbed one of six times.

    [​IMG]

    [​IMG]

    With that done, it's time to start re-assembly. The easiest part - of course - is putting on the new rotor. It just slides right on over the studs, and you should secure it - finger tight only - with two lug nuts, so you can get the caliper installed more easily.

    [​IMG]

    Next, put the caliper in place and secure it with the two 17mm bolts. I finger tightened these first, and then torqued them right down to the speced 90 ft-lbs. After-all, I had no plans to remove them again - and as you'll recall, I was trying to get this done quickly!

    Zooming through the last few steps, it was time to put the new brake pads in and secure them. Having purchased OEM pads and shims, that means I first needed to assemble them, which is easy. It sandwich goes pad - slotted shim - a little grease - solid shim - a little grease. Then I had this nice little sandwich that I could slide into the caliper.

    [​IMG]

    Once I'd done that, it was a simple matter of installing the spring clamps to hold them in place and then using the flare nut wrench to re-attach the hard brake line to the caliper and the 12mm socket to reattach the brake line bracket to the spindle. Oh, and I re-torqued the wheels back on the truck - 89 ft-lbs.

    [​IMG]

    Then, I stopped my stopwatch.

    Well, I looked at the time anyway. 45 minutes. Not too shabby for an old guy. All that was left was to bleed the lines - something that @mrs.turbodb was happy to help with.

    And now, we've got amazing braking on the 4Runner. Even better than the Tacoma, since there's not all the extra armor and gear weighing it down!
     
    CowboyTaco, MR E30 and Digiratus like this.
  6. May 3, 2019 at 8:53 AM
    #6
    Canadian Joe

    Canadian Joe Well-Known Member

    Joined:
    Jan 30, 2017
    Member:
    #209128
    Messages:
    1,050
    Gender:
    Male
    First Name:
    Joe
    Ontario
    Vehicle:
    2016 Tacoma trd off-road ,access cab,MT
    SCS rims 285's OME lift
    We will look forward to seeing your build progress and your adventures with your new rig
     
    turbodb[OP] likes this.
  7. May 6, 2019 at 8:30 AM
    #7
    turbodb

    turbodb [OP] AdventureTaco

    Joined:
    Feb 9, 2016
    Member:
    #177696
    Messages:
    7,777
    Gender:
    Male
    First Name:
    Dan
    PNW
    Vehicle:
    2000 Tacoma Xcab 4x4 SR5 V6 TRD
    AdventureTaco
    Old Man Emu for Four Corners of the 4Runner, with a Twist
    April 2, 2019.

    I like to think that I live and learn. I'm also a creature of habit, and I wonder if I'm starting down the same road I've been down before.

    See, with the Tacoma, I thought long and hard about the first set of aftermarket suspension that I put on it. Originally I wanted to spend a couple hundred dollars. Luckily - and before I spent any money - I realized that I didn't want a block lift, I wanted a suspension lift. So then I did a bunch of research and came up with Toytec BOSS coilovers as a reasonably-priced setup - though quite a bit more than a couple hundred dollars.

    And then, two years and a bunch of experience later, I ditched the Toytec setup for a high-end ADS suspension on all four corners. At a high-end price. I could have saved a bunch of money if I'd just gone that route from the start.

    Fast forward to today. If the 4Runner is going to be our family adventure vehicle when @mini.turbodb is with us, it's going to need some new suspension. We'll need that to support the weight of our gear, and to provide a bit nicer ride on the bumps we'll encounter. Which immediately begs the question - do I go all-out now and put on the high-end stuff, or - like I did with the Tacoma - do I start with something else?

    OK, from the title of the post, those who know about suspension know my decision - but bear with me while I explain how I ended up where I did. Because I'm starting with something else.

    [​IMG]

    The reason I'm starting here - rather than going all-out - is that the plan for the 4Runner is to keep it a bit tamer than the Tacoma. We've found that full-family outings are more enjoyable when we're not wheeling all day, the small one liking to get to a cool spot and then get out and explore, rather than being cooped up in her seat. If I'm honest, I remember that feeling myself - never really caring about the things we were seeing as we drove to our camp as a kid - clearly a deficiency of human children. :rofl:

    As such, I don't need the high-levels of performance, or the adjustability of a high-end racing shock. And, because family adventures are generally fewer and closer to home than some of our longer treks in the Tacoma, I don't think I'll need to worry about annual rebuilds - so that's another place I can save a few bucks.

    So why then did I decide to go with Old Man Emu (OME) and not another brand like Bilstein or even Toytec again? Simple - it was for the simplicity can convenience of it all. OME has several different shock/strut options, as well as several different coil spring options that make it reasonably easy to get the performance you're looking for.

    In my case, I wanted just a little bit of lift (1-2"), a little more weight carrying capacity (for our gear), and a bit of rake in the rear (the rear 1-2" higher than the front). So I ordered The following parts:
    [​IMG]

    All that was reasonably straight forward, but there was a twist. Normally, the front shocks and coils are ordered pre-assembled. There are generally two reasons for that - first, pre-assembly includes a new top plate for the coil - a good idea if the existing top plate is rusted. Second - and more critically - most normal people make the smart decision that they don't want to deal with compressing the coils - a potentially deadly operation with the amount of force needed - to remove the old one from the old shock, and install the new one on the new shock.

    That's normal people. Something I'm rarely accused of. I ordered everything unassembled. And I did it because I'd recently purchased one of these puppies! ::D:

    [​IMG]

    This Branick 7600 spring compressor allows me to compress springs safely, and I got it because I know I'll need to do that often on the Tacoma as I rebuild the suspension on an annual basis. As such, I might as well save the $100 assembly on the 4Runner as well - you know, helping to offset the cost of the Branick. That's called "flawless" male logic.

    At this point, I was ready to go. Or so I thought. I got started on the front by gathering all the necessary tools:
    • A few different size sockets/wrenches (though expensive this is a good kit that has nearly everything you'll ever need)
      • 14mm - for the shock top mount nuts.
      • 17mm - for the lower shock mount.
      • 21mm - lug nuts.
    • Impact wrench (or large breaker bar) - for removing your lug nuts.
    • Torque wrench - to re-torque the lower shock mount and lug nuts.
    I got started by jacking up the 4Runner and removing the wheel, as seems to be the case for a lot of the projects on the trucks - once again adding a smile to the long list of smiles provided by the Milwaukee impact wrench.

    [​IMG]

    Next, it was time to remove the old shock from the truck. I don't know if it was the original, but if it wasn't, it was extremely old. The next few minutes would be very indicative of the rest of my day - if the various nuts came off without being cut, I'd be a much happier dude than if they'd rusted in place.

    [​IMG]

    [​IMG]

    Amazingly, everything came off reasonably easy - another huge win for Pacific coast winters, and the lack of salted roads that cause everything to corrode!

    With the old coil off, it was time for what was easily the most tense few moments of my day - figuring out and using the spring compressor for the first time. Would I kill myself? Only maim? Hopefully neither.

    I got the spring positioned in the compressor and cranked it down. Creaking ensued. Tension (both the spring and mine) rose. And the spring compressed - it was working! I was so relieved that I forgot to snap a photo.

    :anonymous:

    Soon, tension was released from the top cap and it I was able to attempt removal of the center nut that secured the top plate to the strut. It required a bit of heat, but like the other nuts, this one eventually released too - an adjustable wrench used to hold the post stationary while the nut is backed off, and off came the top cap.

    [​IMG]

    [​IMG]

    [​IMG]

    And then, I was left with a little pile of death held in the spring compressor.

    [​IMG]

    At this point, I figured it was a good idea to clean up the top plate a bit - while it was off the truck, I could chase the threads on the posts to remove residual rust, and then get everything ready to install the new OME 90004 Nitrocharger Sport shock into the coil.

    [​IMG]

    Clean up complete, I laid out the new shock, just to ensure that I had all the parts I'd need for the install - or rather, that I knew how to install all the parts that I had (because let's be frank - it was more likely that I'd mess that up than that ARB didn't include some parts ::):.

    So here's what I had: The shock itself, and then the bottom cup on which the spring sits, a new washer, new bushing, old washer, old top plate, new bushing, new washer, new top nut. Perfect.

    [​IMG]

    Assembly was essentially the reverse of removal - the first step was sliding everything into the compressed spring and tightening the top center nut.

    [​IMG]

    Finally, I was able to release pressure on the spring compressor and breath easily again. It had been a huge success, especially given that I hadn't had to change my underwear.

    Back out at the truck with new coilover in hand, I slid it into place and loosely attached the three top nuts to hold it in place while I worked to align the bottom bolt - which of course is rarely an easy thing to do when a truck has it's OEM upper control arms (UCAs) and the stock rubber bushings on both the UCAs and lower control arms (LCAs). In the end, I resorted to a trick I'd also used on the Tacoma - the stock screw jack and a neoprene knee pad positioned in the wheel well, pushing down on the UCA, which in turn pushes down the LCA so that the lower bolt can slide in through the shock.

    Not sketchy at all. Probably even the way they recommend doing it in the Toyota manual. :wink:

    [​IMG]

    At that point, I torqued everything to spec - 47 ft-lbs for the three top nuts, 89 ft-lbs for the lower bolt, and 89 ft-lbs for the lug nuts, and the front suspension was done. It was great, except that the rake on the 4Runner was now backwards - the front higher than the rear by a good amount.

    Some people like it, but personally I think that looks a little goofy.

    [​IMG]

    <span style="font-size: 10pt; color: #808080;">Photo © </span><span style="font-size: 10pt; color: #808080;">Joshua.Sindy</span>

    So it was time to do the rear. Something that would turn out to be not-quite-as-straight-forward as the front. Go figure. I started with the tools I thought I'd need:
    • A few different size sockets/wrenches (though expensive this is a good kit that has nearly everything you'll ever need)
      • 12mm - for the sway bar mounts.
      • 14mm - for the shock top mount nuts.
      • 17mm - for the lower shock mount and lateral bar.
      • 21mm - lug nuts.


    Eventually, I discovered that I also needed
    Unlike the front, the rear end of a 4Runner really needs to be done as a whole - you can't do one side and then the other like you can on the front - because the solid axle needs to be able to drop pretty far down in order to get the springs in/out of each side. So, the first step is to jack up the whole back of the truck and get both wheels removed. As you do this, make sure to support the frame on jack stands, and the rear diff with your floor jack - you don't want it putting too much strain on the rear brake line when you remove the shocks from the axle.

    [​IMG]

    Then, to make your life much easier, I recommend removing the sway bar as well. You don't need to remove the sway bar links, just remove the sway bar itself from the rear axle - two bolts on each side - and then pull the sway bar out of the way.

    You may also need to remove the lateral bar from the attachment point to the passenger side frame - that will allow you to drop the rear axle just a bit more - I needed it lower on the driver side to squeeze in the spring. Of course, that led to a minor different issue for me, but I'm getting ahead of myself.

    [​IMG]

    [​IMG]

    With the truck up in the air and the sway bar (at least) removed, the next step is to remove the old shocks. The bottoms are easy - remove the single 17mm bolt and pry the shock off of the mounting post. If it gives you trouble, a pitman puller can make this an easy process.

    [​IMG]

    [​IMG]

    Then, it's time for the top. And if you're anything like me, you'll be puzzled for a bit. It is not immediately obvious how to remove the top of the shock. In the end, I had to internet it.

    There's no easy way to say this - Toyota really screwed the pooch here. The upper shock mounts are nearly impossible to access - they are recessed in a cup that's up next to the body, collecting dirt (and therefore rust) and stymieing any attempt to remove the top nut of the shock unless it's never gotten wet.

    So the right thing to do is to cut it out. Get a grinder - or even better a sawzall - and figure out the best way to get an angle on the very top of the shock - right where it goes into the cup. The idea here is to cut the post off of the top, so that the shock falls to the ground, and you can just pull the post out of the cup.

    [​IMG]

    For me, that meant unclipping several of the ABS sensor wire clips and moving that away from the cutting area. Only then did I feel confident that when I used the sawzall on the driver side and the grinder on the passenger side, that there wasn't anything in danger of being cut that shouldn't have been.

    [​IMG]

    [​IMG]

    A bit of burning-rubber-stink later, and you should have the shock free from the upper mount - the shock body will fall to the ground, and you can retried the top of the post from the cup (along with a bunch of dirt). Laying everything out, this is what I ended up with:

    [​IMG]

    Knowing I was close to getting everything disassembled, I plowed ahead - lunch be damned. The old springs were pretty well shot - likely the original on the truck - and so it didn't take much effort to angle the rear axle a bit in order to slide them out.

    [​IMG]

    From there, it was a reasonably simple matter of re-assembly in the reverse order. I pulled the bump stops out of the old coil springs and inserted them into the tops of the new springs before forcing the new springs into position on the rear axle. This was the point where I needed the lateral bar in order to get the driver side of the axle to drop low enough to fit the new spring, but it went easily enough once that was done.

    Then, the new shocks simply bolt in place - the only thing to be careful of is that you've got all the parts installed in the right order: lower bushing in the lower eye of the shock; shock, capture washer, bushing, capture washer (with small lip), &lt;evil vehicle cup mount&gt;, bushing, capture washer, top nut.

    [​IMG]

    I found it easiest to install the shock on the lower mount first (torque to 72 ft-lbs), and then to release the compression clamp that it shipped with. As the shock uncompressed, guide it up into the evil cup mount at the top of the frame, and then slide the second bushing and capture washer on before tightening down the top nut until it bottoms out.

    Then, re-attach any ABS clips you've removed as well as the sway bar (assuming you're keeping the sway bar on your truck). Finally, grab the 17mm bolt that holds the lateral bar in place and re-insert and tighten it to spec (72 ft-lbs).

    Or, in my case, don't. :annoyed_gaah: For the life of me, I couldn't get the holes to align. I tried several different things ranging from ratchet straps to the floor jack to get them back into alignment, eventually wondering, "Wonder what happens if I drive it without it being attached? Probably the axle slides out of the truck. Cool."

    But then, I realized I had a hammer for every screw. I pulled out the Tacoma and hooked up a tow strap. That was more than enough force to pull everything back into place!

    [​IMG]

    And with that, I was done. New suspension all around on the 4Runner - now, one step closer to family adventure vehicle, and also ready for an alignment. And alignment that still needs to happen, now three weeks later!

    Say it with me now... what. a. slacker.

    [​IMG]
     
    CowboyTaco likes this.
  8. May 8, 2019 at 7:13 AM
    #8
    turbodb

    turbodb [OP] AdventureTaco

    Joined:
    Feb 9, 2016
    Member:
    #177696
    Messages:
    7,777
    Gender:
    Male
    First Name:
    Dan
    PNW
    Vehicle:
    2000 Tacoma Xcab 4x4 SR5 V6 TRD
    AdventureTaco
    Fabricating Sliders for the 4Runner
    January 9, 2019.

    With winter here and therefore the weather a bit crappier, it's a generally a good time to take stock of the truck and perform the maintenance and modifications that will keep it going strong for another year. This year however is a little different - there's not just one vehicle that needs attention - there are two!

    In fact, the still relatively new-to-us 4Runner might even be the more important vehicle to get right, since it'll be the one we take when we venture out with @mini.turbodb.

    There are only a few things on tap for the 4Runner since it won't be our extreme #instaexpedition mobile, and the first of those things is one I'm not sure we'll really ever use for their intended purpose: sliders. However, we (and especially the little one) will use them all the time for convenience of getting in-and-out of the truck, and if we're going to have "steps," they are going to be functional (damn it!)

    At any rate, I'd picked up a weld-yourself kit of steel pipes and plates way back at the beginning of November 2018 (gasp, two months earlier) and I figured that a rainy day was as good as any to get them positioned, welded up, and installed.

    Of course, I was getting ahead of myself and overestimating the amount of work I could do in a day - nothing new, for sure.

    I got started by forgetting to take any photos of figuring out the position of the sliders on the side of the 4Runner - a big part of the reason you're reading all this text. See - most of the pieces just weld together, but I had to figure out how far out from the frame I wanted the sliders to sit.

    I knew I wanted them closer in (tighter) than on the Tacoma, but I still wanted them protruding enough to be used as steps, and platforms for accessing anything stored on the roof. At any rate, I eventually figured out the necessary length for the legs and got to cutting.

    [​IMG]

    Patting myself on the back for remembering to take a single photo of perhaps the most boring part of the build, I promptly forgot to take photos again, and got to tacking and welding the various pieces of the sliders together. It was only when I got to the part of welding the legs onto the main slider that I realized - oh right, my camera is sitting over there for a reason.

    Luckily, this was an interesting part of the build, so I proceeded to take a crappy photo showing how I used a couple of triangular blocks of wood to hold the slider in the right position to weld on the legs - the welding table serving as a plane to keep them all perfectly aligned.

    [​IMG]

    That worked well, and I proceeded to tack each leg in four places (at 90º's to each other) so that as I fully welded the leg, I wouldn't get any deformation in one direction or another. Then I moved the sliders to the ground and proceeded to continue welding. Once again, picture-less.

    [​IMG]

    With the legs secured, the next order of business was positioning the frame plates - a task that required careful balancing and alignment - so I fetched @mrs.turbodb to hold the slider while I once again tacked everything in place.

    [​IMG]

    Further welding ensued and as is often the case, it wasn't until I had only 3" of weld remaining when my spool of welding wire ran out. Luckily I'd purchased an extra spool and so it was a quick change to get up and running again - much nicer than having to run to the store, or order something online!

    In no time, the sliders were completely welded and to my surprise, they looked decent. I mean, there might still be a couple little blobs of pigeon poop on a couple joints, but many of them look like they were done by someone with eyesight. And, even better - all the bits that are supposed to line up, and be planar with each other, are!

    It's a miracle really, I'd say.

    [​IMG]

    Of course, by now it was starting to get dark and it was clear that there was no possible way I was going to get these things primed, painted dried, and welded to the 4Runner in the 39ºF rainy weather (perhaps I was just a tad optimistic with what I could accomplish earlier in the day) so I decided this would be a good place to stop for the day.

    Plus, it would let me stew on a decision I'd been avoiding: spray paint or powder coat?

    I knew I wanted powder coat - not for the bottom of the sliders, those will get chewed up by rocks over time no matter what, but it'd be nice to have the tops powder coated so that as people step in-and-out of the truck, their feet don't wear off the paint - which would surely happen with spray paint. But powder coat here is expensive. The cheapest of the three quotes I'd gotten was $300 - significantly more than I'd paid for the kit in the first place, and of course nearly $300 more than spraying them myself.

    But then, as I was resigning myself to a life of re-spraying the sliders where foot traffic wore off the paint, I got one more lead on a reasonably-priced, quality powder coater - Carl, of . He was awesome, coming in at less-than-half of the next highest bid and so I arranged to take the sliders his direction at a time convenient for both of us.

    - - - - -​

    April 4, 2019.

    It wasn't for a couple months that I could get back out to Carl's - the tough life of trips and whatnot getting in the way. But when I finally did in early April, I couldn't have been happier with the result. He'd clearly done good prep and the result was fantastic. And now, I was finally ready to install the sliders on the 4Runner.

    [​IMG]

    First, I positioned them. I knew that I'd have to do this a couple times, since I wanted them relatively tight to the body - this first positioning allowing me to mark the body pinch weld so I could notch it where the slider legs would connect the frame and slider rails. I found that fully bending the pinch weld where I'd notched it was easiest done with a 2x4 stood on-end, on my floor jack, essentially pressing the pinched steel up into the body of the 4Runner.

    [​IMG]

    [​IMG]

    Pinch weld taken care of, the sliders went back into place and I prepped the frame and tacked them in several places. I wanted to make sure that they'd clear everything (doors opening and closing, etc.) before fully welding them on. To my amazement, I'd seemed to have measured correctly and they fit just fine - enough, but not too much room between the sliders and the body, and the bottom of the doors. We all get lucky sometimes.

    [​IMG]

    With everything seemingly right, I finished welding - which, by the way, I really don't enjoy downhill mig - I much prefer uphill and once again got everything cleaned up before spraying any remaining raw metal with a bit of paint.

    [​IMG]

    [​IMG]

    [​IMG]

    And with that, we had sliders. Or steps, if we're being honest with ourselves. :rofl:

    [​IMG]
     
    sawbladeduller and CowboyTaco like this.
  9. May 13, 2019 at 9:34 AM
    #9
    turbodb

    turbodb [OP] AdventureTaco

    Joined:
    Feb 9, 2016
    Member:
    #177696
    Messages:
    7,777
    Gender:
    Male
    First Name:
    Dan
    PNW
    Vehicle:
    2000 Tacoma Xcab 4x4 SR5 V6 TRD
    AdventureTaco
    Slowly Turning the 4Runner into a Tacoma...New LBJs and OTREs
    April 23, 2019.

    It's been a busy few weeks getting the 4Runner whipped into shape mechanically. As I've said before - I knew there were a few things to do when I bought it, and I felt like it was easily accounted for in the purchase price of the vehicle.

    The last of those mechanical things was one that I wanted to do out of an abundance of caution - preemptively replace the lower ball joints (LBJs). These are a part that's known to fail - and catastrophically - on 3rd gen 4Runners, and since I had no idea when (or if) the previous owner last replaced them, I figured that it'd be good to get mine into a "known" state.

    [​IMG]

    That, and I wanted to perform a little experiment - I wanted to install some 1st gen Tacoma LBJs on the 4Runner. :spy:

    "Why?" You may ask, "would you ever want to do that?"

    My answer would be twofold:
    1. Convenience. Because the LBJs are a known failure point, whenever I'm out on an adventure, I like to carry a set of trail spares. These are just my original Tacoma LBJs - which, while used, are definitely be in good enough shape to get me home. And, if I could carry those Tacoma LBJs with me when I'm in the 4Runner, that's more convenient than having a second set to lug around there.
    2. Curiosity (and a possibly better part; but mostly curiosity). I've heard a rumor that the Tacoma LBJs are stronger (or at least beefier) than the 4Runner variant. Not by much, but a little. Before this experiment I had no idea if that was the case, so I figured this would be a good way to find out.
    As one does - having already made the decision - I figured a bit of research was in order to try to understand if it would work. And - of course - I discovered that switching out to Tacoma LBJs wasn't a single-part swap, and that there could be a side effect.
    • To swap the LBJs, I'd also need to replace the outer tie rod ends (OTREs) since the joint between the two is slightly different between the Tacoma and 4Runner.
    • Word on the street was that turning radius could be affected due to OTRE interference/contact with the sway bar at full lock (or rather, limiting full lock).
    Both seemed reasonable to me - after-all, new OTREs just meant a few more bucks into the bottomless black hole of truck costs, and the turning radius of the 4Runner is already so much better than the Tacoma that even if I lost a bit of radius, I'd still feel like it was amazing.

    It's settled then.

    So, I gathered the requisite parts. The LBJs were easy - I knew I was going with OEM there, since the aftermarket ones generally lead down a road to trouble. I ordered a left and right using the following part numbers since these come with new bolts as well, where the other part numbers don't (L: 43340-39585; R: 43330-39815). For the OTREs, I'd heard from Zane @Speedytech7 that I could get Japanese made 555 versions in ACDelco Professional boxes for about half the price of OEM (L: 45047-39175;R: 45046-39295), so I ordered a left (ACDelco: 45A0832) and a right (ACDelco: 45A0833) as well.

    Everything arrived, and proceeded to gather dust for a month in the living room. Tough life when trips and adventures get in the way!

    [​IMG]

    Now, an astute reader may notice a couple things in that photo. First, those specific LBJ part numbers do in fact come with new bolts. Second, that passenger (right) OTRE doesn't look like any 555 part I've ever seen. In fact, I'm told it's a Mevotech - which I've never heard of but is apparently reasonably high quality as well.

    I contemplated and balanced my OCD of having two different OTREs on the 4Runner with the common sense knowledge that these parts would work just fine, and eventually decided to install everything and not go to the trouble of tracking down an actual 555 part to replace the Mevotech.

    And with that, I gathered the necessary tools to do the job:
    • 14, 19, 21, 22, and 24mm sockets - to remove the lug nuts, LBJ from the lower control arm (LCA), and OTRE from the LBJ.
    • A pair of 8" and 10" adjustable wrenches to loosen the OTRE jam nut.
    • An impact wrench to make removal of castle and other nuts easier.
    • OTC 6295 Front End Service Set - to easily separate the LCA, LBJ, and OTRE.
    • A torque wrench for re-installation of critical components.
    • And of course a floor jack and jack stands.
    My first order of business after jacking up the truck and taking off the wheel, was to take a couple of measurements between stationary components on the truck and the dust shield - I knew I was going to need an alignment when this was all done, but I hoped I could get things "mostly" realigned by keeping the measurement consistent in the transition from old to new.

    [​IMG]

    [​IMG]

    Then, it was time to get out my favorite tool in the shop - the Uga-Uga - a Milwaukee Mid-Torque Impact Wrench. This thing makes me feel young again it works so well, so I use it as much as I can. In this case, to remove the castle nut holding the OTRE and LBJ together.

    [​IMG]

    Next, the smaller Pittman Puller in the OTC 6295 Front End Service Set makes quick work of separating the OTRE and LBJ. A hint here for anyone who doesn't know - leave the castle nut loosely threaded onto the OTRE when you do this, and it will keep the joint from exploding when it's pressed out.

    [​IMG]

    The final step in removing the OTRE is loosening the jam nut that secures it to the inner tie rod. This was by far the hardest part for me since I was unable to use the Uga-Uga - thereby making me feel each and every one of the years that constitute my age. I even had to resort to some penetrating fluid and a bit of heat; these were clearly on there too tight!

    [​IMG]

    [​IMG]

    From there, the only thing left to do is remove the LBJ from the LCA. I started by removing the castle nut in the same was as I had the one on the OTRE - Uga-uga and then the larger Pittman Puller from the OTC kit.

    [​IMG]

    That leaves just the four, 14mm bolts to remove from the LBJ - assuming you still have all four, since they have been known to work their way out, a key component to failure!

    [​IMG]

    With everything apart, I was excited to take a look at the standard equipment from the 4Runner and compare it to that from the Tacoma. Would the Tacoma LBJs really be heftier than the 4Runner, or was it all just internet bunk?

    [​IMG]

    [​IMG]

    [​IMG]

    What you can see reasonably clearly - I believe - is that the ball joints in both 4Runner and Tacoma LBJs are the same! But, we can't bust the internet myth entirely - on close inspection, it's clear that the stud on the Tacoma OTRE that connects it to the LBJ is in fact bigger than it's 4Runner counterpart.

    Assuming - as the internet tells us - that size does matter :gossip:, the Tacoma assembly may be slightly stronger, just not in a way that's likely to make much difference - since if the ball joint goes, I don't think any size OTRE connection is going to keep your wheel from eating your fender.

    Just sayin'.

    OK, from here, everything is reasonably straight-forward. And yes, I know it was up to this point as well - but there is one twist at this point - we'll get to that when installing the OTREs.

    Start by installing the new Tacoma LBJs - they bolt right in using the new bolts. I also recommend just a bit of blue Loctite (242), for good measure. Torque the four, 14mm bolts to 59 ft-lbs and the castle nut to 103 ft-lbs + any slight additional tightening necessary to insert the cotter pin (Note: these are Tacoma torque specs, since this is a Tacoma part).

    [​IMG]

    Now, it's time for the OTREs. The strange bit here is that in order to get them to fit without interfering - at all, as far as I can tell - with the sway bar links, is that you have to install them on the opposite side of the 4Runner than you do on the Tacoma. That is, what goes on the driver side of the Taco goes on the passenger side of the Runner.

    It's weird, yes. But it works. And I've learned not to argue when it works.

    [​IMG]

    Get the OTRE threaded in until your measurements to the dust shield match those that you got before anything was disassembled. They'll never match exactly, but if you're close enough, it'll be fine to get to the alignment shop. Toque the castle nut to 67 ft-lbs and the jam nut "good and tight, but not so tight that the next guy will need a torch."

    Trust me on that one, too tight makes a guy feel weak. I mean, that's what I've heard anyway.

    With that - well, and re-installation of the wheel (89 ft-lbs on those lug nuts) - I was done! My 4Runner had new parts and I now had the comfort of knowing that even more of the two trucks were the same - one less thing for me to remember when I go to order parts in the future!
     
  10. May 21, 2019 at 8:33 AM
    #10
    turbodb

    turbodb [OP] AdventureTaco

    Joined:
    Feb 9, 2016
    Member:
    #177696
    Messages:
    7,777
    Gender:
    Male
    First Name:
    Dan
    PNW
    Vehicle:
    2000 Tacoma Xcab 4x4 SR5 V6 TRD
    AdventureTaco
    Building a Roof Rack - Measure Once, Drill, Swear; Measure Twice...
    May 3-5, 2019.

    If you're going to turn a 4Runner into a family adventure vehicle to replace the Tacoma, one thing is for sure - it's going to need a way to carry the CVT @Cascadia Tents Mt. Shasta that we sleep in every night. With an Exped Megamat 10 Duo, it's some of the most comfortable sleep I've had, really.

    So with most of the mechanical work done for now, I figured the next bit of work was to figure out the roof rack situation. I generally start with a mid-level design for these kinds of projects, but this time I just wasn't feeling it for some reason - ending up at essentially this.

    [​IMG]

    I started by doing something that I maybe should have done before even buying the 4Runner - some research to see if the roof rails from 1997 were even rated to hold the weight of a modern day roof top tent (RTT). To my relief, the OEM crossbars are rated at 165 lbs of dynamic load, and all the aftermarket racks I could find out there had load ratings of 200-300 lbs, meaning that the rails attached to the roof using five of these riv-nut looking anchors were probably strong enough.

    [​IMG]

    Whew. That was going to have been an expensive lesson if we'd been unable to use the tent!

    At this point, I had two options - buy something or build something. I wanted a rack just large enough for the tent (not a full-length rack) and in the few-hundred dollar range. And, from a design perspective, I knew I wanted something reasonably sleek - I didn't want to see big bulky bars running around up on the roof.

    A quick look around showed that I didn't really love the designs or prices of the few after-market options. Prinsu always seems to have nice designs, but I could nearly purchase another 4Runner for the price. The only possible option I really found was Rocky Mountain Racks - the design of their Antero half-rack along the lines of what I was thinking - alas, they no longer made it, opting to focus solely on the full-length model.

    So that brought me to build. And really, if you know me at all, you know that's the option I preferred anyway. The only problem was: how to do it? I knew that it'd have to be relatively light given the load limit on the roof and that ruled out my usual steel construction - it would need to be aluminum.

    My very first order of business then was to order some 1"x2" extruded aluminum cross-bars that would build up the base I could mount the tent to. Since these would be the heart of the system, I figured it would be a good idea to have them take up space in the living-room-truck-part-storage-area for 6 months or so. Note: @mrs.turbodb didn't agree that this was a good idea.

    [​IMG]

    Next, I'd need to figure out how to attach it to the roof. I thought about trying to bend some aluminum for the feet, but ultimately decided that it'd be easier for me to weld up some steel feet. All I needed to do was to figure out the exact right angle to make the top (which would attach to the aluminum cross bars) and bottom (which would attack to the roof rails), and then somehow make sure those angles were correct even after the heat of welding.

    A challenge if I ever heard one... And yes, I fully realize that may simply show my lack of experience - don't burst my bubble.

    At any rate, I eventually realized that if I placed a block of wood on the roof rails, and then placed a level across the roof of the truck (itself held off the roof by approximately 2" blocks), that I could trace the line where the level crossed the wood. That line, in conjuction with the bottom of the block on the roof rail would be the two angles I needed for my brackets.

    Of course, in my excitement and celebration of intelligence, I took exactly no photos. So, here's a diagram.

    [​IMG]

    Next, it was time for me to gather the materials. I didn't have any good flat bar laying around, but I did have a length of 2.5" angle that was 0.25" thick, so I figured I could get the pieces I wanted out of that for a total cost of free. Nice.

    [​IMG]

    With all my little bracket pieces in hand, I knew the main challenge was going to be welding them up in a way that they maintained the correct shape. I'd need some sort of jig. So I laid everything out on a piece of rect tube, using the piece of wood I'd drawn the angles of the roof on and the corners I'd cut off the piece of angle to a jig.

    A few tacks and it was ... ugly. But also hopefully functional

    [​IMG]

    [​IMG]

    From there, I proceeded to tack everything up in several places in order to prevent movement during the full welding, and then decided that I'd even do as much of the full welding in the jig as I could - both as practice with downhill and to keep everything stable.

    [​IMG]

    To my surprise - yes, I'm still easily surprised when it comes to metal fab - I seemed to stumble through successfully. Once ground, the brackets looked like a single piece. "Oooo, those are pretty." -@mini.turbodb

    [​IMG]

    The drill press made quick work of the necessary holes* for the cross bars and roof rails, and then - with great enthusiasm, as I'm sure was the case the first time I got to use spray paint when I was a kiddo - I got some help getting them primed and painted.

    * I just wished I'd measured their location twice before drilling.

    [​IMG]

    Once the paint had a day or so to dry, I went to test fit one of the cross rails so I could start on the rest of the rack and that's when I discovered that I'd drilled the holes on the wrong ends of the bracket. That is - the hole spacing on the end which sits on the roof was drilled for the end which bolts to the cross rail and vise-versa.

    :facepalm:

    As a woodworker I know better. Measure twice, cut once.

    I figured that the best thing to do at this point was to fill in the holes rather than try to make entirely new brackets - the only downside being that I'd have to regrind and repaint everything. Grrrr. But, no use crying over spilled milk as they say, and pretty soon, I was once again ready to make forward progress.

    [​IMG]

    [​IMG]

    To make the side plates, I'd picked up a remnant piece of 3/16" aluminum the last time I'd been to the steel yard - my thought being that I could use my woodworking tools to create the shape I wanted. To make things easier, I started with a piece of 3/4" plywood to create a template - forming the wood much easier (and less expensive) than using the sheet aluminum right off the bat.

    Tracing and cutting, cutting and sanding - it didn't take long to arrive at a shape I liked that followed the lines of the roof and would provide a bit of visual interest for the rack.

    [​IMG]

    [​IMG]

    Finally, the moment of truth - time to start cutting aluminum. First, roughly on the tablesaw. Let me tell you - aluminum chips flying up and hitting you in the face is way different than sawdust! Once that torture was over, I headed over to the bandsaw to get the gentle curves.

    [​IMG]

    [​IMG]

    Finally, I clamped the plywood template to the roughed-out side plate and used the router with a flush-trim, templating bit to get the shape just-so, and the wire brush on the angle grinder to give it a nice brushed look.

    [​IMG]

    [​IMG]

    Holy smokes - this might actually work. And that would be totally awesome.

    I grabbed all the parts and headed out to the 4Runner, which had been patiently waiting for me for a few days - this project, like essentially all others, taking longer than I expected given the fact that life continues even when projects aren't complete! ::):

    [​IMG]

    I made quick work of removing the OEM rack and made a mental note to pressure wash the roof of the 4Runner. It was a mess up there - lots of pine needles and pollen that don't exist around our place, so likely from the previous owner - probably not cleaned in years!

    [​IMG]

    And then, it was just a few M6 stainless steel bolts to secure the feet to the roof rails, some ¼-20 stainless carriage bolts to secure the feet to the cross bars, and ¼-20 stainless hex bolts to attach the side plates to the cross bars.

    [​IMG]

    [​IMG]

    Came out pretty reasonably if you ask me. And it's sturdy! I have only a small amount of lingering doubt that it won't be up to the task of holding the tent. ...which I still need to figure out a mounting solution for.

    But that should be "easy." :rofl:
     
    CowboyTaco likes this.
  11. May 28, 2019 at 10:19 AM
    #11
    turbodb

    turbodb [OP] AdventureTaco

    Joined:
    Feb 9, 2016
    Member:
    #177696
    Messages:
    7,777
    Gender:
    Male
    First Name:
    Dan
    PNW
    Vehicle:
    2000 Tacoma Xcab 4x4 SR5 V6 TRD
    AdventureTaco
    4Runner Organization and a Bed for @mini.turbodb
    May 7, 2019.

    Roof rack built, we now had a place for @mrs.turbodb and I to sleep, but what about the whole reason we decided to get the 4Runner in the first place? We wanted to have something more comfortable for @mini.turbodb!

    The idea was for her to sleep in the back of the 4Runner - "downstairs" as she likes to call it - but for that to work, I needed to make the back storage area just a little higher so that it would be level with the folded down back seat.

    Not only that, but I knew that we'd want a nice place to store the 50 qt ARB Fridge/Freezer, and it wouldn't be bad to get a flat work surface for making meals and whatnot on when we were in camp.

    With those things in mind, I set out to make what I thought would be the perfect organization platform - functional, reasonably inexpensive, and as light as possible. To that end, I decided that the construction would be primarily ½" shop-grade Baltic Birch plywood. This would be lighter and less expensive than ¾" ply, and would also be plenty strong with it's 7-layer (but really 5 + veneers) construction. A rough estimation suggested that one sheet would be more than enough.

    [​IMG]

    [​IMG]

    My next order of business - having once again decided that I would wing the design as I had with the 4Runner roof rack - was to start measuring the space where the organization platform would live. I broke out my favorite trusty tape measure and a pencil and paper and started writing down numbers.

    No, not random numbers. The size of the rear storage area.

    [​IMG]

    As I was measuring, I realized that I was completely wasting my time. Toyota had done this for me already - or rather, they'd done it for all of us, and likely other folks had realized it well before I had. So I stopped measuring and headed back into the shop, with the perfect template for what I planned to build!

    [​IMG]

    A bit of tracing and it was time to cut. At approximately 40-inches in depth, the first cut was easiest with the track saw, and the rest were a combination of track and jig saw - close to the line on the curves, but leaving just a hair of material that I removed with the belt sander. Yes, I was approaching this a little more precisely than necessary.

    [​IMG]

    [​IMG]

    A quick test fit showed that what I'd created was perfect - it fit into place and wouldn't slide around. And, it was still about half-an-inch lower than the folded-down back seat. Perfect, since the next steps involved adding a bit of height.

    [​IMG]

    First though, a piece of maple edging. While this is likely not really necessary - since who cares if this thing gets a little banged up - I liked the idea of providing a bit of protection for when people slide things in and out of the back of the 4Runner. Glue and a few pin nails held this in place nicely.

    [​IMG]

    Oh, and I should mention at this point - it's simply amazing how much faster it is to build things using wood as opposed to metal. Definitely my favorite medium despite all the metal fab I've been doing of late.

    With the edging on, the next step was to install a few 9/16" runners on the bottom of the panel. The purpose of these was threefold:
    1. Raise the panel approximately ½" so that it was flush with the back seat. (Bear with me, I know I'm repeating myself.)
    2. Provide some additional thickness for the drawer supports (that would hold the ARB fridge) to screw into.
    3. Provide a small void under half of the panel for a slide-out table. More on that shortly.
    [​IMG]

    With the runners in place, the next order of business was building the pull out "drawer" for the fridge. I modeled this off the one I built for the Tacoma since it's worked so well (with minor modification). The only difference on this one is that I decided to rabbit the bottom into the drawer sides for a bit more strength and rigidity. So I quickly machined some maple bits (for strength) and got ready to put everything together.

    [​IMG]

    A few screws to hold the drawer sides together, a few more to hold the drawer rails to the platform, and finally even more to attach the drawer slides to the drawer sides and rails and I was nearly done. The only thing left to do - cut a simple piece of plywood that could pull out as a work surface.

    [​IMG]

    And with that, it was time to test it out again. Or really, place it in its final location in the back of the 4Runner.

    [​IMG]

    One of the quickest projects since it was made of wood, this is one that I think we'll get a ton of use out of. And, perhaps most importantly, @mini.turbodb loves it. And she cant wait to get setup "downstairs."
     
  12. Jun 5, 2019 at 10:06 AM
    #12
    turbodb

    turbodb [OP] AdventureTaco

    Joined:
    Feb 9, 2016
    Member:
    #177696
    Messages:
    7,777
    Gender:
    Male
    First Name:
    Dan
    PNW
    Vehicle:
    2000 Tacoma Xcab 4x4 SR5 V6 TRD
    AdventureTaco
    "Best Day of My Life" - @mini.turbodb's First Trip in the 4Runner
    May 18, 2019.

    With all the recent work on the 4Runner, I wasn't the only one who wanted to put it all to the test. Upon seeing the storage/sleeping platform, @mini.turbodb had declared, "We need to go camping right away!"

    I don't know if she's been well-trained or it was just a wrinkle in the space-time continuum, but it was music to my ears.

    So, we found the first weekend that we possibly could and scheduled a single night camping trip to one of our favorite "quick getaway" spots outside Leavenworth, WA. And then we watched the weather. As the weekend drew near, the forecast steadily improved until it was mostly cloudy with a bit of rain. Not ideal, but better than wish-we-weren't-here-'cause-rain-all-the-time.

    Our plan was to head out Saturday around mid-day, after @mrs.turbodb wrapped up a few morning engagements, and to grab lunch at one of our favorite Mexican spots in Monroe on our way to camp.

    The morning was going reasonably well as @mini.turbodb and I got things ready to go - the tent loaded up on the top of the 4Runner, sleeping and cooking gear into the storage area, and the fridge full of two whole meals - pasta for dinner and cereal for breakfast.

    And then, with an hour before @mrs.turbodb would be back, we were done. Never short on energy, @mini.turbodb reminded me that she would really like a bench/platform in her favorite climbing tree - and that we might as well get that taken care of while we waited.

    Might as well.

    We found the perfect spot and I worked out the logistics and the day was off to a great start.

    [​IMG]

    It wasn't long before @mrs.turbodb showed up, and in high spirits we all piled into the 4Runner and headed for lunch. A few minutes onto the freeway, a voice piped up from the back seat:

    As hard as that was for us to argue, we inquired as to what exactly made this the "best day?" The answer of course should have been obvious - a brand new platform in her tree and she got to go camping to her favorite spot and she got to sleep in the 4Runner for the very first time.

    I mean seriously. Duh!

    90 minutes later however, that same voice declared:

    How quickly a boring, 2-hour car ride can change things!

    At any rate, as we pulled into our camp site, I was relieved to find the tent still attached to the top of the 4Runner - the roof rack apparently strong enough to keep it from flying away at highway speeds.

    [​IMG]

    I wasn't however thrilled with the condition of the cover. One of the benefits of having the tent behind the cab of the Tacoma is - apparently - that all of the bugs on the highway hit the jetstream of the cab and either die on the windshield or fly over the top of the tent. Not so on the 4Runner.

    Regardless, I set about deploying the tent - a familiar and yet more-difficult task given it's height several feet higher off the ground - as @mrs.turbodb helped @mini.turbodb get her own sleeping situation arranged in the back of the truck.

    [​IMG]

    [​IMG]

    [​IMG]

    Then - of course - it was time to explore! We have several favorite spots along the river, and we visited them all. I'd snuck in my Muck boots, and with the creek higher than we'd ever seen it, I took the opportunity to mention that I was apparently the only one who could make it to one of our favorite beaches. :evil: Not that it mattered - the entire thing was under water.

    [​IMG]

    [​IMG]

    We eventually found ourselves at a nearby bridge, the water roaring beneath us, and the clouds finally parting - briefly - above us.

    [​IMG]

    By now, @mini.turbodb was excited for pasta - her favorite - and we were ready to relax back at camp. As @mrs.turbodb got dinner ready, I set about making a fire - a reasonably easy task given the fact that we were the first ones to camp here this year, so there was plenty of dead wood to pile high in the pit

    And - naturally - pine cones for @mini.turbodb to collect and throw in the fire.

    [​IMG]

    Dinner and fire tending dragged on well past one of our bedtime, but when bed is as exciting as the back of the 4Runner, it's not really that big a deal when you're told that it's extra late and time to hit the sack.

    We enjoyed the fire a bit longer as the last of the light left the sky - still mostly cloudy and so sunset-less - before hitting the sack ourselves.

    [​IMG]

    As expected, we got some rain through the night - the perfect time to get it, really - but that all stopped by 8:00am Sunday morning, when @mini.turbodb was out exploring and us oldies were still all cozied up in bed. Of course, that can't last very long with a little terror running around, so we eventually climbed down the ladder to enjoy what was turning into an amazing day.

    [​IMG]

    Cereal for breakfast, some more exploring, and even a morning camp fire were enjoyed and just after noon we had everything packed up and ready for the return trip. The whole ordeal had been - as usual - a resounding success, and everyone's looking forward to our next outing.

    Can't ask for more than that!

    Mini Rig Review

    This isn't a full-blown review since this wasn't a very long trip, but there are a few things worth noting on the 4Runner:
    1. Roof Rack - It's hard to install/remove the tent from the roof rack - specifically from the center cross-bar - because there's no way to access the nut without removing the side rails. I think I need to cut an access hole in the side rails, so I can slide a ratchet in there in the future.
    2. Storage Platform Fridge Drawer - I forgot to put a "locking pin" on this drawer in order to keep the drawer from moving on acceleration/deceleration and up/down hill. I need to do that because right now the fridge clunks around back there.
    3. Storage Platform Storage Space - the space next to the fridge is supposed to hold my military cases (the kitchen stuff). Right now, it's an inch too narrow. So, I need to figure out a way to manufacture one more inch of width in the 4Runner.
     
  13. Jun 5, 2019 at 10:49 AM
    #13
    CowboyTaco

    CowboyTaco $20 is $20

    Joined:
    Aug 19, 2010
    Member:
    #41928
    Messages:
    6,750
    Gender:
    Male
    North Georgia
    Vehicle:
    11 TRD Sport
    Dang. Another one of your threads to keep up with.

    On one hand, I'm definitely going to enjoy it. On the other....I have work I need to do. 1st world problems :annoyed:
     
    turbodb[OP] likes this.
  14. Jun 5, 2019 at 10:54 AM
    #14
    Speedytech7

    Speedytech7 Toyota Cult Ombudsman

    Joined:
    Feb 20, 2014
    Member:
    #123587
    Messages:
    52,627
    Gender:
    Male
    First Name:
    ゼイン
    5520 E Sprague Ave, Spokane Valley, WA 99212
    Vehicle:
    93 80 Series LC & 96 Turbo V6 Taco 4WD
    I've done a mod or two
    Ditto
     
  15. Jun 5, 2019 at 10:54 AM
    #15
    TenBeers

    TenBeers Well-Known Member

    Joined:
    Jun 5, 2009
    Member:
    #18067
    Messages:
    7,055
    Gender:
    Male
    First Name:
    Rich
    Bentonville, AR
    Vehicle:
    2018 TRD Pro Cavalry Blue
    CBI bed rack and sliders, Backwoods Adventure Mods front and rear bumpers, etc. And some stickers.
    My wife's first 4Runner was a green '99 just like that (but sadly it was only 2WD). I picked the vehicle and told her what she was getting, and she picked the color. She previously drove a Datsun 200SX, with a dashboard that looked like some kind of airplane/spaceship control panel. Her first question looking around inside was, "Where's all my stuff?" I told her that everything she needs is there. She didn't think so at first, but a few months later she admitted that it was true and has been a Toyota convert since. I miss that vehicle, but she's got the Limited now with the center Torsen diff that I will turn into a monster someday (tee hee).

    Nice upgrades and mods!
     
    turbodb[OP] likes this.
  16. Jun 5, 2019 at 10:56 AM
    #16
    Speedytech7

    Speedytech7 Toyota Cult Ombudsman

    Joined:
    Feb 20, 2014
    Member:
    #123587
    Messages:
    52,627
    Gender:
    Male
    First Name:
    ゼイン
    5520 E Sprague Ave, Spokane Valley, WA 99212
    Vehicle:
    93 80 Series LC & 96 Turbo V6 Taco 4WD
    I've done a mod or two
    200SX is rare and cool, and spaceship dashboards are always nice
     
  17. Jun 5, 2019 at 11:27 AM
    #17
    TRVsTRD

    TRVsTRD Well-Known Member

    Joined:
    Aug 30, 2016
    Member:
    #195962
    Messages:
    281
    Gender:
    Male
    Georgia
    Vehicle:
    02 Lunar Mist Prerunner TRD DCSB
    Great, something else I have to daydream about! :laugh: There is something wonderfully satisfying to me about seeing a Tacoma and a 4Runner parked in the same driveway/garage. Congratulations on the purchase and successful upgrades! :thumbsup:
     
    turbodb[OP] and Speedytech7 like this.
  18. Jun 5, 2019 at 11:34 AM
    #18
    CowboyTaco

    CowboyTaco $20 is $20

    Joined:
    Aug 19, 2010
    Member:
    #41928
    Messages:
    6,750
    Gender:
    Male
    North Georgia
    Vehicle:
    11 TRD Sport

    So the one question/criticism I have with this post is the reuse of the front top mount hardware. I get having the new spring compressor and wanting to use it, but why on earth would you reuse the old top mount hardware? Replacements are like $20 on RockAuto for the KYB and you get all new rubber with it.

    I know the OME suspension isn't super expensive, but it isn't super cheap either. Another $40 and you'd have been able to assemble the front coilovers in advance so you just pull the old out and swap the new in. The added peace of mind and time savings more than make up for the additional cost.
     
  19. Jun 5, 2019 at 12:40 PM
    #19
    TenBeers

    TenBeers Well-Known Member

    Joined:
    Jun 5, 2009
    Member:
    #18067
    Messages:
    7,055
    Gender:
    Male
    First Name:
    Rich
    Bentonville, AR
    Vehicle:
    2018 TRD Pro Cavalry Blue
    CBI bed rack and sliders, Backwoods Adventure Mods front and rear bumpers, etc. And some stickers.
    LOL, you are talking about the same guy that put a new boot on a CV axle. @turbodb has his own style. But yeah, I would have done new top hats myself.

    I'd love to have one of those spring compressors. I have 2 pairs of the old school screw type that I use, makes it easier and slightly safer than a single pair (and a single pair is not strong enough for these truck springs). It is scary how much the bolt will flex. But I am careful and prepared so they don't spend a lot of time compressed, never have had an issue. I've done 2 Tacomas, 1 4Runner, and my old '77 Celica (Celica was a breeze comparatively).
     
    turbodb[OP] likes this.
  20. Jun 5, 2019 at 12:46 PM
    #20
    CowboyTaco

    CowboyTaco $20 is $20

    Joined:
    Aug 19, 2010
    Member:
    #41928
    Messages:
    6,750
    Gender:
    Male
    North Georgia
    Vehicle:
    11 TRD Sport
    He did inspire me to order a boot kit for my OEM CV axle, so there's that.

    Other inspiration being that the OEM rebuilt CV axles are on significant backorder, so why not repair mine to have a spare ready to go? Now I just gotta order the right tools for the job.
     
    turbodb[OP] likes this.

Products Discussed in

To Top