

-
Welcome to Tacoma World!
You are currently viewing as a guest! To get full-access, you need to register for a FREE account.
As a registered member, you’ll be able to:- Participate in all Tacoma discussion topics
- Communicate privately with other Tacoma owners from around the world
- Post your own photos in our Members Gallery
- Access all special features of the site
 New Owner...few questions
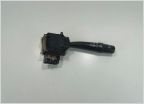 Intermittent wipers
 2.7l 3rz oil pump leak
 Help with temp gauge
 LED reverse lights flickering!
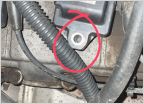 Advice for stripped threading on valve cover
U joints tools
Discussion in '1st Gen. Tacomas (1995-2004)' started by shankyjones, Nov 9, 2022.
Page 1 of 2
Page 1 of 2
Products Discussed in


