1. Welcome to Tacoma World!

    You are currently viewing as a guest! To get full-access, you need to register for a FREE account.

    As a registered member, you’ll be able to:
    • Participate in all Tacoma discussion topics
    • Communicate privately with other Tacoma owners from around the world
    • Post your own photos in our Members Gallery
    • Access all special features of the site

Update- Installed! Anyone here have a kalil fab front bumper?

Discussion in 'Armor' started by Toy_Runner, Nov 18, 2023.

  1. Nov 18, 2023 at 4:07 PM
    #1
    Toy_Runner

    Toy_Runner [OP] Well-Known Member

    Joined:
    Nov 19, 2019
    Member:
    #311172
    Messages:
    1,006
    Gender:
    Male
    Vehicle:
    99 4Runner SR5
    3" OME lift, heavy coils f/r 3/16" steel skids Modified Coastal Offroad diy bumper 5spd swap ('98 donor)
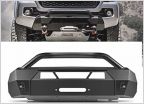
    Looking at bumper options, searched the forum and don't see many posters with prerunner type bumpers, and only a few with a kalil fab bumper.

    I'm interested in the "54" winch bumper.

    https://kalil-fab.com/products/54-winch-bumper

    The photos on their site don't really illustrate how the winch is mounted, but they rate it for a 10k winch. Modifying it isn't out of the question if it looks like it needs it, but just curious if anyone here has one of their bumpers and can comment on how the install went and if its survoved any hits/bumps.
     
    Gpetey22 likes this.
  2. Nov 19, 2023 at 6:09 PM
    #2
    Toy_Runner

    Toy_Runner [OP] Well-Known Member

    Joined:
    Nov 19, 2019
    Member:
    #311172
    Messages:
    1,006
    Gender:
    Male
    Vehicle:
    99 4Runner SR5
    3" OME lift, heavy coils f/r 3/16" steel skids Modified Coastal Offroad diy bumper 5spd swap ('98 donor)
    And more general question- does anyone know if the 5th gen 4runner has a similar mounting pattern as bumpers for the 3rd gen tacoma?
     
  3. Nov 22, 2023 at 7:35 PM
    #3
    Toy_Runner

    Toy_Runner [OP] Well-Known Member

    Joined:
    Nov 19, 2019
    Member:
    #311172
    Messages:
    1,006
    Gender:
    Male
    Vehicle:
    99 4Runner SR5
    3" OME lift, heavy coils f/r 3/16" steel skids Modified Coastal Offroad diy bumper 5spd swap ('98 donor)
    Well, found their instagram, and they had some more detailed shots of how their winch bumper is constructed. Little more solid than I thought. Little sketched out that the bash plate is supposed to take the load from the winch line and fairlead...

    Screenshot_20231122_192217_Firefox.jpg
    Screenshot_20231122_192257_Firefox.jpg
    Screenshot_20231122_192239_Firefox.jpg
     
  4. Nov 25, 2023 at 7:59 AM
    #4
    Toy_Runner

    Toy_Runner [OP] Well-Known Member

    Joined:
    Nov 19, 2019
    Member:
    #311172
    Messages:
    1,006
    Gender:
    Male
    Vehicle:
    99 4Runner SR5
    3" OME lift, heavy coils f/r 3/16" steel skids Modified Coastal Offroad diy bumper 5spd swap ('98 donor)
    Well. Went ahead and ordered a "54" bumper. And a pair of diode dynamics SS5's.

    The instagram posts showing the winch mount construction kinda sold me. I think I will add some recovery/shackle points to the bumper mounts, but Im still clearing space in my garage, so this may wait till spring to modify, then mount.
     
  5. Nov 26, 2023 at 8:41 PM
    #5
    Gpetey22

    Gpetey22 New Member

    Joined:
    Jun 4, 2022
    Member:
    #398762
    Messages:
    3
    Gender:
    Male
    First Name:
    Garrett
    St George, Utah
    Vehicle:
    2018 Toyota Tacoma Trd Off Road
    Foam Cell Pro 3 Inches. RR7-H -25 offset. 35 geolanders. DRT CMR.
    Would love to see install pics after you get it.
     
  6. Nov 27, 2023 at 7:10 AM
    #6
    Toy_Runner

    Toy_Runner [OP] Well-Known Member

    Joined:
    Nov 19, 2019
    Member:
    #311172
    Messages:
    1,006
    Gender:
    Male
    Vehicle:
    99 4Runner SR5
    3" OME lift, heavy coils f/r 3/16" steel skids Modified Coastal Offroad diy bumper 5spd swap ('98 donor)
    Frankly not going to happen until the spring, weathers already changing for the worse here, but I will document the install and what I do to add recovery points.
     
  7. Nov 27, 2023 at 7:15 AM
    #7
    mud

    mud Djentleman

    Joined:
    Dec 21, 2018
    Member:
    #276560
    Messages:
    1,339
    Gender:
    Male
    SoCal
    Vehicle:
    2019 TRD OR DCSB LMNOP QRS TUVWXYZ
    sicki likes this.
  8. Nov 27, 2023 at 11:59 AM
    #8
    sicki

    sicki Well-Known Member

    Joined:
    Jun 13, 2015
    Member:
    #157339
    Messages:
    1,147
    Gender:
    Male
    That's a real good bumper and winch setup.
     
  9. Nov 27, 2023 at 2:49 PM
    #9
    Toy_Runner

    Toy_Runner [OP] Well-Known Member

    Joined:
    Nov 19, 2019
    Member:
    #311172
    Messages:
    1,006
    Gender:
    Male
    Vehicle:
    99 4Runner SR5
    3" OME lift, heavy coils f/r 3/16" steel skids Modified Coastal Offroad diy bumper 5spd swap ('98 donor)
    It looks very well tied together for sure. As I said, I am a little sketched out about the fact the bash plate has to take the strain of an off-angle winch pull, but once it's in my hands I might add some more tabs, maybe even a cross-tube, but the mount and winch plate does look much more solid than I expected. The instagram page sold me on it, honestly.

    I picked up a bamf bracket to mount the pair of SS5's that I also ordered, those will go behind the grille for now, but I will externally mount them when I mount the bumper.
     
  10. Dec 20, 2023 at 5:14 PM
    #10
    Toy_Runner

    Toy_Runner [OP] Well-Known Member

    Joined:
    Nov 19, 2019
    Member:
    #311172
    Messages:
    1,006
    Gender:
    Male
    Vehicle:
    99 4Runner SR5
    3" OME lift, heavy coils f/r 3/16" steel skids Modified Coastal Offroad diy bumper 5spd swap ('98 donor)
    Bumper was delivered today, earlier than expected. Havent unwrapped it yet, just had time to stick it in my garage before heading to work. I should be able to take a look at it this weekend of the weather stays dry.
     
  11. Jul 12, 2024 at 5:43 PM
    #11
    Toy_Runner

    Toy_Runner [OP] Well-Known Member

    Joined:
    Nov 19, 2019
    Member:
    #311172
    Messages:
    1,006
    Gender:
    Male
    Vehicle:
    99 4Runner SR5
    3" OME lift, heavy coils f/r 3/16" steel skids Modified Coastal Offroad diy bumper 5spd swap ('98 donor)
    Long overdue for progress getting this mounted up. Life has a way of getting in the way these days.

    So, my one issue with this bumper was the lack of recovery points. So I'm seeking to rectify this with a pair of weld-on shackle tabs from barnes 4x4. Unfortunately, these tabs are 1" thick. I was going to take these to work and slice about 3/8" off them with our edm machine, but it burned up its transducer about two days after I received the tabs, so rather than waiting, I tried pre-heating them and welding them on with my little lincoln 140.

    After pre-heating the driverside tab, I placed it on the base plate of the bumper, tacked it in place, and started a root pass with .030 wire at the top and bottom. I then alternated shorter passes from up each length of the shackle. Then proceeded to try two overlapping passes.

    Long story short, the outer-side lower overlap weld cracked and peeled itself away from the baseplate as it cooled.

    If you can't tell from my fuuugly welds, I'm not a professional welder.

    So, learning from that, I kept my torch handy and kept the shackle hot while welding the passenger side shackle tab. Then, when done with last pass, I kept heat on the welds, in order to allow the total mass of the weld area and shackle to cool down more slowly and evenly. No cracking on that one.

    I spent some time grinding out the welds on the driver side shackle yesterday afternoon. I was happy to see that the root pass was solid, even around the top (which was tight to reach with my mig torch, I should have spaced it 1/4" or so lower) so I'll reheat everything, re-weld everything, and keep it hotter, longer and as with the passenger side shackle, allow it all to cool down slowly. Hopefully nothing warps appreciably. Both sides are still square and flat as of this point. Looking forward to getting this prepped for paint, and finally mounted up.

    20240710_170657.jpg

    Edit- yes, I am absolutely aware the weld pictured is pretty terrible for attempting to overlap the root. Not much overlap to speak of.
     
  12. Jul 13, 2024 at 12:05 PM
    #12
    Toy_Runner

    Toy_Runner [OP] Well-Known Member

    Joined:
    Nov 19, 2019
    Member:
    #311172
    Messages:
    1,006
    Gender:
    Male
    Vehicle:
    99 4Runner SR5
    3" OME lift, heavy coils f/r 3/16" steel skids Modified Coastal Offroad diy bumper 5spd swap ('98 donor)
    Ground out all my welds on both tabs. Root passes looked good, likely decent penetration because the shackle tabs were at their hottest while laying it.

    This time I preheated each tab, got everything into the 700* range, then went to work with a touch more wire feed speed. After stopping each bead, I used my torch to heat everything as evenly as possible to keep the tab temp elevated. Once I had finished my last bead, I again heated everything up evenly for about 5 minutes before removing heat and allowing to cool.

    I'm still not going to earn a living doing this, but good practice anyhow. And glad to learn from my mistakes.

    20240713_143619.jpg
    20240713_144327.jpg
     
    Steves104x4 likes this.
  13. Jul 14, 2024 at 4:46 PM
    #13
    Toy_Runner

    Toy_Runner [OP] Well-Known Member

    Joined:
    Nov 19, 2019
    Member:
    #311172
    Messages:
    1,006
    Gender:
    Male
    Vehicle:
    99 4Runner SR5
    3" OME lift, heavy coils f/r 3/16" steel skids Modified Coastal Offroad diy bumper 5spd swap ('98 donor)
    Prepped and painted. Combo of grinder with a flap disc, small handheld media blaster to get in and around all the welds and super tight spots, and some hand sanding to get all the mill scale and little bit of surface rust. Blew it off, wiped it down with alcohol a few times, hit it with two coats of self etching primer. Then used a can of duplicolor basic black color mwtch to hit all the weld joints and corners, then two more cans to get two coats of black. Then top coated the main tube and down the outer and front-most tubing with a charcoal gray. Then two coats of duplicolor 1k clear coat. Waiting for it to dry enough to get into my garage now.

    20240714_192814.jpg
    20240714_192805.jpg
     
    Steves104x4 and mud like this.
  14. Jul 15, 2024 at 5:12 PM
    #14
    Toy_Runner

    Toy_Runner [OP] Well-Known Member

    Joined:
    Nov 19, 2019
    Member:
    #311172
    Messages:
    1,006
    Gender:
    Male
    Vehicle:
    99 4Runner SR5
    3" OME lift, heavy coils f/r 3/16" steel skids Modified Coastal Offroad diy bumper 5spd swap ('98 donor)
    Went to test fit it this afternoon. Got the front end torn down, fender liners trimmed. I purchased a partial bumper fill piece for under each headlamp rather than chop up my original bumper cover. Trimmed down the inner two mounting bolts for clearance, per the kalilfab install video (which is for the non-winch bumper.

    And then realized my power steering cooler was going to need to be relocated about 2-1/2" back.

    Lol. Never even thought about it.

    Picked up some 1/8Ă—3/4" strip and some hardware, but then it started pouring down rain. Will update.
     
  15. Jul 20, 2024 at 5:10 PM
    #15
    Toy_Runner

    Toy_Runner [OP] Well-Known Member

    Joined:
    Nov 19, 2019
    Member:
    #311172
    Messages:
    1,006
    Gender:
    Male
    Vehicle:
    99 4Runner SR5
    3" OME lift, heavy coils f/r 3/16" steel skids Modified Coastal Offroad diy bumper 5spd swap ('98 donor)
    Alright. Update. It's on.

    20240720_193334.jpg
    20240720_193330.jpg
    20240720_193342.jpg
     
    Steves104x4 likes this.
  16. Jul 20, 2024 at 5:34 PM
    #16
    Toy_Runner

    Toy_Runner [OP] Well-Known Member

    Joined:
    Nov 19, 2019
    Member:
    #311172
    Messages:
    1,006
    Gender:
    Male
    Vehicle:
    99 4Runner SR5
    3" OME lift, heavy coils f/r 3/16" steel skids Modified Coastal Offroad diy bumper 5spd swap ('98 donor)
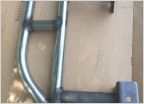
    Couple install points. The one install vid on youtube is for the non-winch version. It didn't occur to me that the back plate would be fitting right through the space the power steering cooler sits, so I never ordered a relocation kit. So. For anyone else installing one, go ahead and order a kit ahead of time. I grabbed a piece of 3/4"x1/8" strip from home depot, cut two 3-1/2" strips, and spaced my two holes about 2-1/2" apart, using the original mounting hardware for the front to the crossmember, and 1/4-20Ă—3/4" bolt for the mew rearmost hole. For reference, the holes for the original hardware need to be 21/64" in diameter. I used four 1/4" washers tacked together to elevate the mounts to clear the front bolt heads. You may not need to, but it will be tighter to the heads of the bolts mounting your brackets to the crossmember. There is a third bracket mount for the short section of hard lines straight back along the passenger side framerail. It's visible from right above, and will need removed for the power steering cooler to be pushed backwards for clearance. You only need to mount the cooler 2" back. But you have 3" of space. So I split the difference to keep some clesrance between the back plate of the winch cradle and the AC condenser.

    This bumper can also let you retain the passenger side OEM recovery point, but I removed that to make the install easier. You also remove the two tie-bars between the frame crossover in front of the front diff and the front crossmember. You re-use two of the bolts, for the front-most mounting horn foe these brsckets.

    Looking at it again, I would like to have added a short piece of 3/16" plate to the top of the rear mounting point so it would allow you to reuse all 4 frame mounting holes, not relying solely on the welded on horns for the front-most mount.

    See pic related, it's fuzzy as it's a zoomed in screengrab, but it gets the point across.

    The install video on yt does make the point to chop 1/4" off the length of the two innermost mounting bolts to clear the tubework. This needs done. Once trimmed the stud won't make contact with the tube on either side.

    I did not chop my OEM bumper cover. I picked up a pair of trim filler pieces from runnin4tacos. I opted for the non-paint matched ones. I sorayed these a few months bsck with an adhesion promoter coat after hitting them with a bit of sandpaper, then a two light tack coats and two medium-wet coats of duplicolor color match red for toyota (aplogies, having a brain fart on the color atm). Then two coats of duplicolor 1k clesr coat. They have a slightly lsrger gap around the grille than the oem bumper, but they snapped right into place along the fenders and fill in. I did not need to trim them any further to fit.

    Kalilfab must have a pretty good jig setup for making these. Everything was tight, square, the welds looked great.

    I did warp the base plates for the crossmember mount with all the extra heat welding the shackle tabs on. Less than an 1/8" of gap at the bottom corner to the crossmember, but definitely my handiwork. So I cannot use the included hardware for the inner-crossmember reinforcing plate, I just ran to grab a pair of 3/8" bolts so I can mount these up.

    I'm going to pull the oem fog lamp plug to mount my diode dynamics SS3's later this week.

    One other point, with no center section of the oem bumper, the grille is free/loose along the bottom edge. Not enough to flap around, but I'll probably find some hidden spots to use some zip ties to tie everything together.

    I did not need to trim or cut out any part of the liner panels to channel air between the grille and radiator. I did have to pull the mounting studs for these plaetic wings out of the lower front radiator cross brace and flex them up and out of the way to mount the bumper. To put them back in place without breaking anything once the bumper was mounted, I removed the black painted front grille support bar, then bolted it back into plsce. These plastic wings will rub on the tubework, but they're stiff enough to keep doing their job.

    When I removed the bumper surround, I just needed to use a razor to trim the fender liner. It's loose now near the front, I may punch some holes if I want to tie the leading edge back down with zip ties.

    Screenshot_20240720_202015_Gallery.jpg
     
    Last edited: Jul 20, 2024
    spicy_fish_taco and Steves104x4 like this.
  17. Jul 20, 2024 at 5:40 PM
    #17
    Toy_Runner

    Toy_Runner [OP] Well-Known Member

    Joined:
    Nov 19, 2019
    Member:
    #311172
    Messages:
    1,006
    Gender:
    Male
    Vehicle:
    99 4Runner SR5
    3" OME lift, heavy coils f/r 3/16" steel skids Modified Coastal Offroad diy bumper 5spd swap ('98 donor)
    I will need to measure the mounting cradle for the winch. Ole Mk.1 eyeball thinks mt upgraded m8000 with 9.5xp motor is going to be a bit too wide to fit. Oof there. But I think I can install <a winch> by removing the grille and removing the grille cross bar again, not having to pull the entire bumper off.

    When I install my winch, I will update.

    The bash plate bolts on with 5/16"Ă—18tpiĂ—1" length chamfered allen key bolts, using a 3/16" allen key. They use a threaded, snap-in-on-install spring clip. I'll probably use a bit of blue loc-tite to prevent them from rattling loose. They look very nice being flush.

    I also retained the OEM engine pan skid for now. There's a couple inches of gap, unfortunately, but kalilfab sells their own skid plate assembly.
     
    Steves104x4 likes this.
  18. Jul 20, 2024 at 6:00 PM
    #18
    Steves104x4

    Steves104x4 Well-Known Member

    Joined:
    Apr 17, 2010
    Member:
    #35468
    Messages:
    17,069
    Gender:
    Male
    First Name:
    Steve
    Buffalo NY
    Vehicle:
    2010 RC 2.7 4x4
    BUCKLE UP! It makes it harder for Aliens to pull you out of your Truck.
    Fantastic. Well done!
     
    Toy_Runner[OP] likes this.
  19. Jul 20, 2024 at 6:02 PM
    #19
    Toy_Runner

    Toy_Runner [OP] Well-Known Member

    Joined:
    Nov 19, 2019
    Member:
    #311172
    Messages:
    1,006
    Gender:
    Male
    Vehicle:
    99 4Runner SR5
    3" OME lift, heavy coils f/r 3/16" steel skids Modified Coastal Offroad diy bumper 5spd swap ('98 donor)
    Thank you. I was really hoping to have this done in May, but I finally got it out of my way in my garage.

    I am a little irked, but it's on me. I ordered this in november. In the time since, the price has dropped $500 bucks. Should have waited, but I had the cash at the time. Oh well, generally things have been trending the other way in price, so I didn't want to wait and see.
     
    Steves104x4 likes this.
  20. Jul 20, 2024 at 7:41 PM
    #20
    Toy_Runner

    Toy_Runner [OP] Well-Known Member

    Joined:
    Nov 19, 2019
    Member:
    #311172
    Messages:
    1,006
    Gender:
    Male
    Vehicle:
    99 4Runner SR5
    3" OME lift, heavy coils f/r 3/16" steel skids Modified Coastal Offroad diy bumper 5spd swap ('98 donor)
    Next step is to externally mount my lights. Does anyone know of an aftermarket grille tha can mount the radar, and is set further back in from the normal grille bezel? I'd really like to do a rectangular light mount setup, similar to whats used on some rslly trucks instead of a traditional hoop offering. But I don't want to have to mount it 4" out in front of the grille.
     

Products Discussed in

To Top