

-
Welcome to Tacoma World!
You are currently viewing as a guest! To get full-access, you need to register for a FREE account.
As a registered member, you’ll be able to:- Participate in all Tacoma discussion topics
- Communicate privately with other Tacoma owners from around the world
- Post your own photos in our Members Gallery
- Access all special features of the site
 What is the deal with my oil filter being all messed up?
 Silicone For Roof Rack Install..
 Spiker Engineering Ultimate Lift Hood Struts now on Amazon
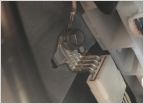 Help Tekonsha P3 issue
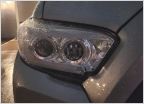 What headlights are these? 2016 TRD Sport.....
 Busted Toytec Struts Need Replacement Recommendations
Upper control arm bolts?
Discussion in '3rd Gen. Tacomas (2016-2023)' started by Hiluxski, Feb 8, 2017.
Page 3 of 5
Page 3 of 5
